







How to Draw a Tiger (Cartoon)
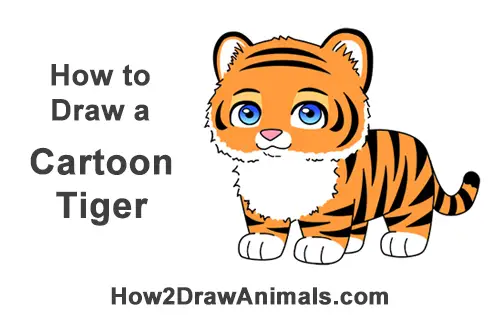
Please PAUSE the "How to Draw a Cartoon Tiger" video after each step to draw at your own pace.
Written step-by-step video tutorial:
For the first few steps, don't press down too hard with your pencil. Use light, smooth strokes to begin.
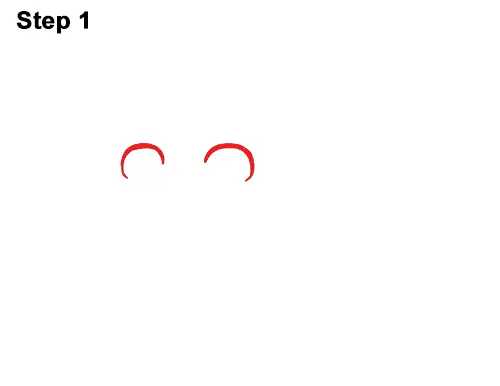
Step 1: Draw two curved lines next to each other for the little cartoon tiger cub's eyes. Make the lines thick to represent eyelashes. The shape of the curved lines should be similar to a half-circle. Pay attention to where the lines are. Don't place them too close together. Sketch these lines lightly at first. When you get the shape and placement right, darken them.
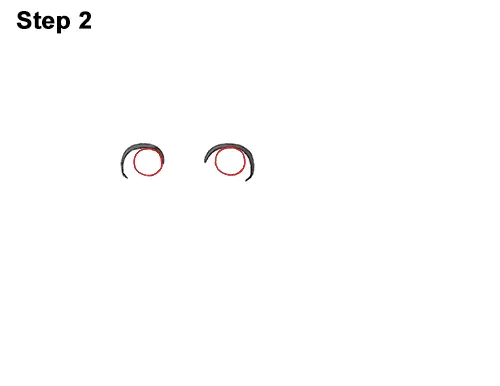
Step 2: Under each curved line, draw a small circle for the cartoon tiger's irises. The circle on the left should be close to the right tip of the line. The circle on the right should be closer to the middle of the line and slightly bigger.
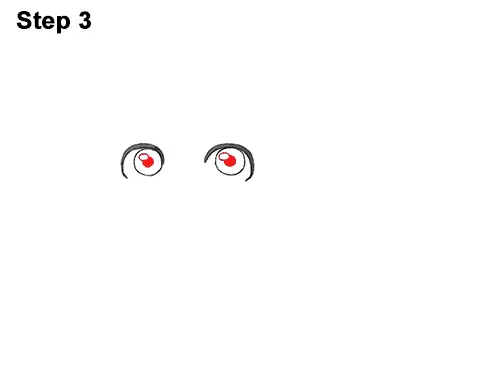
Step 3: Inside each iris, off to the side, draw a tiny circle to represent glare. In the middle of each iris, draw a big dot for the tiger cub's pupils.
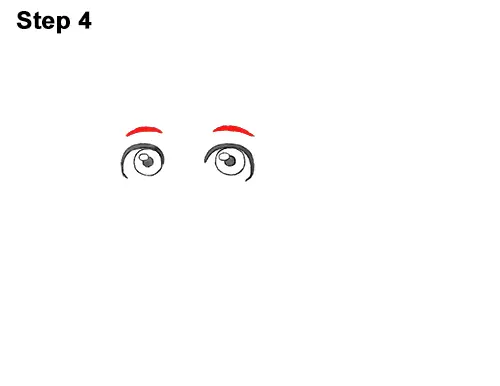
Step 4: Above each eye, draw a thick curved line for the cartoon tiger's eyebrows. The eyebrows should be pretty close to the eyes. Don't place them too high up.
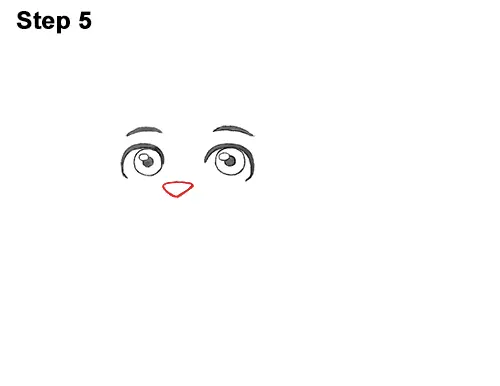
Step 5: Near the lower, right side of the eye on the left, draw a small triangle for the tiger's nose.
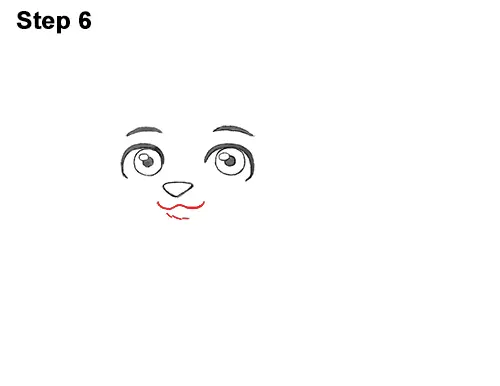
Step 6: Below the little cartoon tiger cub's nose, draw a curved line with two bumps for the mouth. The shape of the mouth should be similar to a curved letter W. Below the mouth, draw a couple of tiny curved lines for the chin.
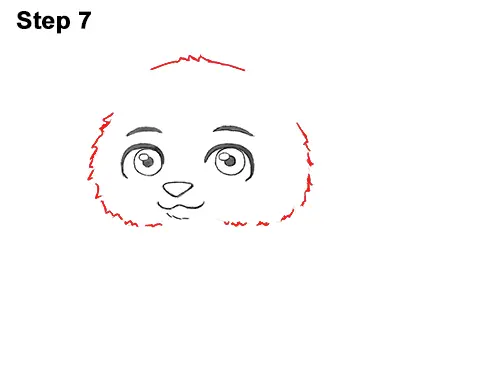
Step 7: Draw the top part of the head as a curved line above the eyes. The line should be placed pretty high. Add a couple of spikes in the middle of the line to represent the tiger's fur. On the left side of the face, draw a curved line that's made up of quick, short strokes for the side of the head. Draw another curved line on the right side but place it farther away from the face. Leave gaps on the top sides of the head.
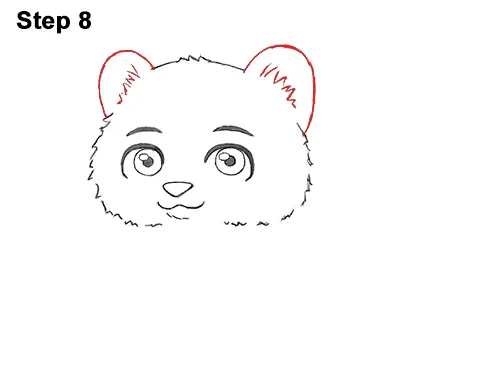
Step 8: Draw an arc on the upper left side of the head for the tiger cub's first ear. Add another arc on the right side for the other ear. This ear should be a bit bigger because of perspective. Add a few quick, short strokes inside each ear to represent fur.
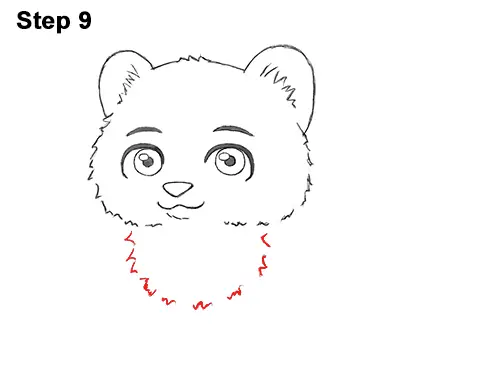
Step 9: Draw the chest under the head using a series of quick, short strokes. The overall shape of the chest should be similar to a half-circle.
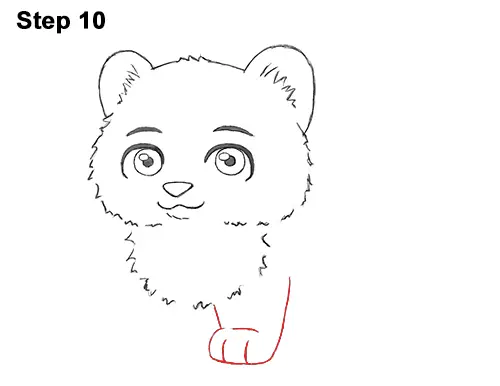
Step 10: Under the chest, on the right, draw two vertical lines (one short, the other long) for the cartoon tiger cub's first front leg. On the left side, draw a C-shaped line to meet the long line on the right to form the foot. Add a two lines inside for the tiger's toes.
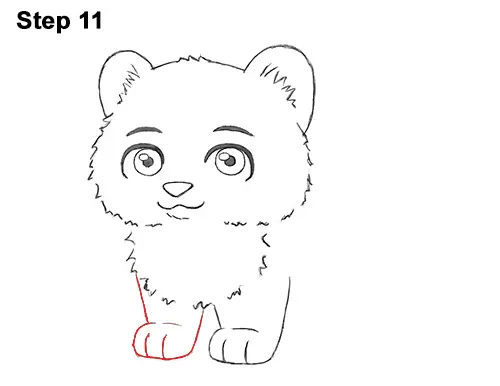
Step 11: Draw the front leg on the left the same way. First draw two vertical lines for the top part. Then add a C- shaped line on the bottom for the foot. Draw two curved line s within the foot for the tiger's individual toes.
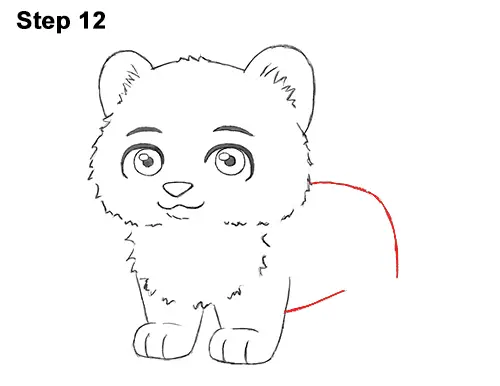
Step 12: Draw a short line next to the first front leg for the bottom part of the cartoon tiger cub's body. And for the top part of the body, draw a longer curved line next to the head.
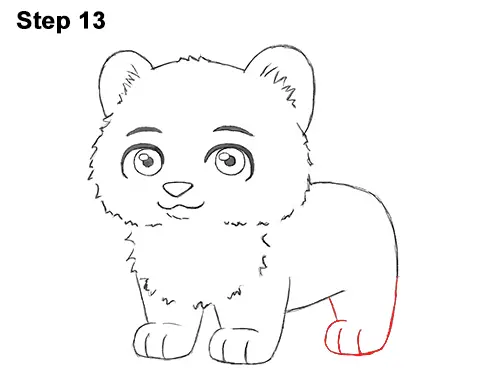
Step 13: Draw the cartoon tiger's hind leg on the right by continuing the curved line for the body. Add the foot and toes the same way as the front legs.
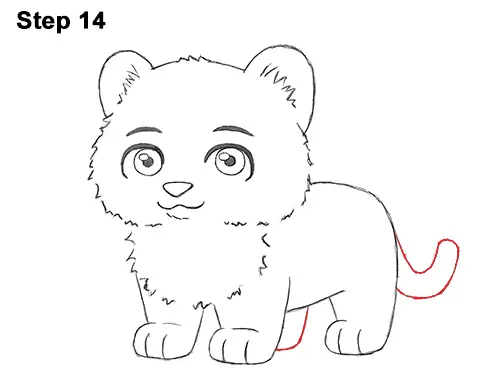
Step 14: Draw small curved line to the right of the first front leg for the visible portion of the cartoon tiger cub's second hind leg. To the right of the body, draw the tail using a couple of short U-shaped lines.
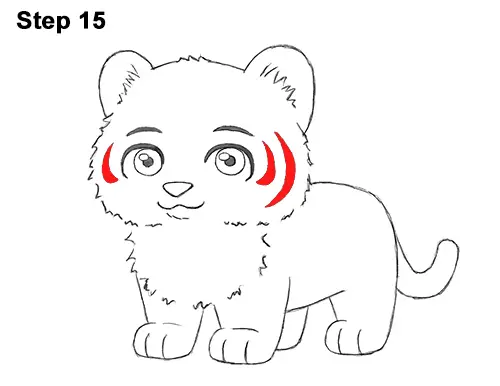
Step 15: Hmm, something's missing on this tiger cub... the stripes! Draw the first stripe on the left side of the face using curved lines. Draw another short stripe to the right of the other eye. Draw the stripes as two curved lines that come to a point at the ends, then just shade them in. Draw a longer, thinner stripe on the far right side of the tiger's face too.
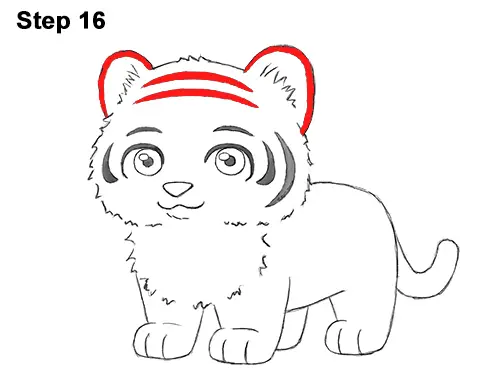
Step 16: High above the eyes, near the top edge of the head, draw two long, horizontal stripes. Don't draw these stripes too close to the eyebrows. The top stripe should be a bit shorter than the bottom one. Shade a small portion of the outer edge of the ears as well. Adding the tiger cub's stripes can be time- consuming, so be patient and take breaks.
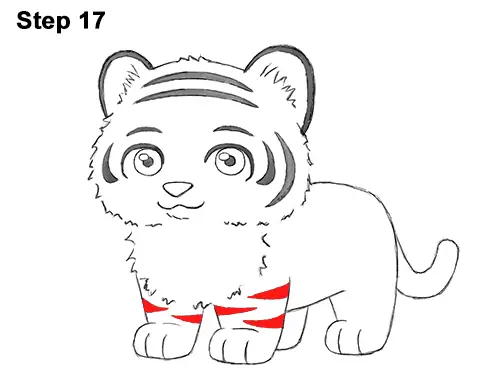
Step 17: Now draw two triangle-like horizontal stripes on the cartoon tiger's front leg on the left. Add three similar stripes to the front leg on the right. Draw two on the right edge and one on the left so they fit.
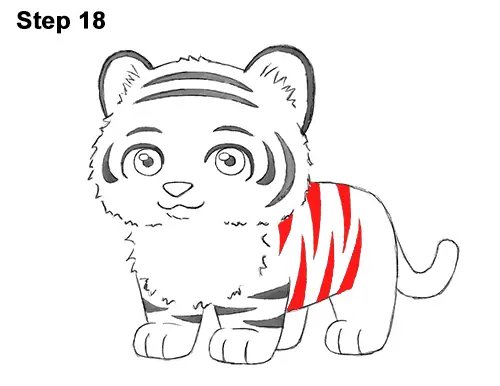
Step 18: Draw six long, vertical stripes on the tiger's body, three on top and three on the bottom. First draw the long triangle-like spike, then shade it in. Stagger the spikes so that they fit within the body. You can also draw fewer stripes on your tiger for an easier drawing.
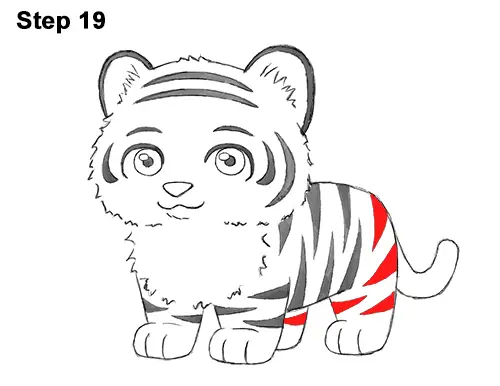
Step 19: Add three more stripes along the right side of the cartoon tiger's body and hind leg. Tilt the stripes as you draw them farther down the leg. Add a smaller stripe on the left edge and on the other hind leg too.
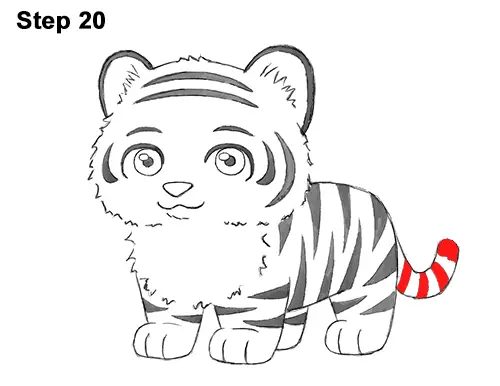
Step 20: Draw three thick bands on the tiger cub's tail and shade the tip too.
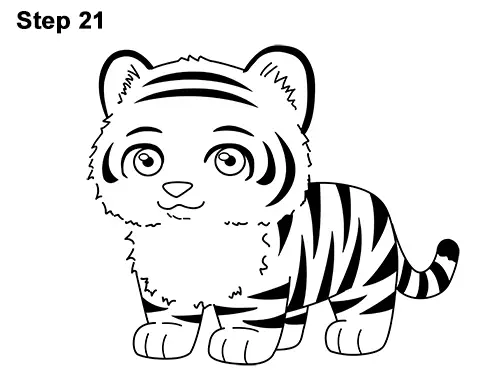
Step 21: Using a pen or marker, carefully go over the lines to make your cartoon tiger cub drawing permanent. After inking, get rid of every pencil mark with an eraser.
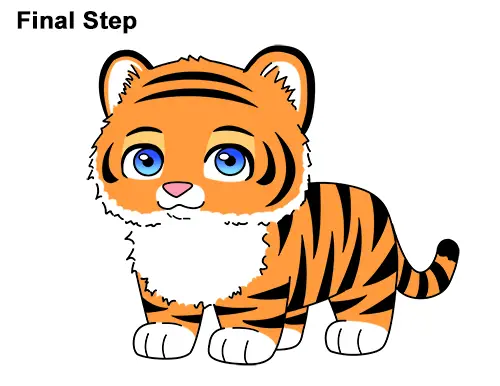
Final Step: Color your cartoon tiger drawing using color pencils, markers or even crayons! Color your tiger's body orange but leave the inside of the eyes and ears, the cheeks, muzzle, chest and feet white. Outline the white sections with orange first, then color inside. The section above the eyes should be light orange. To get a gradient effect on the eyes, color the top part dark blue and the bottom part light blue. Use pink for the nose.
Thanks for watching! Subscribe to the How2DrawAnimals YouTube Channel for a new tutorial every Tuesday.
To learn how to draw popular cartoon characters, visit EasyDrawingTutorials.com.
RELATED TUTORIALS
 |
 |
 |