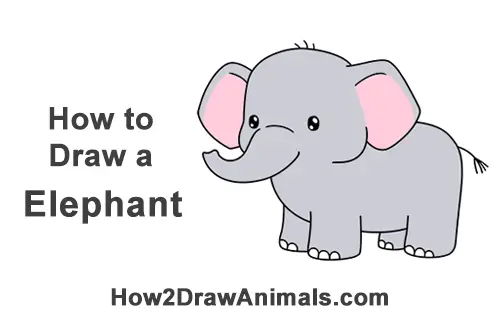
In this free art lesson, you'll learn how to draw a cartoon Elephant step by step.
Stay tuned for more free drawing lessons by:
Liking us on Facebook>>
Subscribing on YouTube.com>>
Following us on Instagram>>
To draw this cartoon Elephant step by step, follow along with the video tutorial below and pause the video after each step to draw at your own pace. You may find it easier to follow the step-by-step drawings below the video. The new lines in each step are shown in red, so you'll know exactly what to draw next. You may want to open the video in a new tab and use both drawing methods. Take your time and draw at your own pace.
Written step-by-step video tutorial:
For the first few steps, don't press down too hard with your pencil. Use light, smooth strokes to begin.
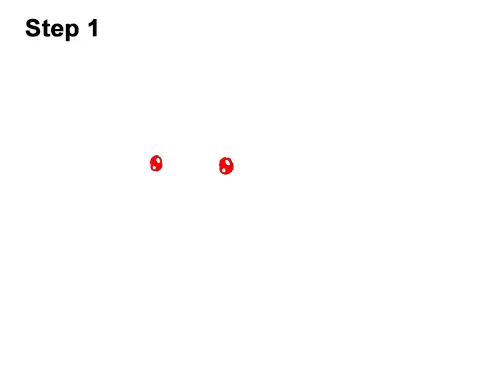
Step 1: Draw two small ovals for the elephant's eyes. Shade in the ovals but leave a couple of circles inside each oval blank to represent glare. Space out the eyes. Don't draw them too close together. If you'd like, you can skip the glare circles and just shade the ovals completely.
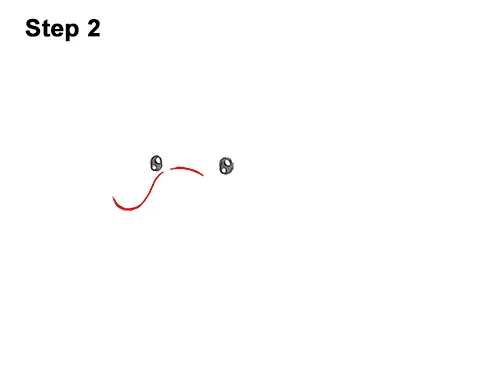
Step 2: Draw a short, curved line between the eyes for the first part of the elephant's trunk. Now draw a line that slopes to the left like a slide to form the top edge of the trunk.
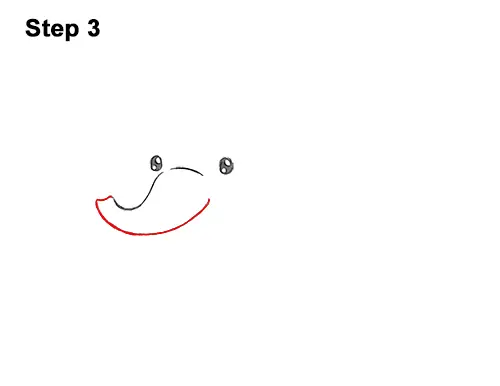
Step 3: On the left side, draw a small wavy line for the trunk's tip. Now draw a longer, curved line below for the bottom edge of the elephant's trunk. The tip of the trunk should be thin, while the base should be thick.
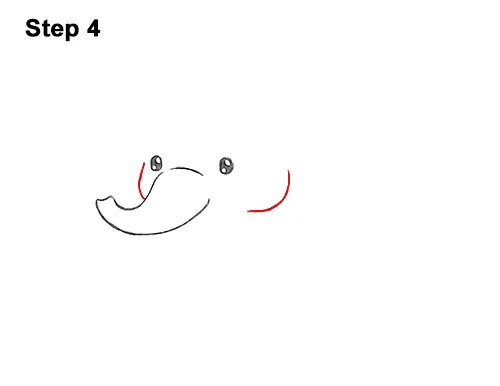
Step 4: On either side, draw a short, curved line for the elephant's cheeks. The line for the cheek on the right should be far away from the eyes. The line on the left should be close to the eyes.
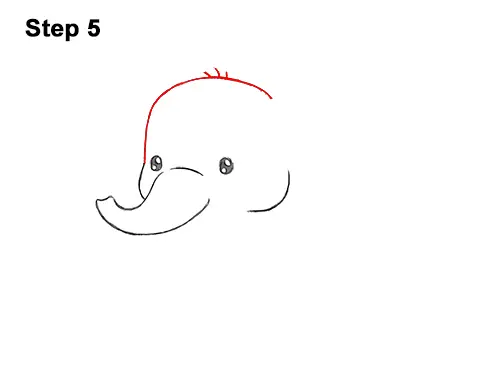
Step 5: Add the head by first making a small mark high above the eyes. Now connect the mark to the cheek on the left using a long, curved line. Make the mark a bit longer on the right side and add three short lines at the top of the elephant's head for hair.


