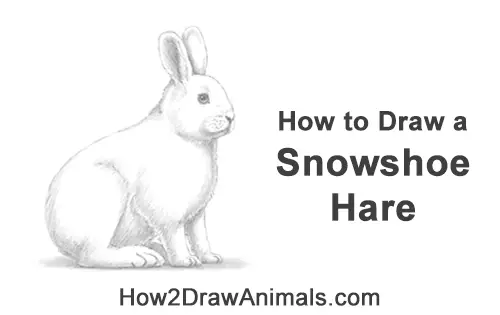
In this free art lesson, you'll learn how to draw a Snowshoe Hare step-by-step.
Stay tuned for more free drawing lessons by:
Liking us on Facebook>>
Subscribing on YouTube.com>>
Following us on Instagram>>
All of the tutorials on How2DrawAnimals.com are good drawing tutorials for beginners and experienced artists alike. The online tutorials are easy to follow; they teach you the how to draw basics while showing you how to draw animals step by step. Each animal has a video drawing tutorial option, as well as step-by-step photos and written text to follow.
RELATED TUTORIALS
 |
 |
 |
To draw this Snowshoe Hare step by step, follow along with the video tutorial below and pause the video after each step to draw at your own pace. You may find it easier to follow the step-by-step drawings below the video. The new lines in each step are shown in red, so you'll know exactly what to draw next. You may want to open the video in a new tab and use both drawing methods. Take your time and draw at your own pace.
Below you can watch a Narrated step-by-step video tutorial:
For the first few steps, don't press down too hard with your pencil. Use light, smooth strokes to begin so that it's easy to erase if you make a mistake.
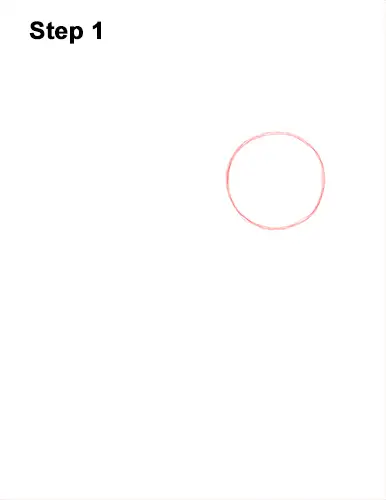
Step 1: Start by drawing circle as a guide for the snowshoe hare's head. To draw the circle, first make four marks to determine its height and width. Then connect the marks using curved lines. If you're struggling to draw the circle, just trace the outer rim of a circular object like a coin or a bottle cap. For a more detailed guide on the different ways to draw a circle check out this tutorial: Four simple ways to draw a circle.
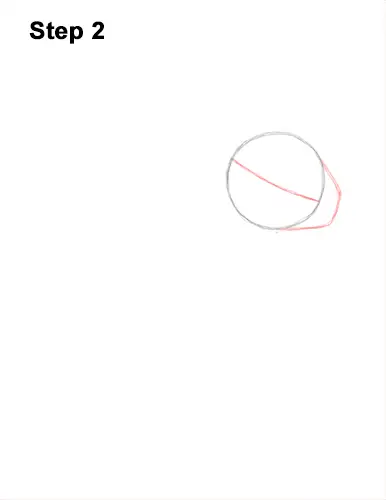
Step 2: Inside the head, draw a diagonal line as a construction guide to help you place the hare's facial features later on. On the lower, right side of the head, draw an angled line as a guide for the muzzle. Pay attention to the size of the muzzle in relation to the head. The right side of the muzzle should be flat.
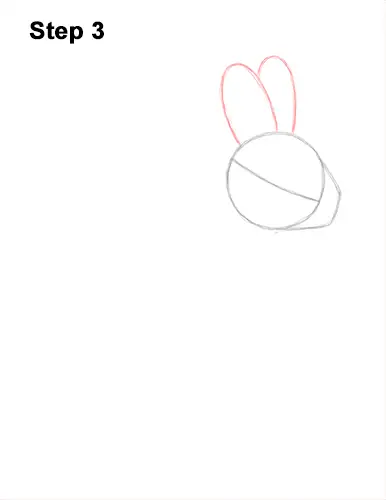
Step 3: On top of the head, draw two tall arcs as guides for the rabbit's ears. The ear on the left should partially block the ear on the right. The ears should be pretty big in relation to the head.
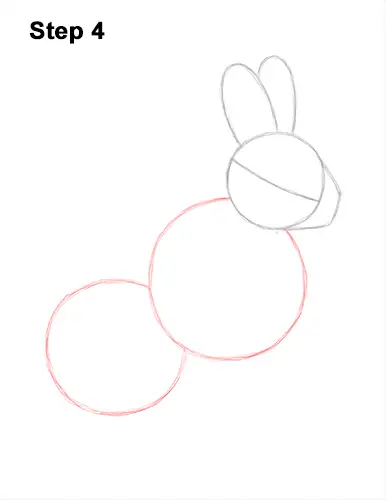
Step 4: Under the head, slightly to the left side, draw a bigger circle as a guide for the top part of the snowshoe hare's body. Use the four marks method to draw this circle too. This circle should be about twice the size of the head circle. On the lower, left side, draw another circle as a guide for the bottom half of the body. The size of this circle should be between the size of the head circle and the top body circle.
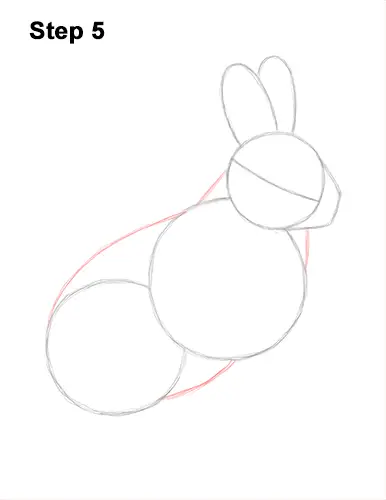
Step 5: Connect the circles using curved lines to complete the guide for the hare's body. The lines at the top should be short to create the guide for the neck. The lines at the bottom should be longer and more curved.


