Please PAUSE the "How to Draw a Woodpecker" video after each step to draw at your own pace.
For the first few steps, don't press down too hard with your pencil. Use light, smooth strokes to begin.

Step 1: Draw a circle as a guide for the woodpecker's head. The circle doesn't have to be perfect. It's just a guide. Leave enough room at the bottom for the body.

Step 2: Draw an angled line similar to a triangle on the right side of the head as a guide for the woodpecker's beak.

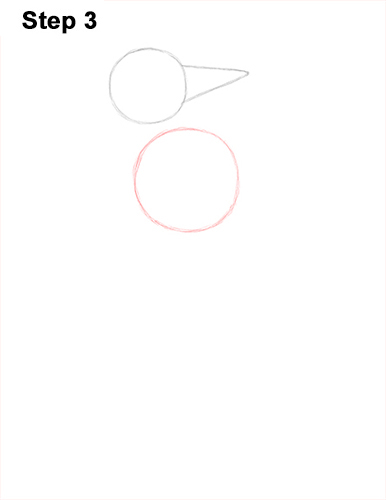
Step 3: Draw another circle under the head as a guide for the woodpecker's body. This circle should be bigger than the head and should be placed off to the right a bit.

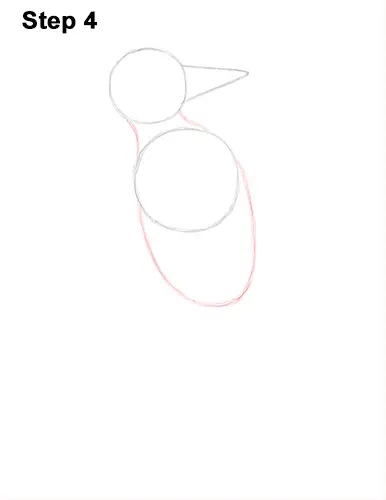
Step 4: Add a few more lines to complete the guide for the woodpecker's body. Start with a couple of short, curved lines at the top for the neck. Then draw a big U- shaped arc at the bottom as a guide for the lower half of the body.

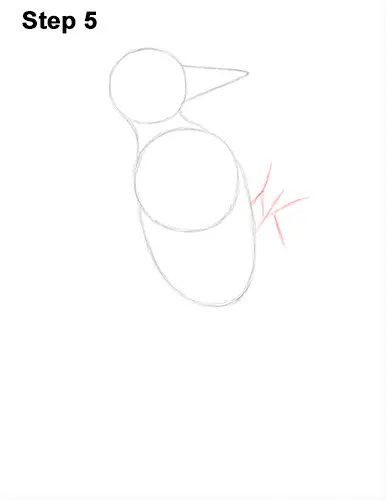
Step 5: Draw a series of lines on the lower right side of the body as guides for the woodpecker's feet. Add a few lines on the side as guides for the toes. The guide for the foot on this side should resemble the letter K.


