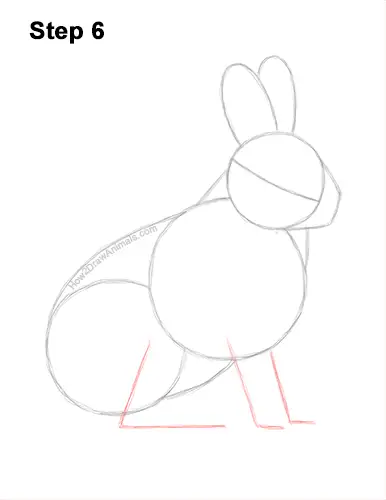
Step 6: Under the top body circle, draw two diagonal lines as guides for the rabbit's front legs. Bend the bottom tips of the lines to indicate where the feet will be. Under the circle on the left, draw a longer, angled line as a guide for the folded hind leg.
That's it for the guides! From this point on, press down harder with your pencil for a more defined drawing.
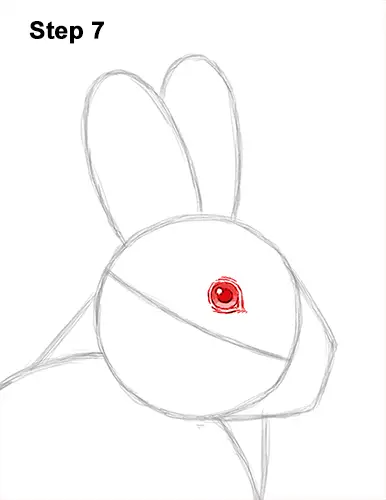
Step 7: Inside the head, lightly sketch a small circle for the snowshoe hare's eye. Place the eye on top of the horizontal construction guide. When you get the size and position of the eye right, darken the lines. Inside the eye, off to the side draw a tiny circle for a highlight. In the middle of the eye, draw a slightly bigger circle and shade it in for the pupil. Don't overlap the tiny highlight circle as you shade in the pupil. Add a few small, curved lines around the eye for a bit of the bare skin and corners of the eyes.
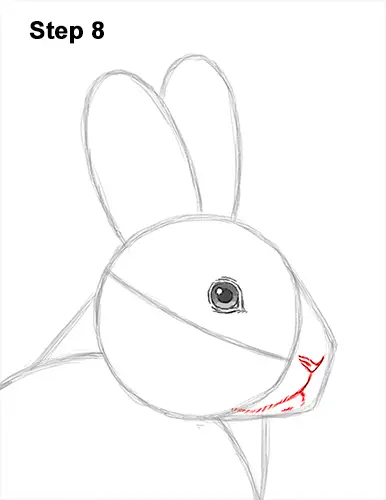
Step 8: Inside the muzzle, near the top, draw small V-shaped line for the rabbit's nose. Draw a thicker line on the left side for the nostril. Add another V-shaped line at the top for the rest of the nose. Under the nose, draw a line that curves to the left for the mouth. Use a series of short strokes as you draw the mouth for a furry texture. Draw a shorter line on the right side for the rest of the mouth.
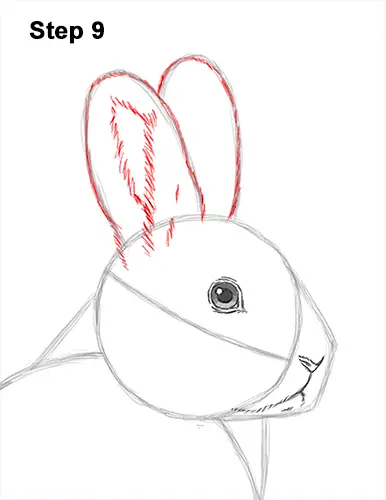
Step 9: Darken the arc on the top, left side to create the hare's first ear. Use short strokes as you darken the guide for a furry texture. Extend the bottom part of the ear farther inside the head. Inside the ear, draw a long, thin shape for the furry ear opening. Darken the arc on the right side for the other ear. This ear is facing the opposite direction so don't draw the ear opening.
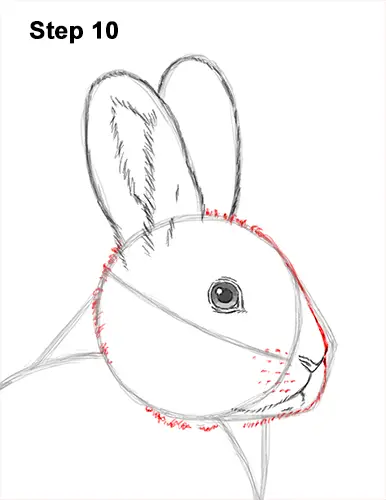
Step 10: Darken the outer edges of the initial guide lines to create the shape of the snowshoe hare's head. Use short strokes as you darken the guides to create a furry texture. Break up the line at the bottom where the head connects to the body. On the left side of the muzzle, draw a few rows of dots for the base of the whiskers.


