







How to Draw a Horse / Pony (Cartoon)
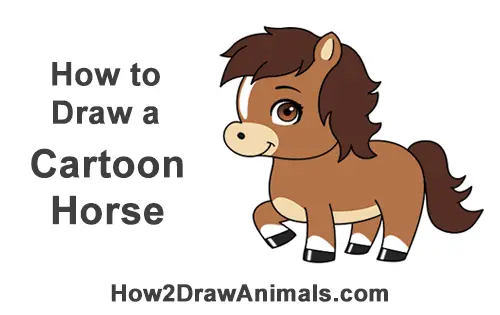
Please PAUSE the "How to Draw a Horse / Pony (Cartoon)" video after each step to draw at your own pace.
Written step-by-step video tutorial:
For the first few steps, don't press down too hard with your pencil. Use light, smooth strokes to begin.

Step 1: Lightly sketch a curved line for the cartoon horse's eye. When you get the shape of the eye right, darken the line. Make the line thicker too. The line should almost curl into a circle. Add a few bumps along the right side of the line to represent eyelashes.
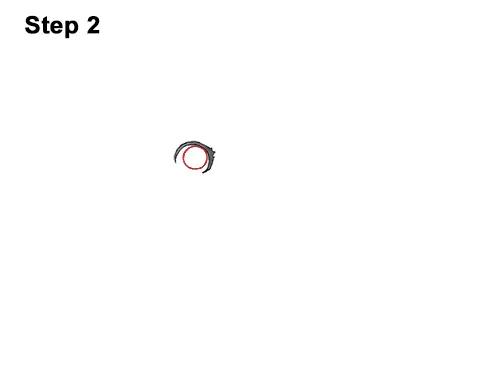
Step 2: Inside the eye, draw a small circle for the iris. The iris should be close to the right edge of the pony's eye.

Step 3: Inside the iris, on the top, right side, draw a tiny circle to represent glare. In the middle of the iris, draw a big dot for the horse's pupil.

Step 4: Above the eye, draw a short, thick curved line for the eyebrow.
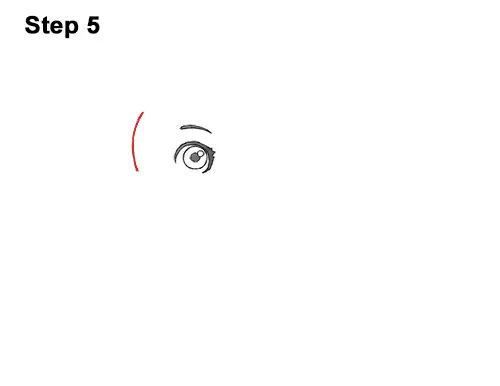
Step 5: To the left of the eye, draw a curved, vertical line for the front part of the cartoon horse's head. Pay close attention to the distance between this line and the eye. Don't draw them too close together.
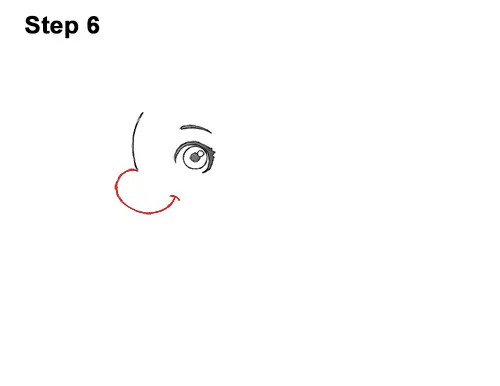
Step 6: Below that line, draw a C-shaped line for the cartoon pony's muzzle. Sketch the shape of the muzzle lightly at first and darken the line when you get it right. The line should curl toward the eye to form the smile.
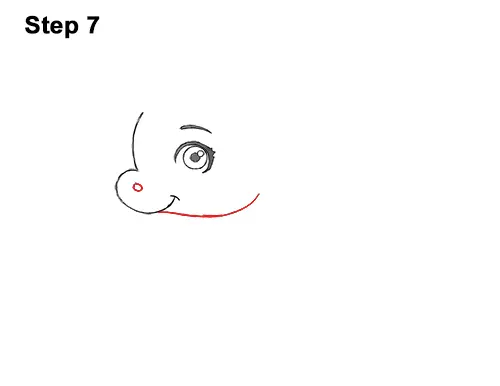
Step 7: To the right of the muzzle, draw another curved line for the bottom part of the pony's head. This line starts out straight and then curls up on the right. Add a small circle inside the muzzle for the nostril.
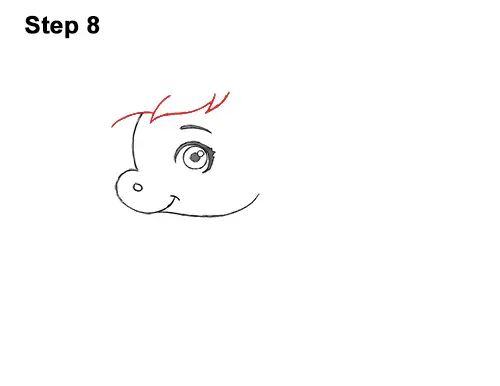
Step 8: Draw a curved line right on top of the face for the first part of the horse's mane. Continue drawing a series of curved lines to the right for the rest of the mane. The lines should be right above the eyebrow. This will be the bottom edge of the mane.
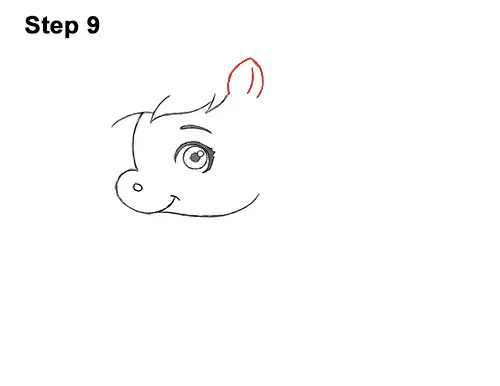
Step 9: To the left of the mane, draw two curved lines that meet at the top for the ear. Add a line inside for extra detail on the ear.
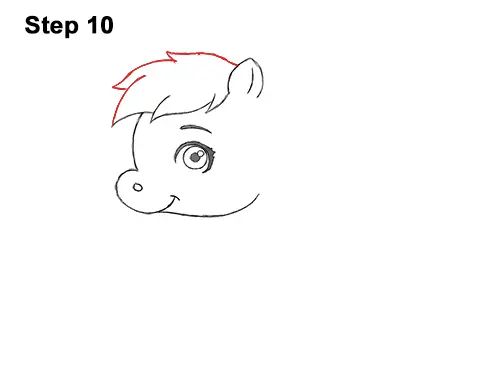
Step 10: Now draw a series of curved lines for the top part of the cartoon pony's mane. Curve this part of the mane high above the bottom part. The line should end to the left of the ear.
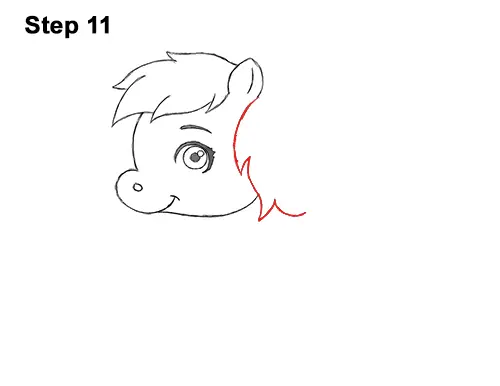
Step 11: Draw a series of lines that start at the ear and extend toward the lower part of the head for more of the mane. Curve the lines and add a couple of pointy ends to create the left edge of the horse's mane.
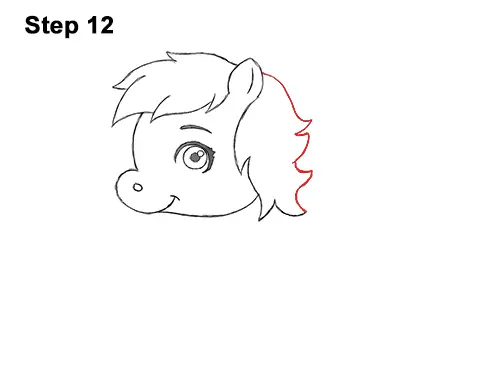
Step 12: Now draw more curved lines to create the right edge of the clump of mane. Be sure to add a few spikes along the way to represent the tips of the horse's messy mane.
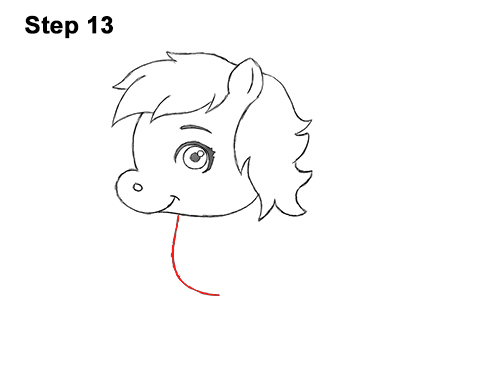
Step 13: Below the pony's head, draw a long curved line similar to the letter J for the cartoon horse's chest.
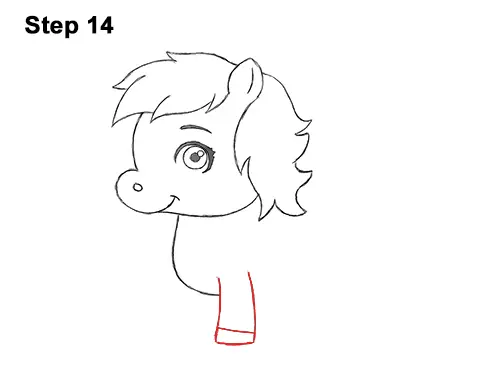
Step 14: To the right of the horse's chest, draw two long vertical lines for the first part of the front leg. At the bottom, draw two short horizontal lines: one for the bottom of the foot and one for the hoof.
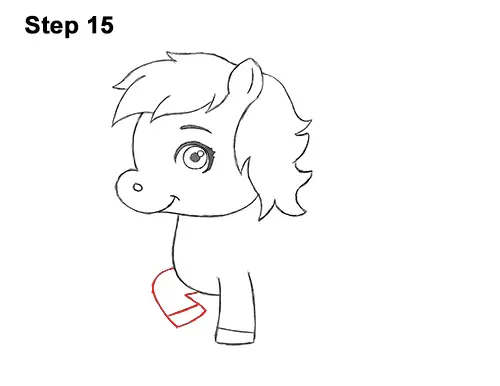
Step 15: To the left, draw a curved line for the pony's other front leg that's folded at the joint. Using shorter, curved lines, add the right edge of the leg and the foot and hoof at the bottom.
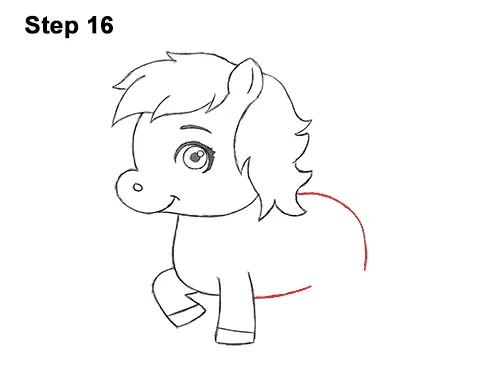
Step 16: To the right of the front leg, draw a horizontal line for the bottom part of the body. To the right of the mane, draw a long, curved line for the top part of the pony's body.
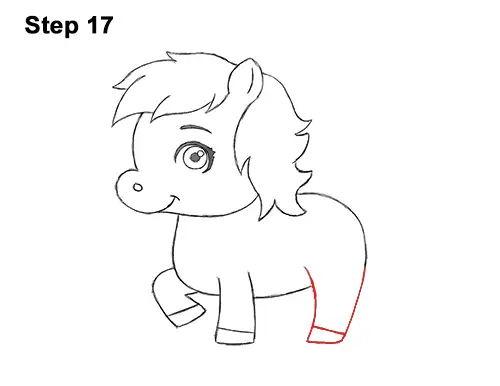
Step 17: Draw two long, curved vertical lines on the lower, right side of the body for the hind leg. Add a couple of short, horizontal lines at the bottom for the bottom of the horse's foot and the hoof.
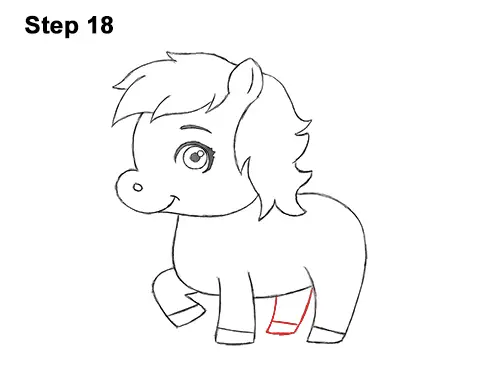
Step 18: Draw the other hind leg the same way but make it a bit smaller.
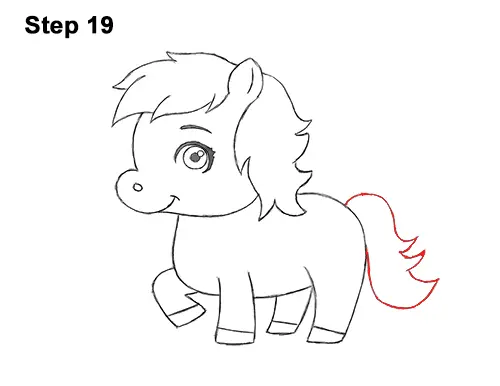
Step 19: Starting on the upper, right side of the body, draw a series of curved lines for the cartoon horse's tail. Just like with the mane, draw the tail as a single shape instead of each individual hair strand. Add a few spike-like shapes along the way to represent the tips of the messy tail.
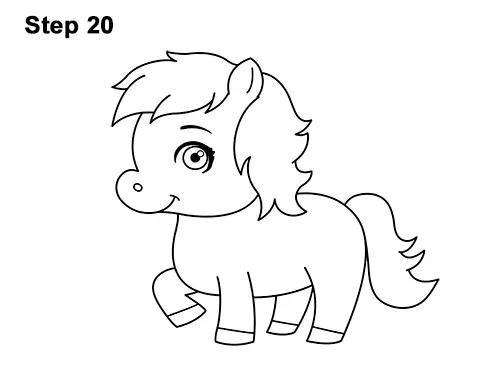
Step 20: Using a pen or marker, carefully go over the lines to make your drawing permanent. After inking, get rid of every pencil mark with an eraser.
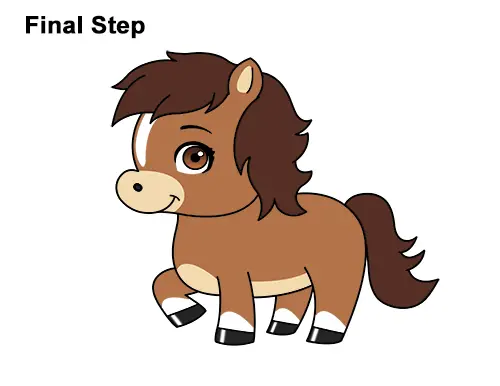
Final Step: Color your cartoon horse drawing using color pencils, markers or even crayons! Horses have different coats, so color your drawing however you'd like. For this pattern, use dark brown for the mane and tail.
Use regular brown for the body, except for the muzzle, chest and hooves. Draw the bottom edge of the eye with the color and leave the inside white. Leave a strip on the forehead blank too. To get a gradient effect on the eyes, color the top part dark brown and the bottom part light brown. Use light brown or yellow for the pony's chest, muzzle and inner ear, and black for the hooves. Leave a strip on the hooves blank for shine. Remember to pause the video to draw at your own pace.
Thanks for watching! Subscribe to the How2DrawAnimals YouTube Channel for a new tutorial every Tuesday.
To learn how to draw popular cartoon characters, visit EasyDrawingTutorials.com.
RELATED TUTORIALS
 |
 |
 |