







How to Draw a Bunny Rabbit (Cartoon) VIDEO & Step-by-Step Pictures
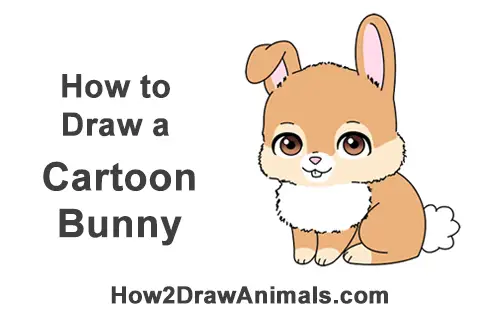
Please PAUSE the "How to Draw a Bunny Rabbit (Cartoon)" video after each step to draw at your own pace.
Written step-by-step video tutorial:
For the first few steps, don't press down too hard with your pencil. Use light, smooth strokes to begin.
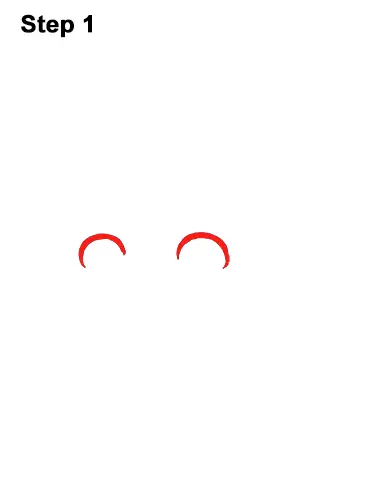
Step 1: Draw two curved lines next to each other for the bunny's eyes. Pay attention to the placement of the lines. Don't draw them too close together. Make the lines thick to represent eyelashes. The shape of the curved lines should be similar to a half-circle. Sketch these lines lightly at first. When you get the shape and placement right, darken them.
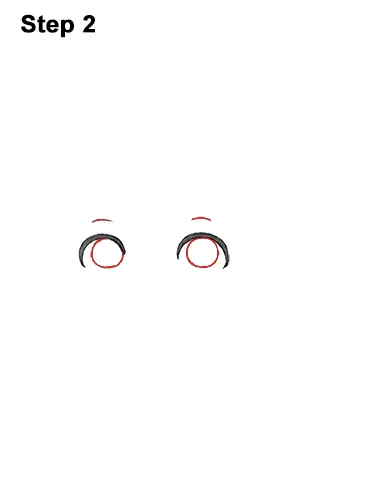
Step 2: Under each curved line, draw a small circle for the cartoon bunny's irises. The circle on the left should be close to the right tip of the line. The circle on the right should be closer to the middle of the curved line.
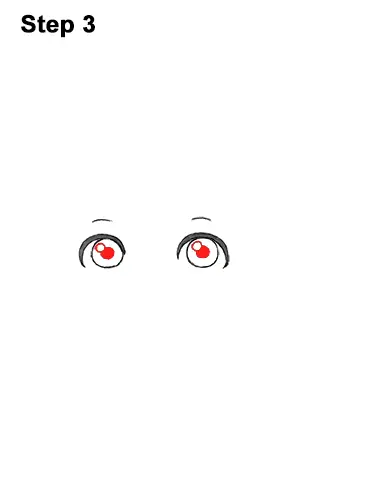
Step 3: Inside each iris, off to the side, draw a tiny circle to represent glare. In the middle of each iris, draw a big dot for the pupils.
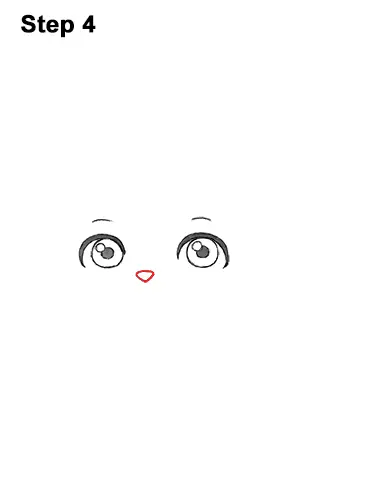
Step 4: Between the eyes but slightly below them, draw a small triangle for the bunny's nose.
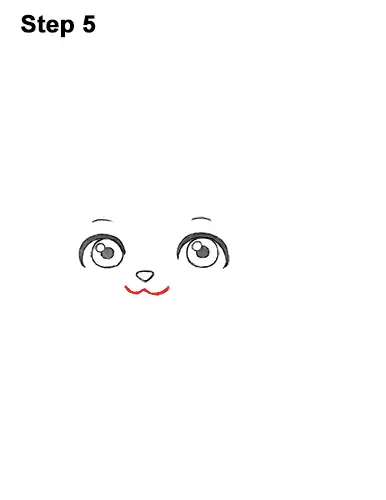
Step 5: Below the nose, draw a small W-shaped line for the bunny's mouth.
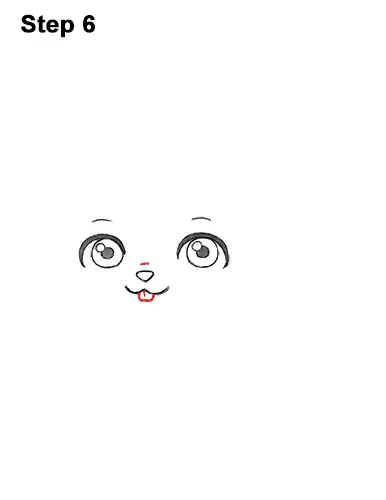
Step 6: Draw a small square-like shape under the mouth for the teeth and a couple of short lines for detail.
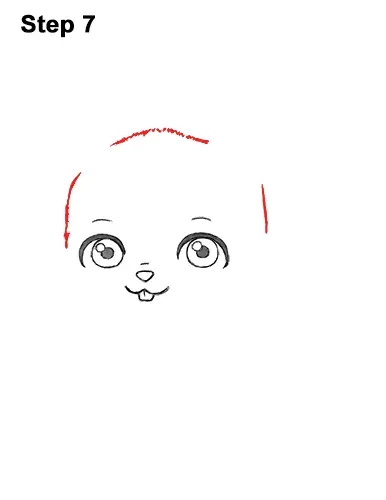
Step 7: Add the cartoon bunny's head by first drawing a curved vertical line next to the eye on the left. Now add another vertical line on the right but farther away from the eye. Using quick, short strokes to resemble fur, draw a curved horizontal line above the eyes for the top part.
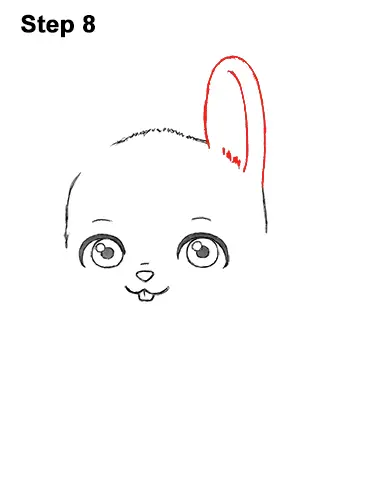
Step 8: Draw a tall arc similar to an upside-down letter U on the top, left side of the head for the bunny's first ear. Add a few lines inside the ear for extra detail.
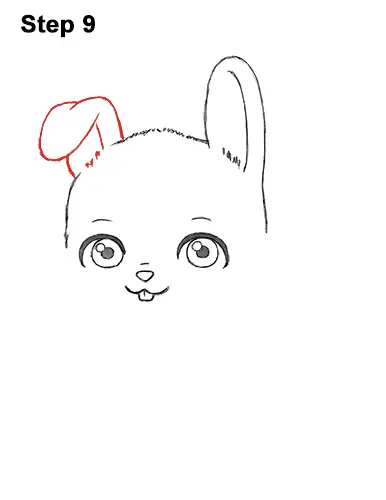
Step 9: Add the other ear by first drawing a short curved vertical line on the top, left side of the head. Then add the folded part of the ear as a longer curved line on the left side. Draw the rest of the bunny's ear under the folded section using a series of short lines.
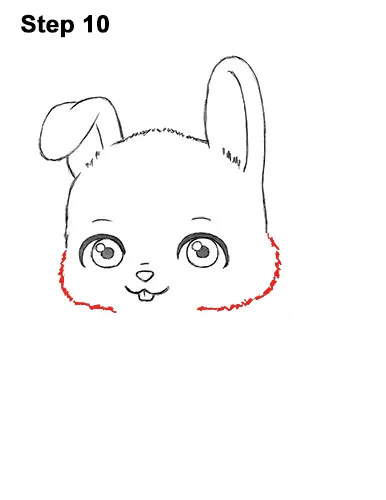
Step 10: Draw the bunny's cheeks on either side using quick, short strokes to represent fur. Curve the bottom part of the cheeks so that the end tip almost touches the mouth. The cheek on the right side should be wider because of the angle of the head.
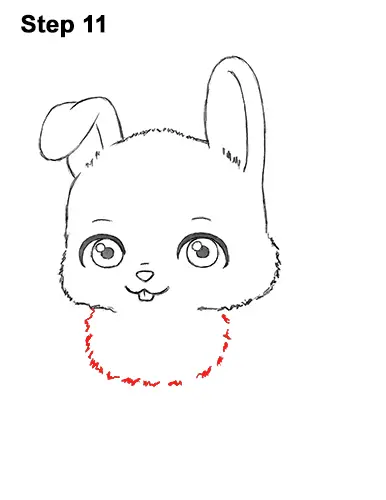
Step 11: Draw the chest under the head using a series of quick, short strokes. The overall shape of the cartoon bunny's chest should be similar to a half-circle.
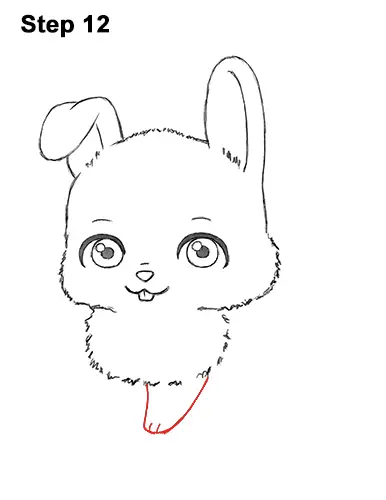
Step 12: Under the chest, near the right, draw two short, vertical lines for the top part of the first leg. Now add a curved line for the bottom of the foot and draw the toes as short lines inside.
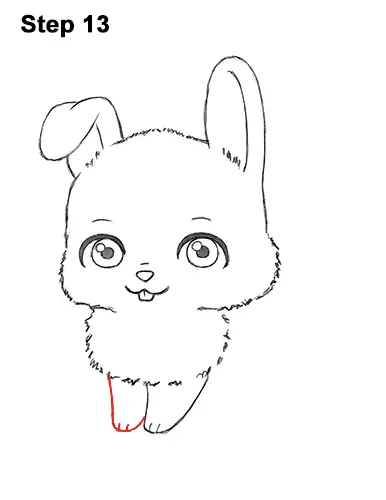
Step 13: Draw the bunny's other leg the same way. Don't forget the toes at the bottom!
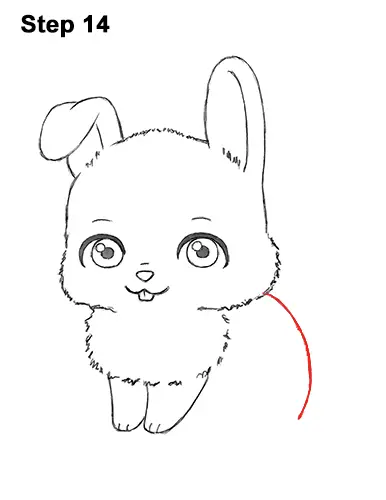
Step 14: Starting on the lower, right side of the head, draw a long curved line for the lower part of the body.
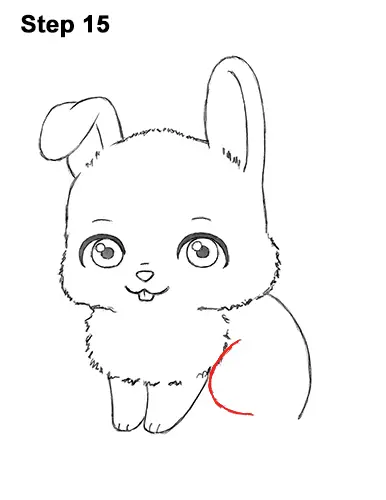
Step 15: To the right of the front foot, draw a C- shaped line for the top part of the bunny's hind leg.
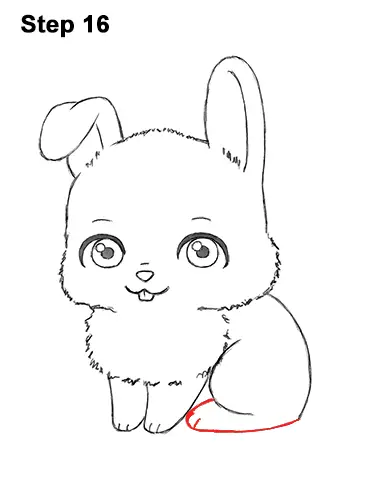
Step 16: Add the big foot by drawing a long curved line at the bottom. Draw the toes as short lines on the left side.
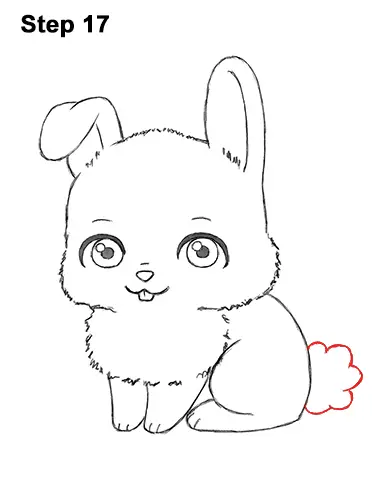
Step 17: Draw the bunny's tail on the lower, right side using a series of short curved lines in the shape of a half-circle.
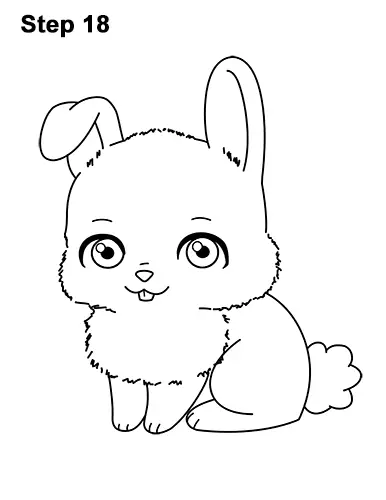
Step 18: Using a pen or marker, carefully go over the lines to make the cartoon bunny drawing permanent. After inking, get rid of every pencil mark with an eraser.
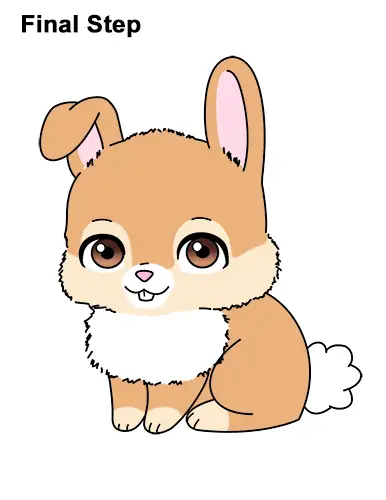
Final Step: Color your bunny drawing using color pencils, markers or even crayons! Use brown to outline the color separation. Add the lower edge of the eyes and leave the inside white. Now use light brown except for the bunny's ears, muzzle, chest and tail. Use pink for the inside of the ears and nose. To get a gradient effect on the eyes, color the top part dark brown and the bottom part light brown.
Thanks for watching! Subscribe to the How2DrawAnimals YouTube Channel for a new tutorial every Tuesday.
To learn how to draw popular cartoon characters, visit EasyDrawingTutorials.com.
RELATED TUTORIALS
 |
 |
 |