







How to Draw a Cobra (Cartoon)
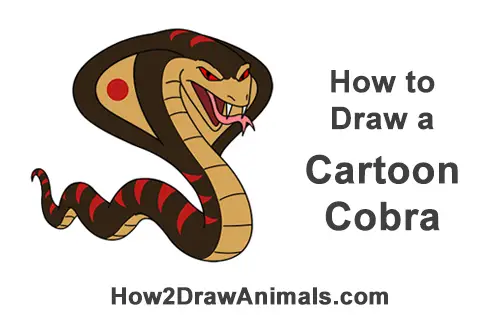
Please PAUSE the "How to Draw a Cartoon Cobra" video after each step to draw at your own pace.
Written step-by-step video tutorial:
For the first few steps, don't press down too hard with your pencil. Use light, smooth strokes to begin.
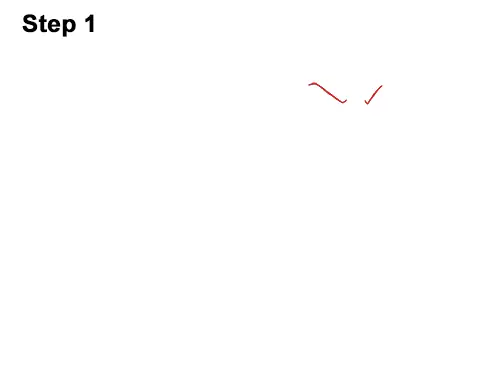
Step 1: Draw two short, diagonal lines for the cartoon cobra's eyebrows. Don't place the lines too far apart. The line on the left should be longer than the line on the right. Curve the ends of the lines a bit to emphasize the furrowed brow.
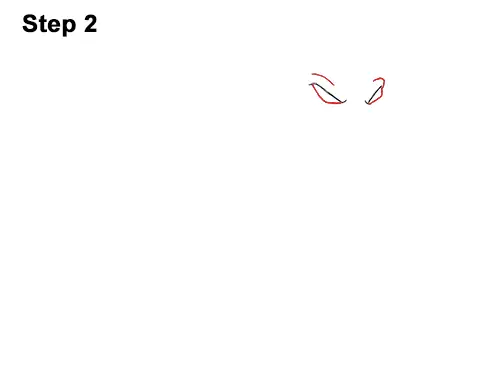
Step 2: Under each eyebrow, draw a short angled line for the bottom edge of the eyes. The eye on the left should be bigger because of perspective. The cobra's eyes should be similar to little triangles. Add a short, curved line over each eye to emphasize the brow.
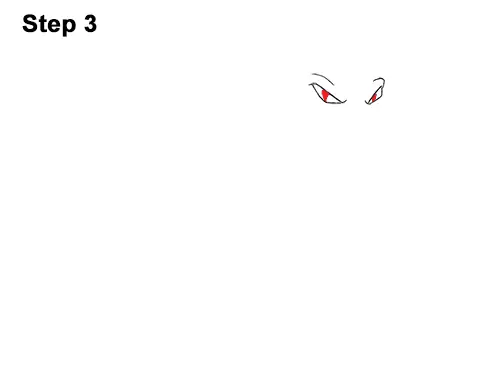
Step 3: Inside each eye, draw a small triangle-like shape and shade it in for the snake's pupils. The eye on the right should be near the middle, while the eye on the left should be close to the left edge.
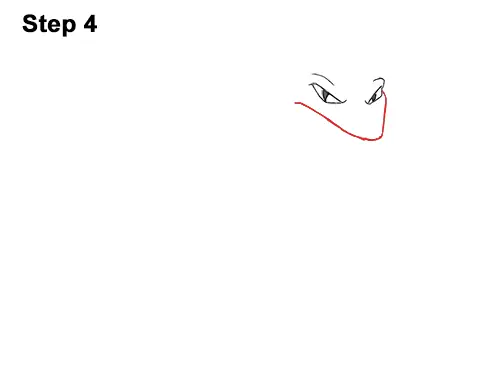
Step 4: Under the cobra's eyes, draw a long, curved line that's similar to the letter V for the top part of the mouth. The line should stretch from one eye to the other and dip down low in the middle.
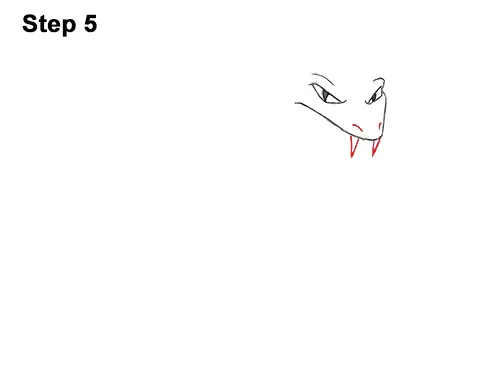
Step 5: Under the tip of the mouth, draw two thin, V-shaped lines for the cobra's fangs. Make the fangs as long as you'd like. Above the tip of the mouth, draw two short slits for the snake's nostrils.
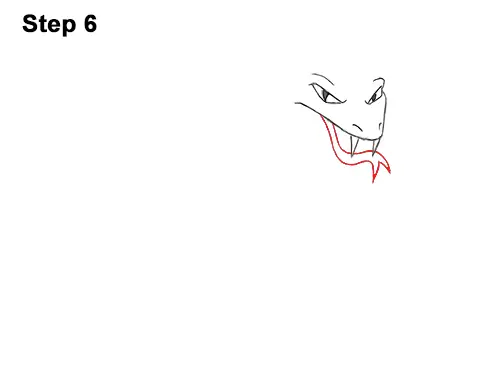
Step 6: Starting on the left side of the mouth, draw two long, wavy lines for the cobra's tongue. Make the lines come apart wider at the end. Don't overlap the lines for the fangs. On the tip of the snake's tongue, draw a line similar to an upside- down letter V to make it forked.
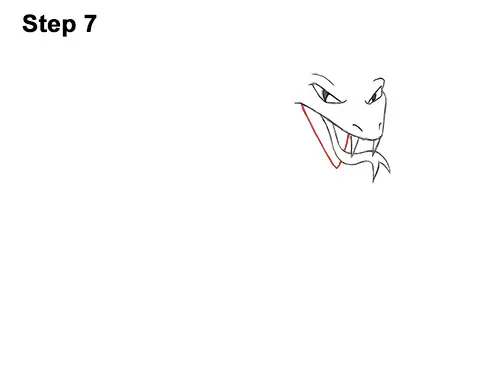
Step 7: Starting on the left side of the mouth, draw an angled line similar to a wide letter V for the bottom part of the cobra's mouth.
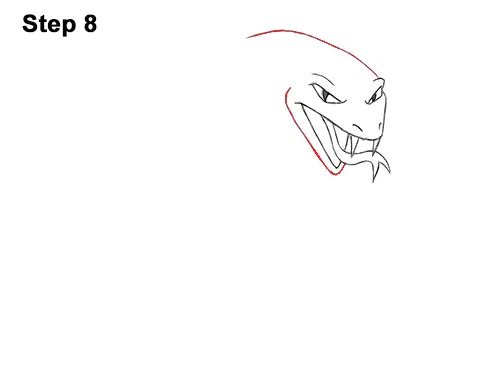
Step 8: Draw another V-shaped line under the mouth for the jaw. Pay attention to how far the line extends to the right. Don't overlap the cobra's tongue or fangs. Now draw a long line that starts from the eye on the right and curves to the left to create the top of the head.
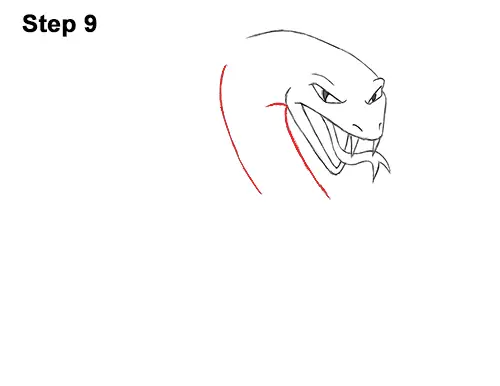
Step 9: Draw two long lines that start on the left side of the head and curve to the right for the cobra's neck. Notice that the line on the left doesn't quite connect to the top part of the head. That's where the hood will go.
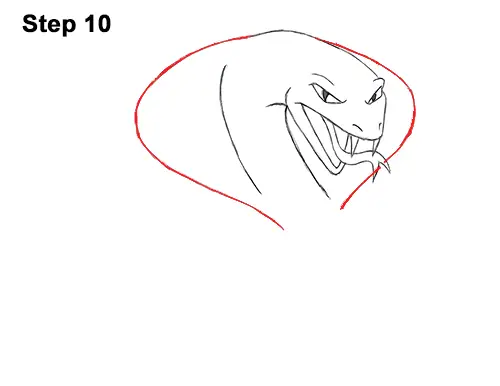
Step 10: Draw a long curved line on the left side for the first part of the hood. This line should start at the top part of the head, curve to the left, and then back down and end just below the neck. Add a similar line on the right side for the other part of the snake's hood. Make it smaller because of the perspective. You can also skip the steps for the hood and draw a regular snake instead of a cobra!
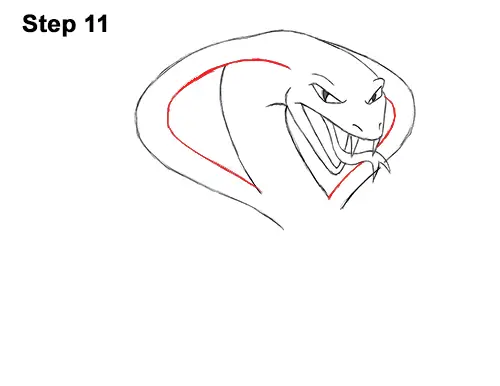
Step 11: Draw another set of curved lines inside the hood to emphasize its structure. These lines should be parallel to the hood. The line on the right starts close to the eye on the left. As you draw the line on the right, be sure to not overlap the lines for the cobra's tongue.
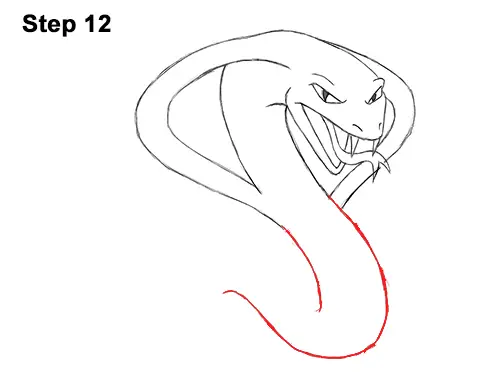
Step 12: Continue drawing the shape of the snake's body by first extending the line on the left. As you extend the line on the right, make sure it goes down farther than the line on the left before it curves back up and to the left.
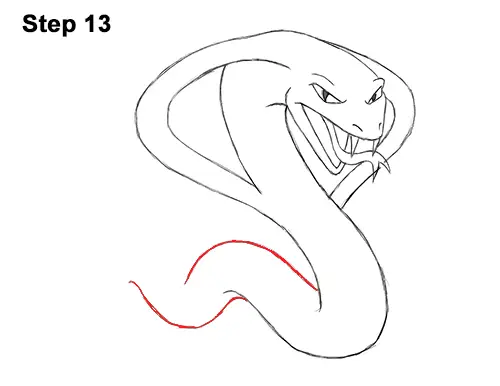
Step 13: Now add a long, curved, horizontal line above the line from the previous step to continue with the snake's body. Now add a long, curved line below that for the bottom part of this segment of the body.
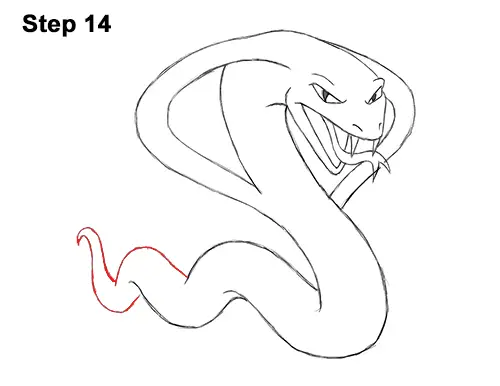
Step 14: Draw another curved line at the top but this time make it shorter. Add a curved line at the bottom but curve it high up for the left edge of the cobra's tail. Draw another curved line to finish the tail. You can make your snake's body longer by adding more curved segments.
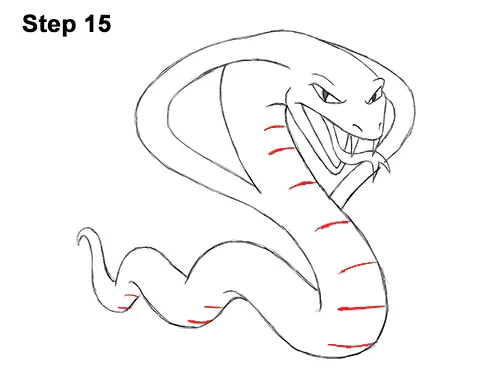
Step 15: Add a series of short lines along the right edge of the cobra's body for extra detail. The lines should get longer the farther down the front part of the body they are. The lines should be shorter on the left segments of the body.
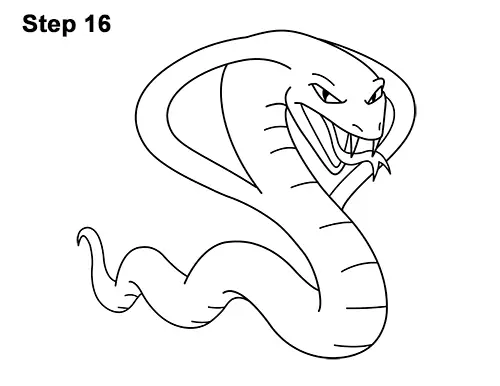
Step 16: Using a pen or marker, carefully go over the lines to make your snake drawing permanent. After inking, get rid of every pencil mark with an eraser.
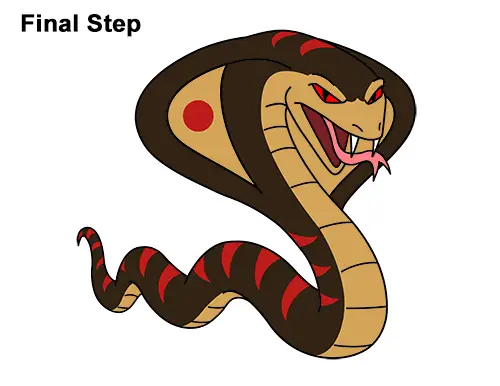
Final Step: Color your cartoon cobra drawing using color pencils, markers or even crayons. Add any design you want to your cobra! For this design, add a red circle to the hood and a series of curved, triangle- like shapes to the top of the body. Use red for the eyes too. Using dark brown, add a color separation on the furrowed brow and along the body. Now color the snake's body dark brown except for the underside, the inside of the hood and the face. Color the rest of the body light brown or yellow. Use dark red for the mouth and pink for the tongue. Don't forget to pause the video to draw at your own pace.
Thanks for watching! Subscribe to the How2DrawAnimals YouTube Channel for a new tutorial every Tuesday.
To learn how to draw popular cartoon characters, visit EasyDrawingTutorials.com.
RELATED TUTORIALS
 |
 |
 |