







How to Draw a Peacock
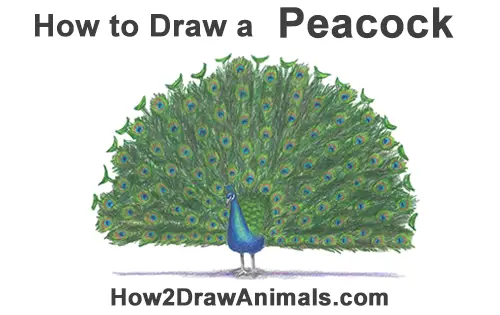
Please PAUSE the "How to Draw a Peacock" video after each step to draw at your own pace.
Time-Lapse (Speed Drawing) video:
Written step-by-step video tutorial:
For the first few steps, don't press down too hard with your pencil. Use light, smooth strokes to begin.
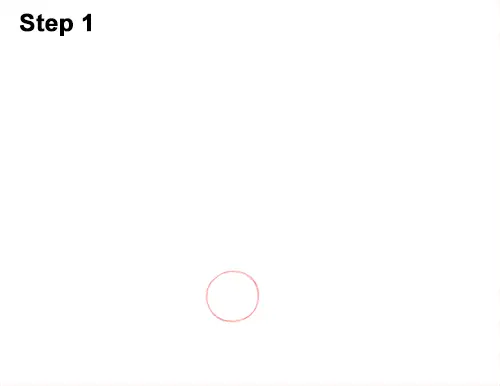
Step 1: Draw a small circle near the bottom of the paper as a guide for the peacock's body. First draw four small marks for the height and width of the circle, then connect the marks using curved lines. If you're struggling drawing the circle, trace the outer rim of a coin, a lid or any other object with a circular edge.

Step 2: High above the body, near the left side, draw a tiny circle as a guide for the peacock's head. Pay attention to the placement and size of this circle in relation to the first one.
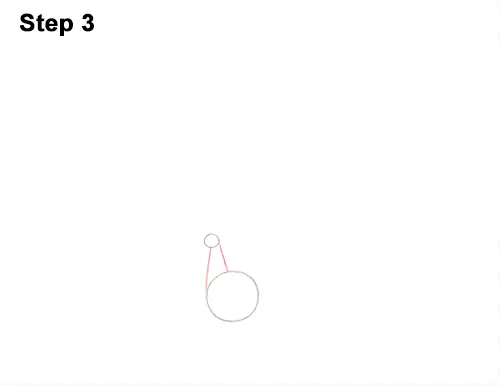
Step 3: Draw two lines that connect the peacock's head to the body to form the guide for the neck.
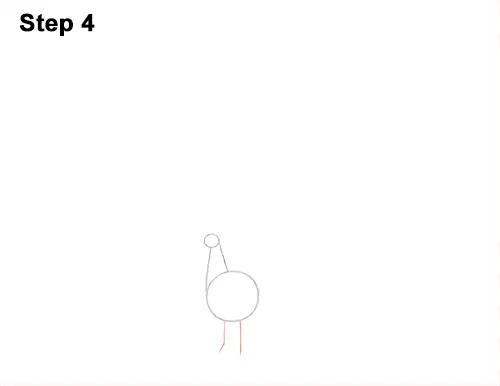
Step 4: Draw two vertical lines under the body as guides for the peacock's legs.
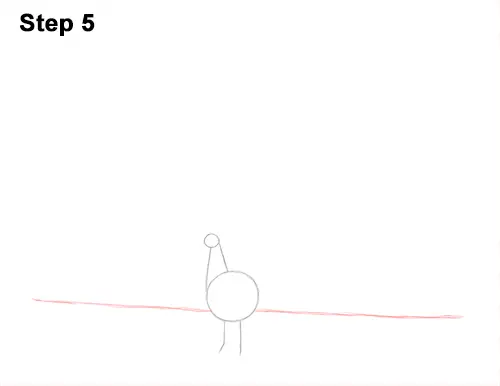
Step 5: On either side of the peacock's body, near the bottom, draw two long horizontal lines as guides for the first part of the tail. The lines don't have to be perfectly straight. They're just guides. The longer you make them, the bigger the bird's tail will be.
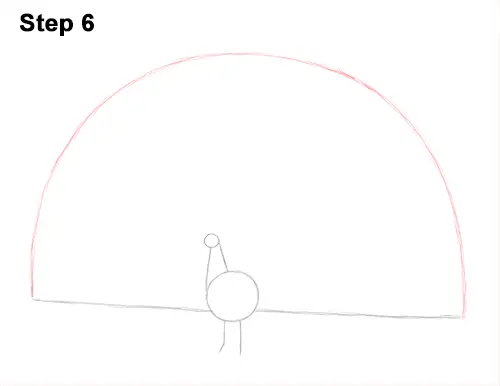
Step 6: High above the body, make a small mark to indicate the height of the tail. The higher you draw this mark above the head, the taller the peacock's tail will be. Now connect the mark to the ends of the horizontal lines below using curved lines to finish the guide for the peacock's tail. The shape of the tail should be similar to a huge letter D on its side. Pay attention to the size of the tail relative to the bird's body. You can also make the tail a lot bigger if you'd like.
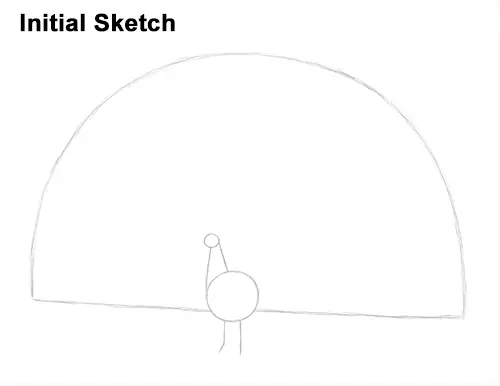
That's it for the initial sketch! From this point on, press harder with your pencil to get a more defined sketch.
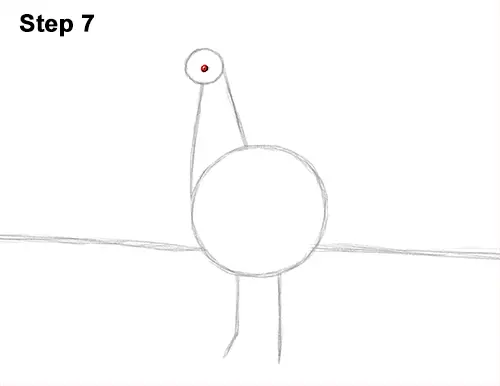
Step 7: Draw a small dot inside the head, near the middle, for the peacock's eye. The eye will be very small, so don't worry about adding too much detail.
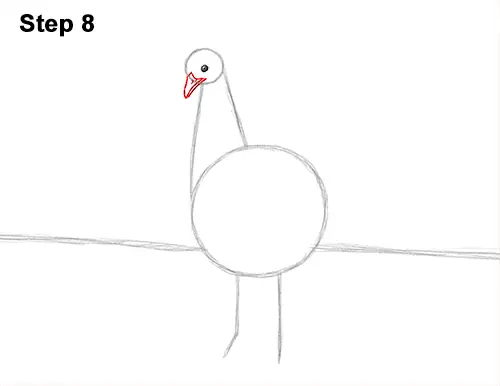
Step 8: Add the peacock's beak by first lightly sketching a V- shaped line on the lower left side of the head. Draw a series of small, curved lines inside the head for the base of the beak. Darken the V- shaped line. Add an extra line on the right for the bird's mouth and a slit at the top for the nostril.
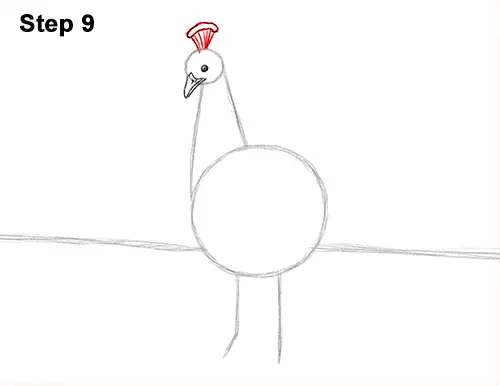
Step 9: On top of the head, draw a couple of short, curved lines for the base of the crest. On top of the base draw a wavy, cloud-like shape for the feathers that form the crest. Add a few more lines in the middle for more feathers.
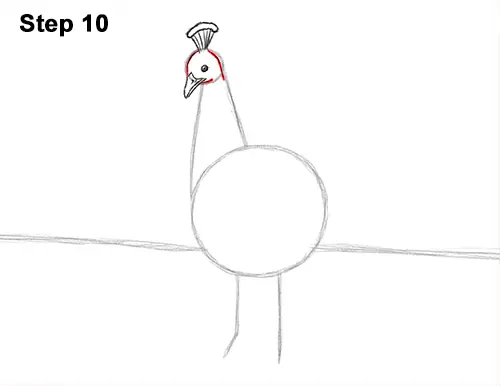
Step 10: Darken the initial circle to create the head. Don't overlap the peacock's crest feathers.
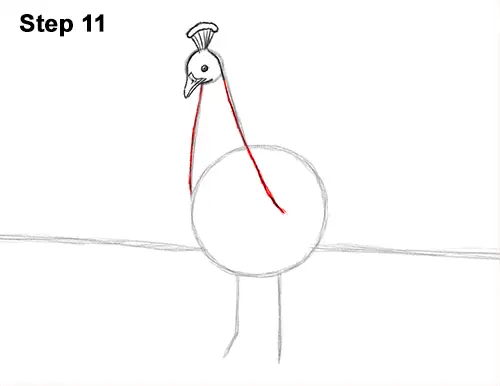
Step 11: Darken the lines under the head to create the peacock's neck. The line on the right should stretch in toward the bird's body.
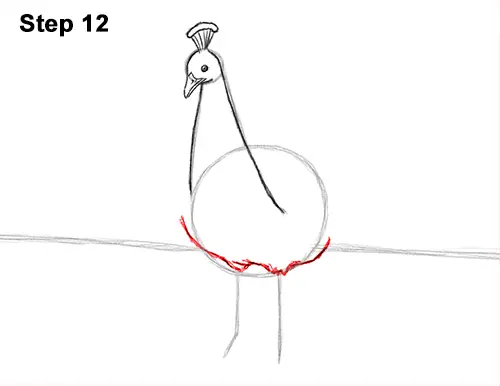
Step 12: Use the bottom half of the first circle as a guide to draw the peacock's body. As you darken the line for the body, add an extra bump above the legs for their feathery base.
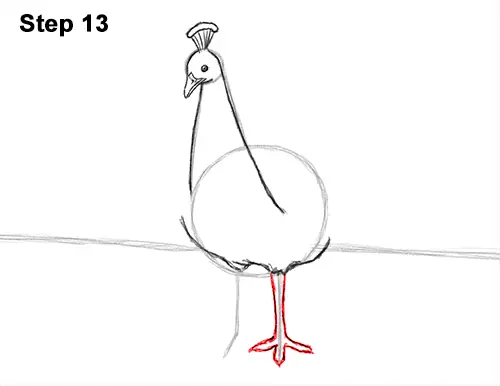
Step 13: Add the peacock's leg on the right by first drawing a couple of lines around the guide. Near the bottom, draw the toes on the sides using sloping lines. Now use the tip of the initial line as a guide to draw the toe in the middle.
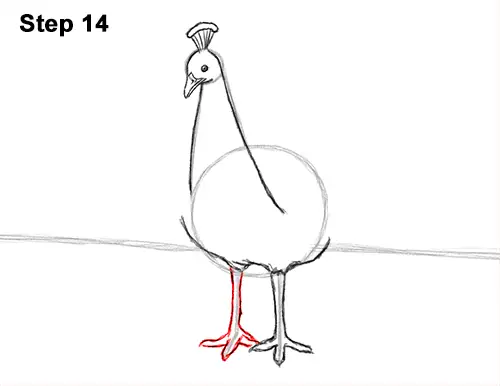
Step 14: Draw the leg on the left the same way. First follow the guide to draw the top part of the leg. Then add the peacock's toes at the bottom using sloping lines.
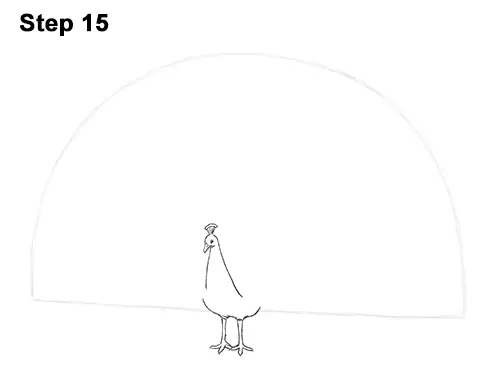
Step 15: Erase as much as you can of the initial guide lines. Don't erase the guide for the peacock's tail yet. Don't worry about erasing all of the guides. It's okay to leave some behind. LIGHTLY erase the guide for the tail so the colors don't get too muddled with the graphite in the next step. Re-draw any final sketch lines you may have accidentally erased.
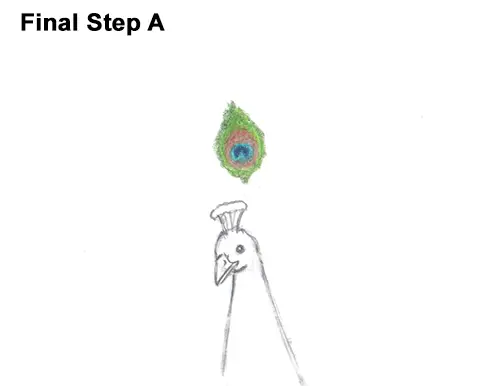
Final Step A: Color your drawing! Start by adding the eyespots on the peacock's fanned tail. Above the head, draw a small oval using light brown. It should be about the size of the head. Inside the oval, near the bottom, draw a small circle using light blue. Inside the circle, draw a small curved shape using dark blue. This shape should be similar to a small Pac-Man facing down. Color in the rest of the small circle at the bottom using light blue. Color the rest of the oval light brown. Draw a diamond- like shape around the initial oval using yellow-green and dark green. Add a bit of dark brown to the original oval too.
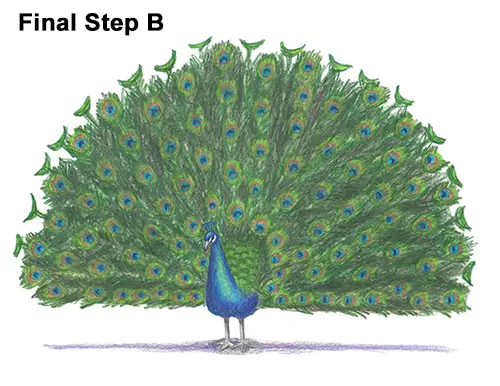
Final Step B: Now do this about one hundred more times inside the fanned tail! It's easier to place the initial light brown ovals throughout the peacock's tail first and then finish the eyespots. The spots should form rows that radiate from the middle of the body toward the initial curved guide. Stagger the spots so that the rows that they create aren't perfectly uniform. It's okay if the rows and ovals aren't perfect. That makes the tail more organic and less rigid. Leave a section to the right of the body blank because that's where the shape of the bird's body curves up.
Now add the detail on the rest of the peacock's eyespots the same way you did with the first eyespot. Use light blue to create a circle near the bottom of each oval. Then using dark blue, draw a shape similar to a half-moon inside the small circle. Adding the eyespots all over the tail can be VERY time- consuming, so be patient and take breaks. There's really no trick or shortcut for adding the eyespots. You just have to add them one at a time.
Now add the light and dark brown to the rest of the eyespots. It might be a good idea to draw a portion one day, then come back and do more another day to break up the process. Now add the yellow-green and dark green around the peacock's eyespots.
Use dark green to start adding the peacock's feathers between the eyespots. Use quick, short strokes that radiate out from the eyespots to create the rest of the feathers. Use more quick, short strokes using dark green to fill the gaps between the eyespots. Add more quick, short strokes in the gaps using dark brown and gray.
Use dark green to draw the tips of the feathers, which consist of curved shapes similar to half-moons. Use yellow-green inside the half- moon shapes and for the base of the tail. Use yellow-green inside the half-moon shapes and for the base of the tail. Use dark green to add a series of curved lines at the base of the tail for the body plumage.
Use dark blue for the outer edges of the peacock's body and head. Now use regular blue inside the body but leave a strip blank to represent the sheen on the feathers. Now use light blue in the middle of the body and blend in the other blues too. Leave a section around the eye blank. Use gray for the bird's beak and legs.
Draw a gray shadow under the body as a thin, horizontal strip. Use a bit of purple too.
Continue adding greens and browns to the peacock's tail until you're happy with what you have. It's always a good idea to use reference when you draw. Don't forget to pause the video to draw at your own pace.
Thanks for visiting! Subscribe to the How2DrawAnimals YouTube Channel for a new tutorial every Saturday.
To learn how to draw popular cartoon characters, visit EasyDrawingTutorials.com.
RELATED TUTORIALS
 |
 |
 |