







How to Draw a Beaver (Cartoon)
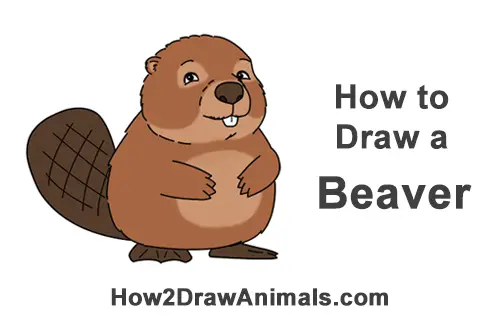
Please PAUSE the "How to Draw a Beaver (Cartoon)" video after each step to draw at your own pace.
Written step-by-step video tutorial:
For the first few steps, don't press down too hard with your pencil. Use light, smooth strokes to begin.
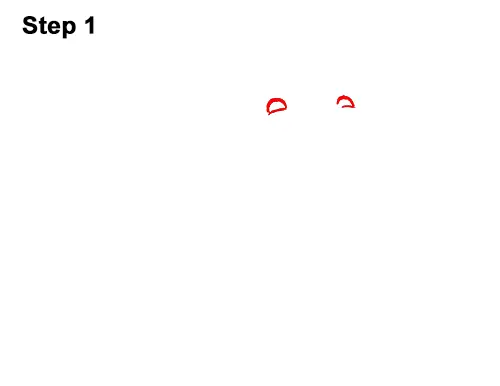
Step 1: Draw two short, curved, horizontal lines for the top part of the cartoon beaver's eyes. The curved lines should be pretty far apart. Don't place them too close together. Draw another small line under the eye on the left for the eye's bottom edge. Add a line under the eye on the right to complete the shape of the eyes.
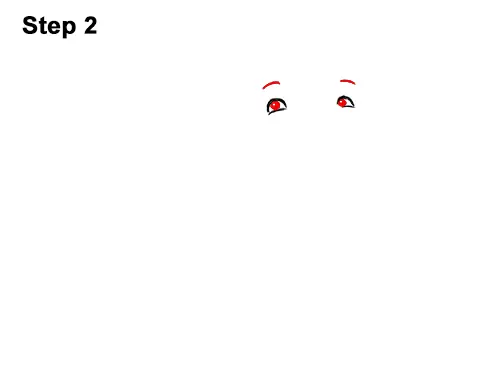
Step 2: Inside the eyes, draw two tiny dots for the pupils. Draw the pupils close to the left edge of each eye. Above each eye, draw a short, curved line for the beaver's eyebrows.
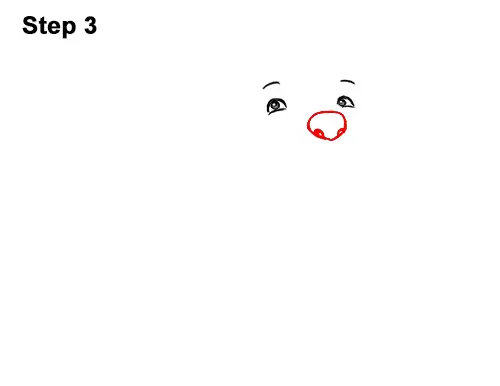
Step 3: Below the eyes, off to the right, lightly sketch a small circle for the beaver's nose. When you get the size and placement right, darken the nose but make the bottom pointier. Inside the nose, near the bottom, draw two short, curved lines for the nostrils.
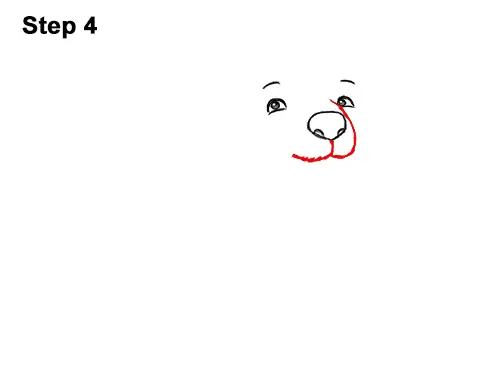
Step 4: Under the nose, draw the mouth as a line that splits in two and curves to the left and right. Break up the mouth into short strokes to represent fur. Draw a curved line that starts next to the eye on the right and ends at the mouth for the rest of the beaver's muzzle.
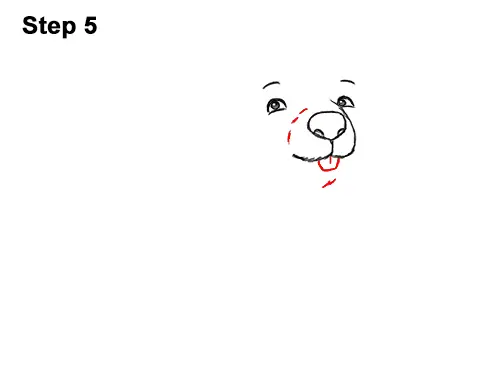
Step 5: Under the mouth, draw a square-like shape with a line across the middle for the beaver's front teeth. Draw a few lines to the left of the nose for the muzzle and under the teeth for the chin.
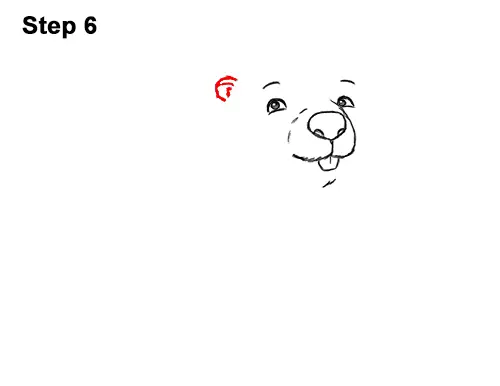
Step 6: To the left of the eyes, draw a small C-shaped line for the beaver's ear. Add a few extra lines for fur.
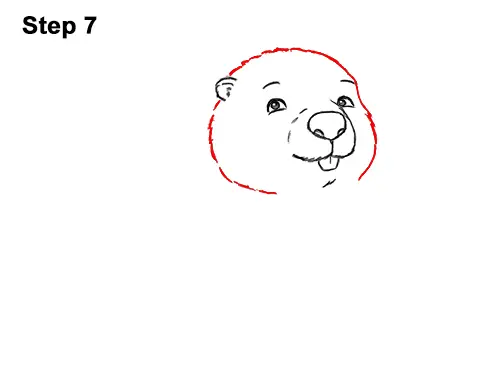
Step 7: Starting at the ear, draw a long, curved, horizontal line for the top of the beaver's head. Notice the distance between the top of the head and the eyes. Continue to draw the line downward on the right side to create the cheek. Add another curved line under the ear for the left side of the head.
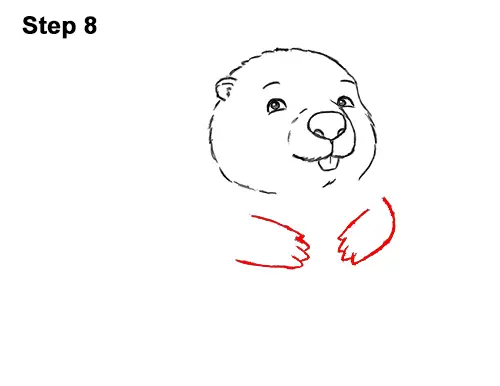
Step 8: Add the first hand under the head by first drawing a sloping line. Then on the right side, draw four tiny V-shaped lines for the fingers. Draw another sloping line underneath for the bottom part of the arm. Draw the beaver's arm on the right the same way but make it a bit shorter.
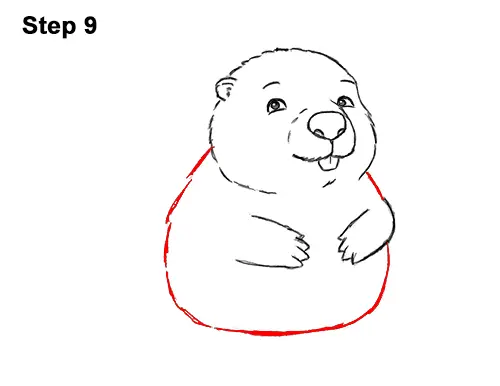
Step 9: For the beaver's body, connect the arm on the right to the head, and then draw a long, curved line on the left side. Add a horizontal, curved line for the bottom part of the body. Don't draw this line too far down. Draw a curved line on the right that connects the arm to the bottom of the body.
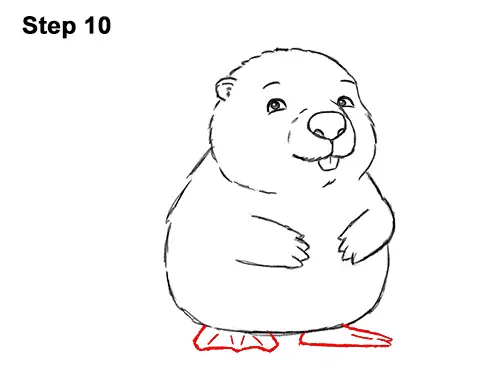
Step 10: Draw the beaver's feet under the body using a series of angled lines. The foot on the left should be wide because it's facing forward. The one the right is sideways, so it should be thin. Add a few lines inside the foot on the right to make the toes webbed.
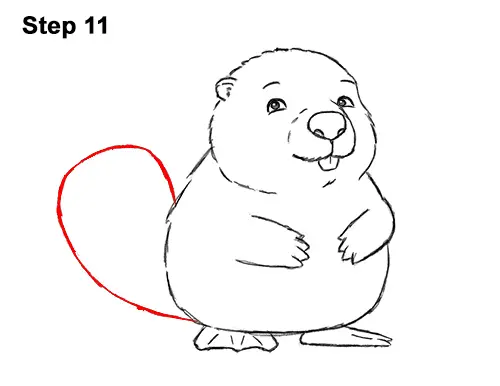
Step 11: To the left of the body, draw a long, curved line for the beaver's big, flat tail. Make the top part of the tail flat instead of round.
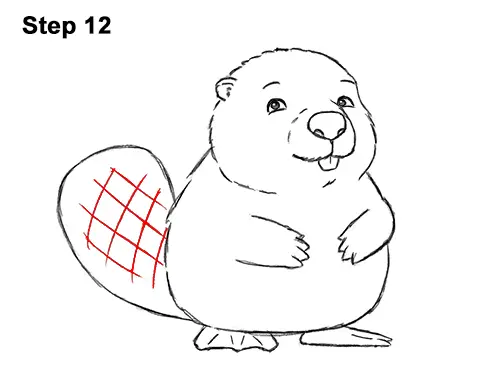
Step 12: Draw a series of intersecting lines inside the tail to give it some texture.
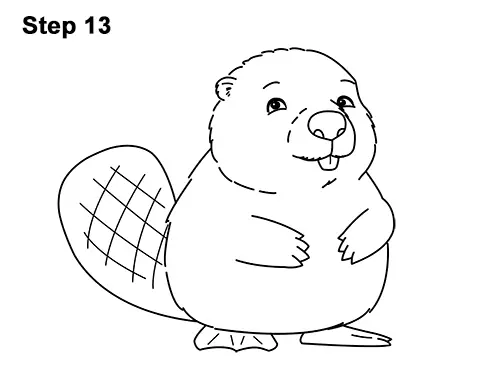
Step 13: Using a pen or marker, carefully go over the lines to make your cartoon beaver drawing permanent. After inking, get rid of every pencil mark with an eraser.
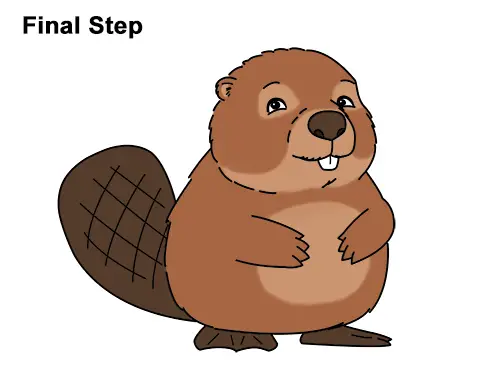
Final Step: Color your beaver drawing using color pencils, markers or even crayons! Use brown for the body and light brown for the area around the eyes, the muzzle and chest. Color lightly at first and build up to the level of darkness that you want. Use dark brown for the nose, tail and feet. Blend in a bit of dark brown to the beaver's body for a furry look. Don't forget to pause the video to draw at your own pace.
Thanks for visiting! Subscribe to the How2DrawAnimals YouTube Channel for a new tutorial every Tuesday.
To learn how to draw popular cartoon characters, visit EasyDrawingTutorials.com.
RELATED TUTORIALS
 |
 |
 |