







How to Draw a Rhinoceros (Cartoon)
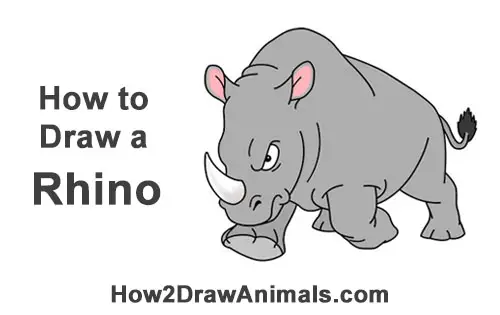
Please PAUSE the "How to Draw a Rhinoceros (Cartoon)" video after each step to draw at your own pace.
Written step-by-step video tutorial:
For the first few steps, don't press down too hard with your pencil. Use light, smooth strokes to begin.
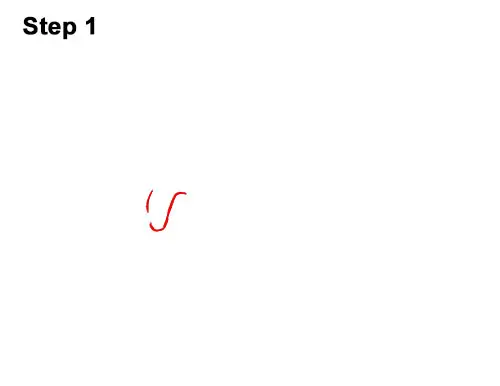
Step 1: Draw a short, sloping line for the charging rhino's eyebrow. Curve the tips of the lines and draw an extra-short line on the left to emphasize the brow's thickness.
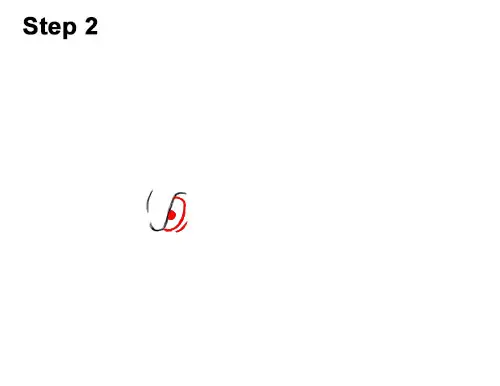
Step 2: Below the eyebrow, draw a curved line for the bottom edge of the eye. Inside the eye, on the left side, draw a big dot for the rhino's pupil.
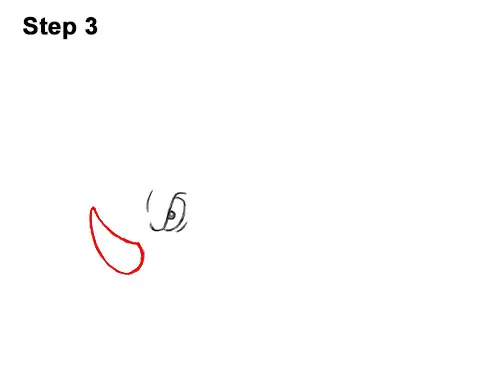
Step 3: To the lower left of the eye, draw a small curved line for the base of the horn. At the top of the base, draw a long curved line for the top side of the rhino's horn. Draw another curved line at the bottom to finish the shape of the pointy horn.
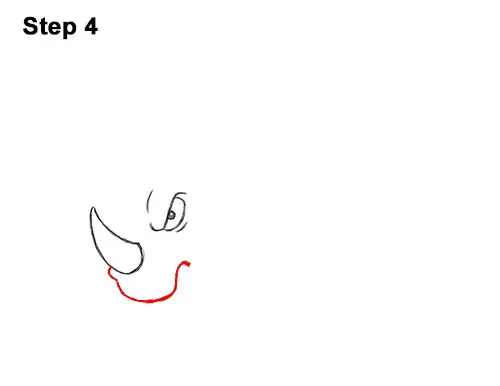
Step 4: Under the horn, draw a long curved line for the muzzle. On the right side, curve the line up and then down to create the rhino's mouth.
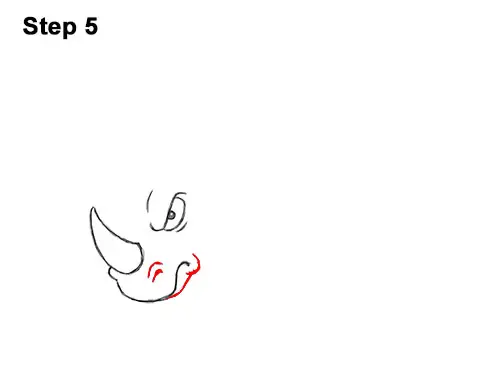
Step 5: To the left of the mouth, draw a couple of small lines for the nostril. To the right of the mouth, draw a couple more lines for the rhino's lower lip and chin.
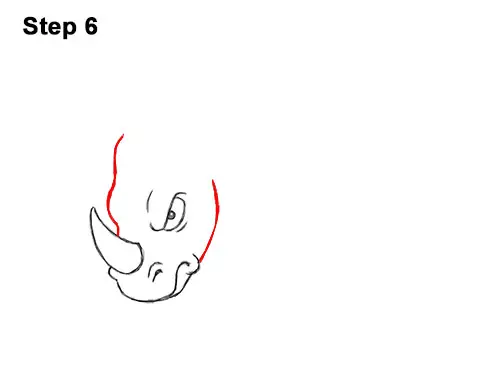
Step 6: Draw a long, curved line on the right side for the rhino's jaw. To the left, draw a long vertical line for the head. Add a bump in the middle for the other brow.
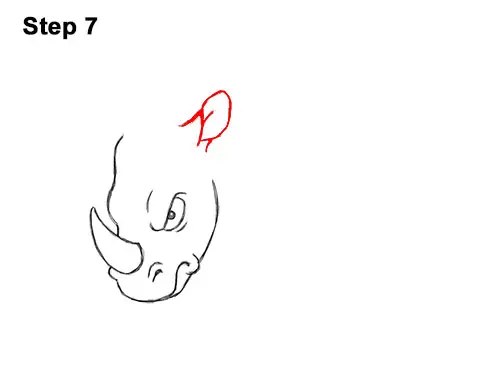
Step 7: On the top, right side of the head, draw a leaf-like shape for the rhino's first ear. Add a couple of short, curved lines at the bottom for the ear's base.
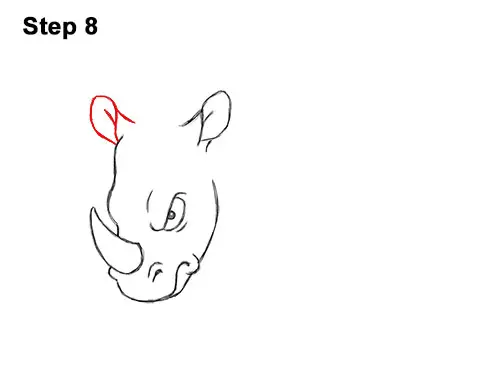
Step 8: Draw another leaf-like shape on the left side for the rhino's other ear.
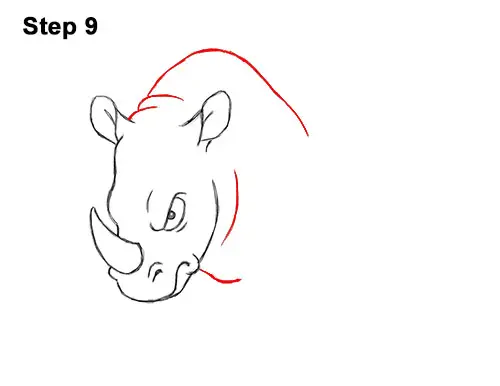
Step 9: Starting at the ear on the left, lightly sketch a long, curved, hill-like line for the rhino's back/hump. When you get the shape right, darken the line and add a few creases on the left. Draw a couple more curved lines at the bottom for the chest and for another neck crease.
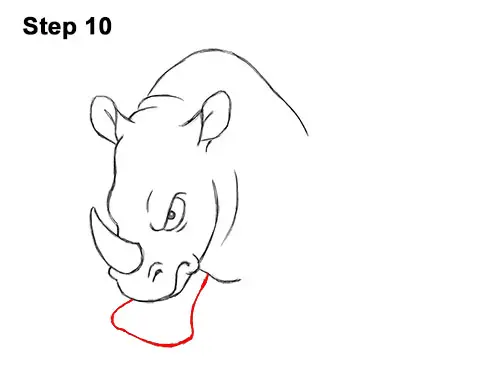
Step 10: Right under the head, draw the first part of the rhino's front leg using three short, curved lines.
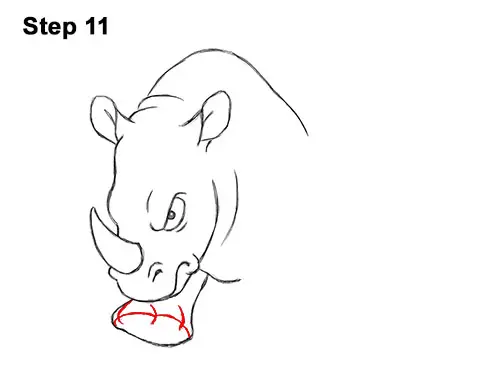
Step 11: Draw a curved line for the foot's sole and three shorter lines at the top for the rhino's toes.
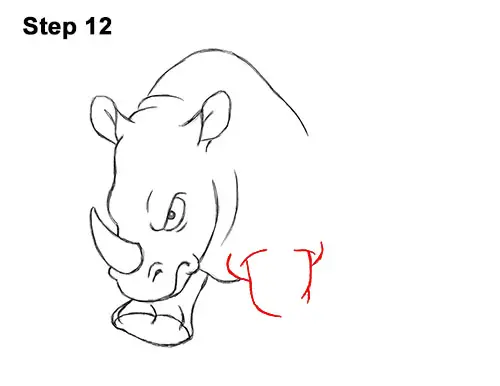
Step 12: At the bottom, draw the top part of the other front leg using a series of curved lines. The lines on the sides are similar to a really long letter T. Add a couple of curved lines at the top for creases. Don't make these lines too long.
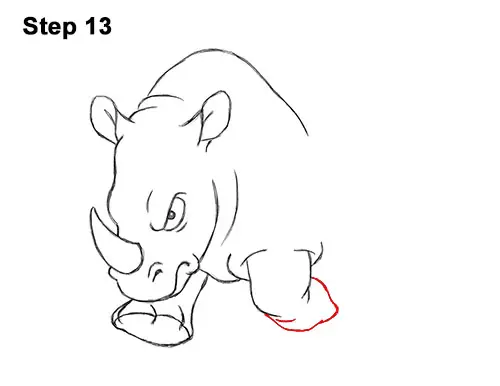
Step 13: Draw a long, curved line at the bottom for the lower half of the rhino's leg. This leg should be bent with the sole facing backward. Don't dip the curve too low.
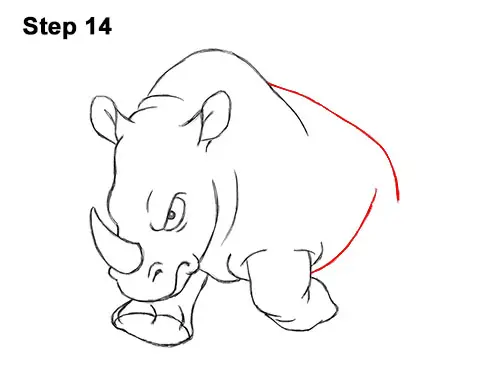
Step 14: To the right of the front leg, draw a long, sloping line for the underside of the rhino's body. At the top, draw another long, curved line for the rump.
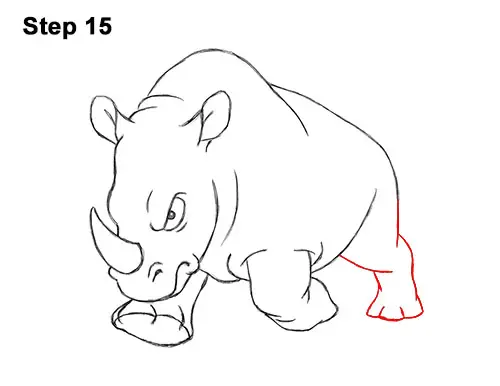
Step 15: On the lower, right side of the body, draw the hind leg using a series of curved lines. The leg should be thin in the middle and wide at the top and at the bottom. The top of the leg should overlap the bottom. Draw two short lines on the foot for the rhino's toes.
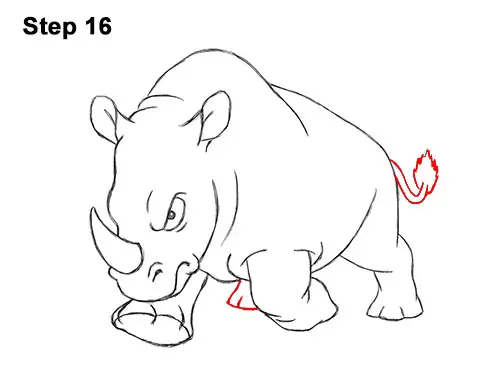
Step 16: Under the body, draw the other hind leg peeking from behind using a few curved lines. On the right side of the body, draw a couple of U-shaped lines for the rhino's small tail. At the top of the tail, draw a series of short strokes for the brush-like tip.
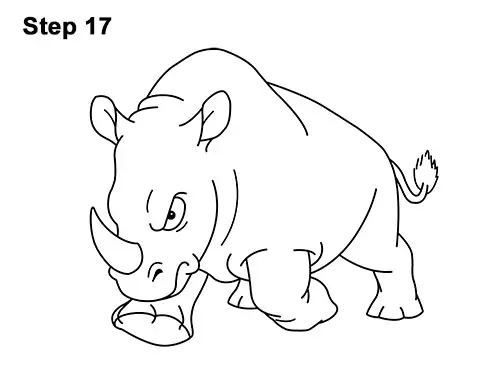
Step 17: Using a pen or marker, carefully go over the lines to make your charging rhino drawing permanent. After inking, get rid of every pencil mark with an eraser.
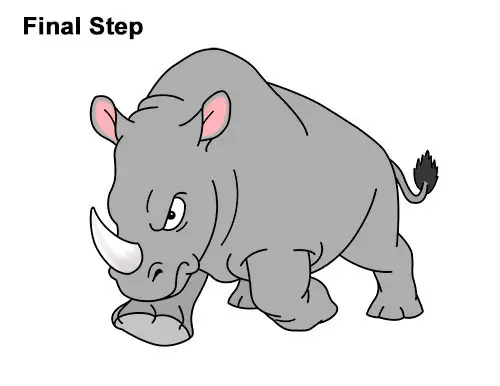
Final Step: Color your rhino drawing using color pencils, markers or even crayons! Use gray for the body. Add some gray to the base of the horn too. Use pink for the ears and black for the tail. Don't forget to pause the video to draw at your own pace.
Thanks for watching! Subscribe to the How2DrawAnimals YouTube Channel for a new tutorial every Tuesday.
To learn how to draw popular cartoon characters, visit EasyDrawingTutorials.com.
RELATED TUTORIALS
 |
 |
 |