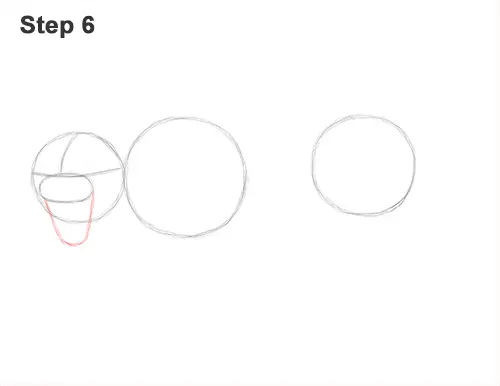
Step 6: Draw a U-shaped line below the oval as a guide for the panther's open mouth. The bottom part of this arc should stick out of the head. The top part should be wider than the bottom.
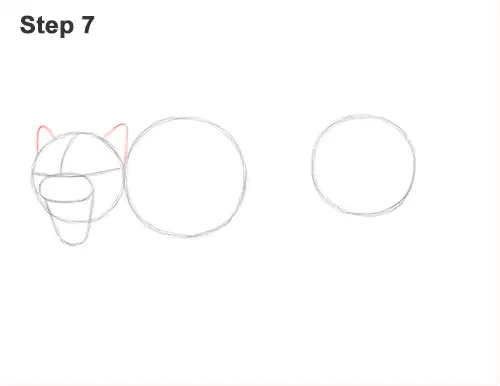
Step 7: On top of the head, draw two small, triangle-like arcs as guides for the black panther's ears.
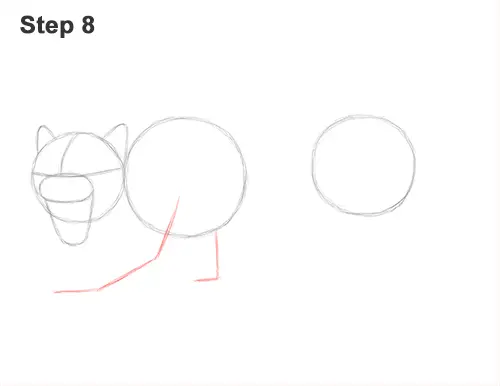
Step 8: Under the first circle, draw a long line as a guide for the panther's first front leg. The line should angle toward the left, and the tip should end up below the head. Add a shorter angled line on the right as a guide for the front leg on the other side of the body.
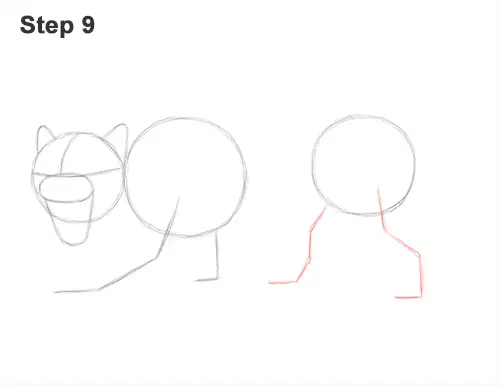
Step 9: Draw two more angled lines under the circle on the right as guides for the hind legs. Pay attention to how these lines bend because it will indicate where the joints will be.
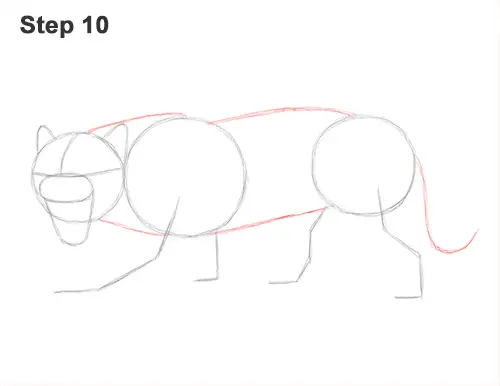
Step 10: Draw two short lines that connect the head to the body to create the neck. Draw two longer lines that connect the circles in the middle to finish the guide for the torso. On the right side, draw a long, curved line, similar in shape to a backward letter J, as a guide for the black panther's tail.


