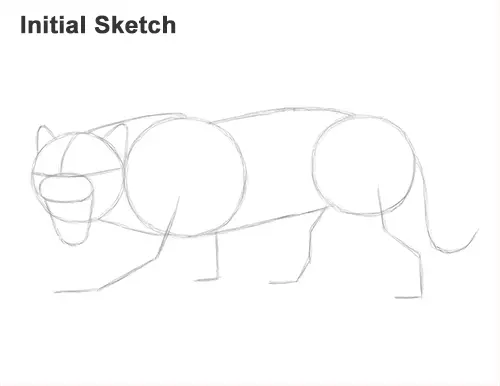
That's it for the initial sketch! From this point on, press harder with your pencil to get a more defined sketch.
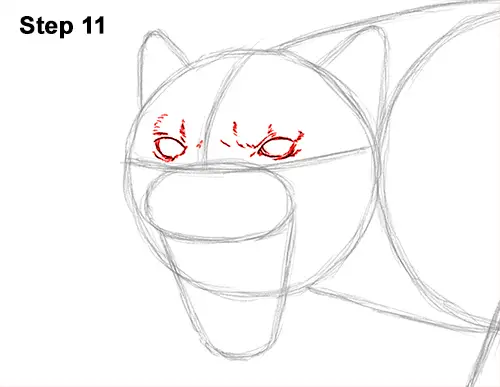
Step 11: Lightly sketch the eyes inside the head as two small ovals. Use the construction lines as guides for the placement of the black panther's eyes. When you get the placement and size of the ovals right, darken the lines. Make the sides of each eye pointy to represent the eyes' corners. Darken the edges of the eyes and make the lines thicker. Add a few strokes around the eyes to emphasize the furrowed brow. Don't worry too much about these lines because they'll be lost in the shading step.
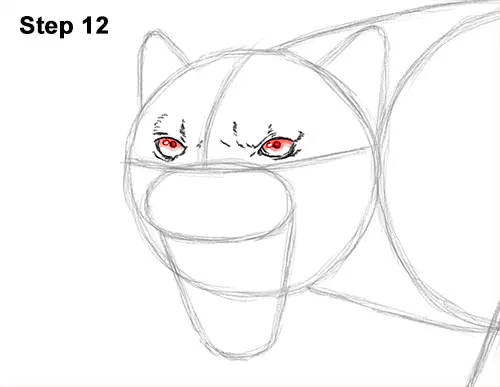
Step 12: Inside each eye, off to the side, draw a tiny circle to represent glare. In the middle of each eye, draw a dot for the pupils. Shade the rest of the eye very lightly as panthers' eyes are very light-colored.
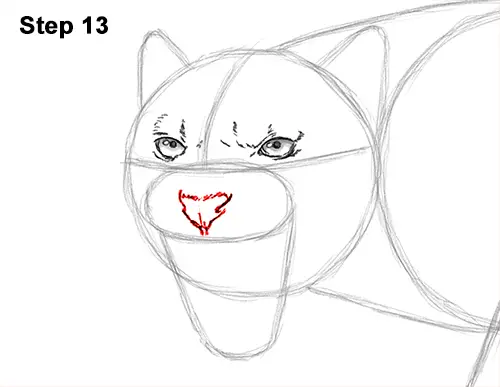
Step 13: Inside the muzzle, lightly sketch a pentagon-like shape for the nose. When you get the shape right, darken the top part using quick, short strokes. Draw a couple of curved lines on the sides for the panther's nostrils. Add a V-shaped line at the bottom with a short line in the middle for the bottom part of the nose.
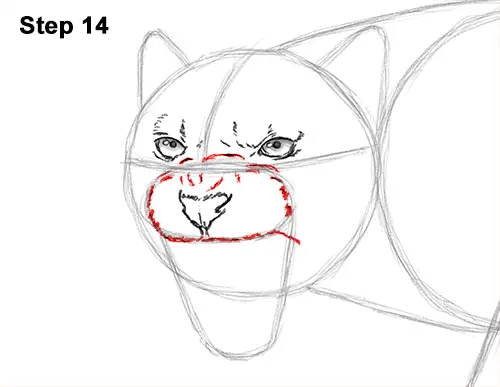
Step 14: Use the initial oval as a guide to create the top part of the muzzle. Follow the basic path of the oval as you use quick, short strokes to create the furry muzzle. Add a few lines above the panther's nose to emphasize the wrinkles on the muzzle.


