







How to Draw a Turkey (Cartoon)
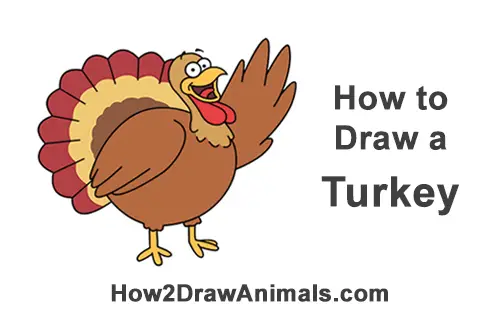
Please PAUSE the "How to Draw a Turkey (Cartoon)" video after each step to draw at your own pace.
Written step-by-step video tutorial:
For the first few steps, don't press down too hard with your pencil. Use light, smooth strokes to begin.
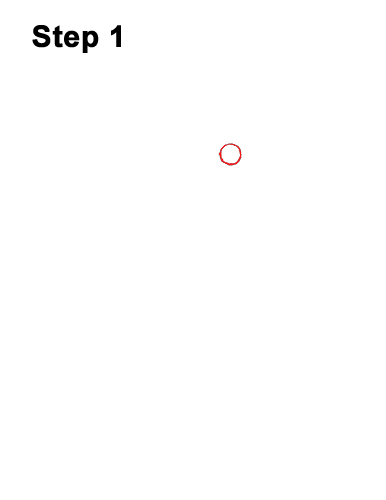
Step 1: Draw a small circle at the top for one of the turkey's eyes. Sketch lightly at first to get all the shapes right and pause the video to draw at your own pace.
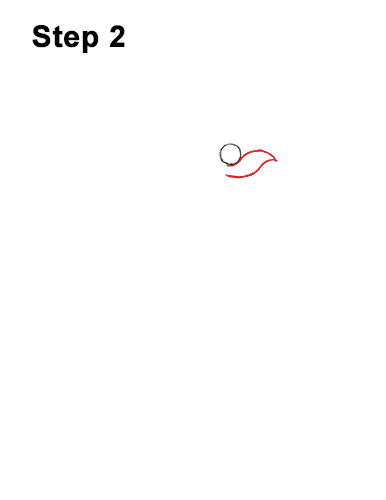
Step 2: Draw the top part of the turkey's beak on the lower right side of the eyeball. The shape of the beak consists of two short curved lines.
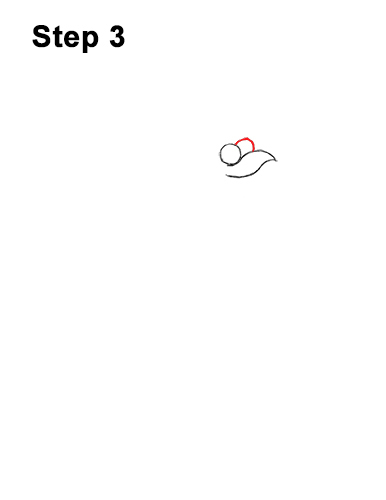
Step 3: Add another short curved line above the beak for the turkey's other eye.
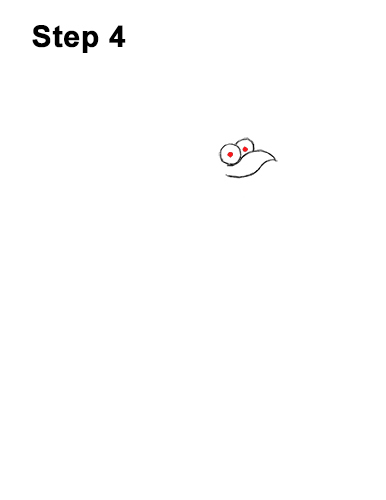
Step 4: Draw a small dot inside each eye for the turkey's pupils.
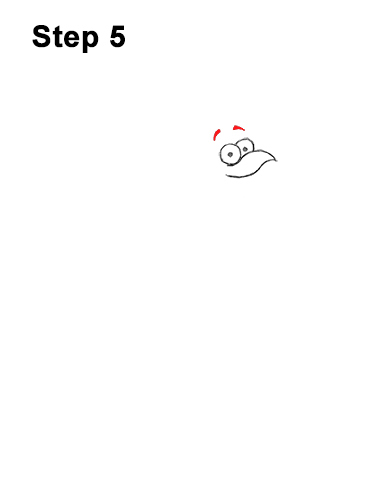
Step 5: High above the eyes, draw two thick lines for the turkey's eyebrows.
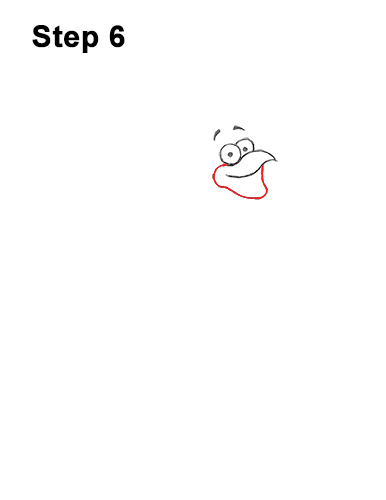
Step 6: Draw a line similar to the letter V under the top of the turkey's beak for the bottom part of the beak.
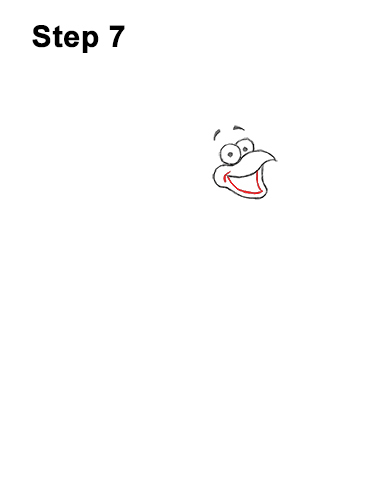
Step 7: Add a smaller V-like line inside the shape for the turkey's mouth.

Step 8: Draw a small curved line inside the mouth for the turkey's tongue.
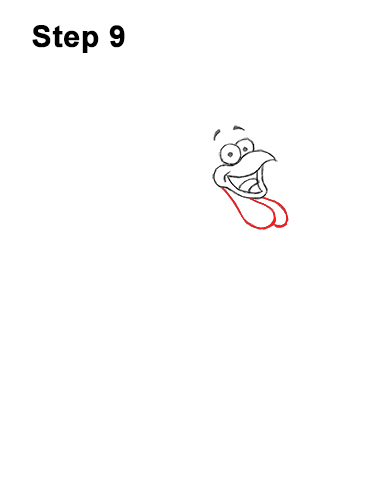
Step 9: Under the beak, draw two long curved lines for the hanging skin called the wattle. Make the turkey's wattle as long or as short as you'd like.
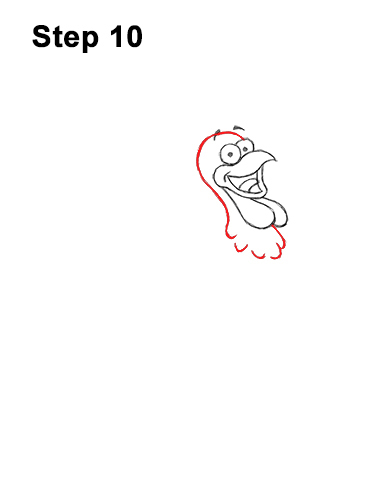
Step 10: Draw the turkey's head as a long curved line that goes around the face. The line for the head starts on the eye on the right, and then curves to the left of the face. Add some short curved lines at the bottom for the feathers around the neck.
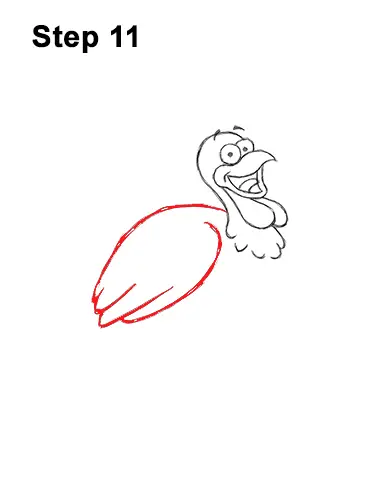
Step 11: Draw the turkey's folded wing to the left of the head using a long curved line. Draw a few long, thin arcs on the bottom for the wing's individual feathers. Add a longer curved line at the bottom for the lower part of the folded wing.
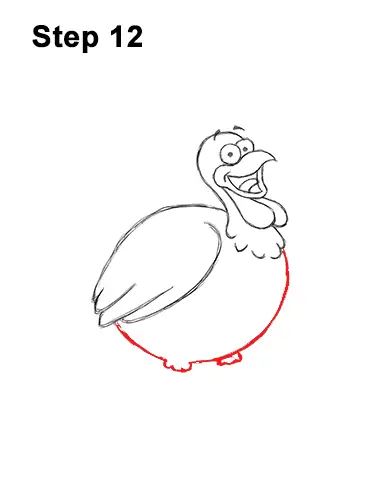
Step 12: Draw a big curved line from the neck to the folded wing for the turkey's body. The shape of the body is basically a half-circle. Add a series of short curved lines under the body to indicate where the legs will be.
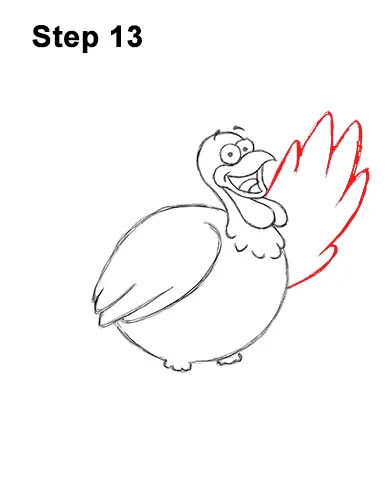
Step 13: Draw the turkey's other wing using a series of long, thin arcs. Draw the arcs high above the head to emphasize the turkey waving. Each arc represents an individual feather. You can draw more feathers if you'd like.
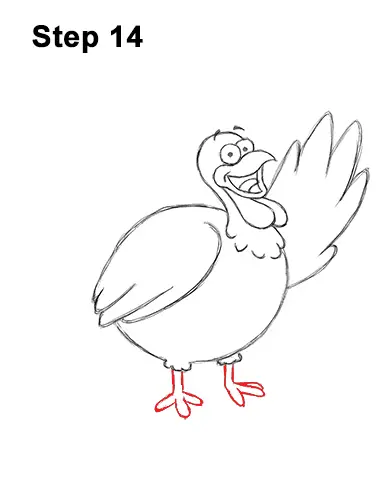
Step 14: Draw the turkey's feet under the body, right below the short curved lines. The foot on this side consists of two short straight lines for the base and three curved lines for the toes. The other foot is similar, but the toes should be pointing right.
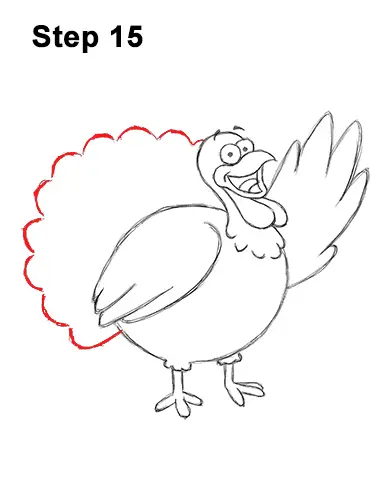
Step 15: Draw the big tail feathers by using a series of short curved lines on the left side of the turkey's body. The overall shape of the tail is similar to a half-circle that's made up of small curved lines. The overall shape of the tail is similar to a half-circle that's made up of small curved lines.
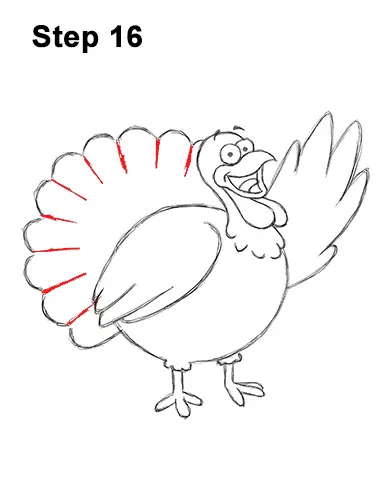
Step 16: Draw a few more lines inside the turkey's tail shape to emphasize each tail feather. The lines should be short and point toward the middle of the body.
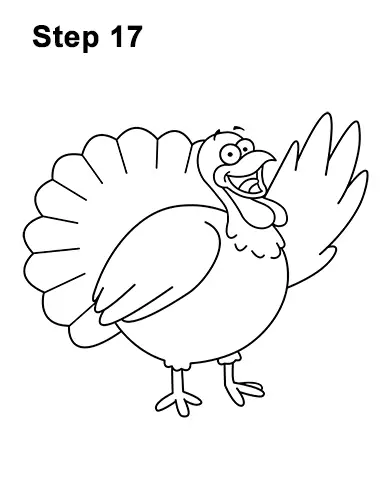
Step 17: Using a pen or marker, carefully go over the lines to make your drawing permanent. After inking, get rid of every pencil mark with an eraser.
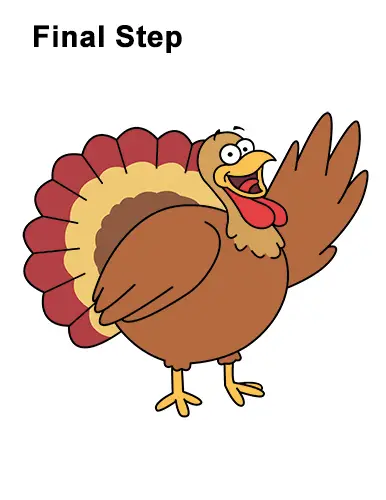
Final Step: Color your turkey drawing using color pencils, markers or even crayons! You can use autumn colors like brown, yellow, orange and red. Use different shades of a color, like dark brown and light brown, or red-orange and yellow orange. You can also split up the tail into sections and color each section a different color. Or each tail feather can be a different color. Have fun with it! For this color scheme, divide the tail into three fan-like shapes and color them differently.
Thanks for visiting! Subscribe to the How2DrawAnimals YouTube Channel for a new tutorial every Saturday.
To learn how to draw popular cartoon characters, visit EasyDrawingTutorials.com.
RELATED TUTORIALS
 |
 |
 |