







How to Draw a Cardinal (Cartoon)
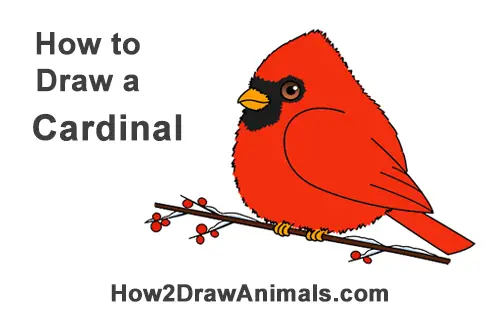
Please PAUSE the "How to Draw a Cardinal (Cartoon)" video after each step to draw at your own pace.
Written step-by-step video tutorial:
For the first few steps, don't press down too hard with your pencil. Use light, smooth strokes to begin.

Step 1: Draw a small circle for the cartoon cardinal's eye. The other eye is on the other side of the bird's head, so only draw one.

Step 2: Inside the eye, off to the side, draw a tiny circle to represent glare. In the middle of the eye, draw a big dot for the pupil. As you shade in the cardinal's pupil, be careful to not overlap the tiny glare circle.
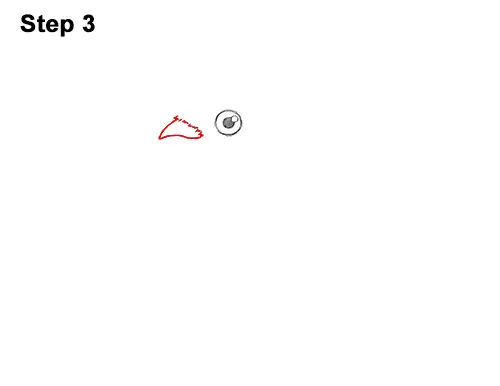
Step 3: Add the top of the bird's beak by first drawing a sloping line to the left of the eye. At the bottom, draw a wavy line toward the right. Now close off the shape on the right using short strokes for the cardinal's feathers.
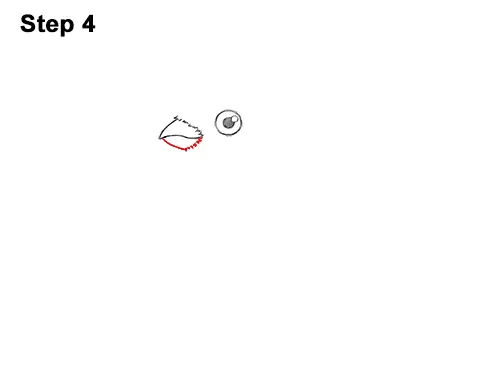
Step 4: Now add the bottom part of the cardinal's beak by first drawing another short, sloping line. Then add the short, feather- like strokes on the right side.
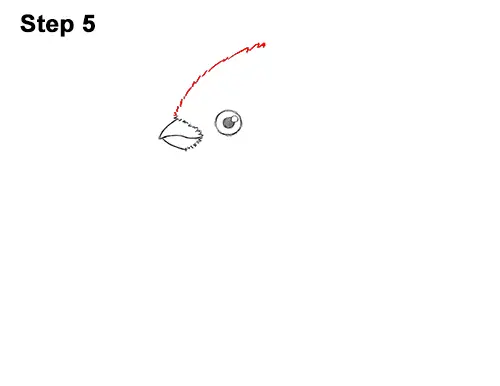
Step 5: Starting at the top of the beak, draw a line that slopes to the right for the first part of the cardinal's head. Use a series of short strokes to form the line to give the head a feather- like texture.
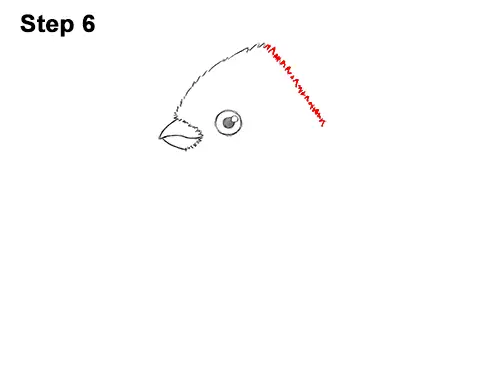
Step 6: Draw another sloping line on the right for the back part of the cardinal's head. This line shouldn't curve like the front part. Use quick, short strokes to draw it.
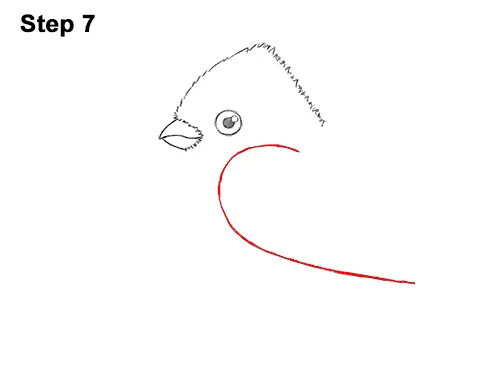
Step 7: Below the eye, make a small mark to start drawing the bird's folded wing. Make the mark longer and curve the line to create the top part of the wing. Continue making the line longer and curve it to the right for the bottom edge of the cardinal's folded wing.
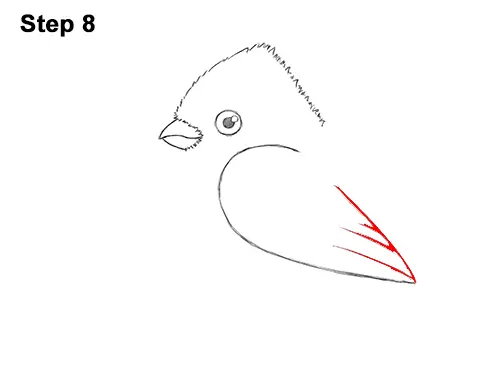
Step 8: Add a sloping line on the right that creates the tip of the cardinal's wing. Add three short lines inside the wing to represent feathers.
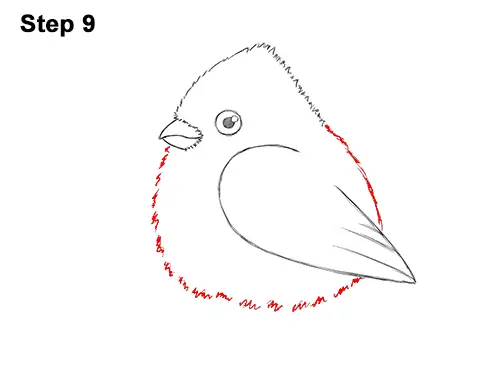
Step 9: Draw a line that connects the head to the wing for the back part of the cardinal's body. Draw a long, curved line that goes from the beak to the wing to form the front/bottom part of the body. Use quick, short strokes to draw the line. It should be similar to a half-circle.
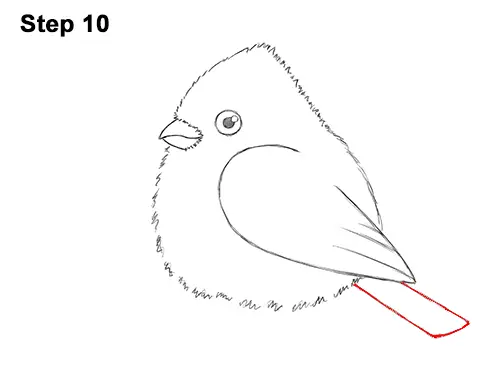
Step 10: Under the wing, draw two long, diagonal lines with a short line at the bottom for the cardinal's tail.
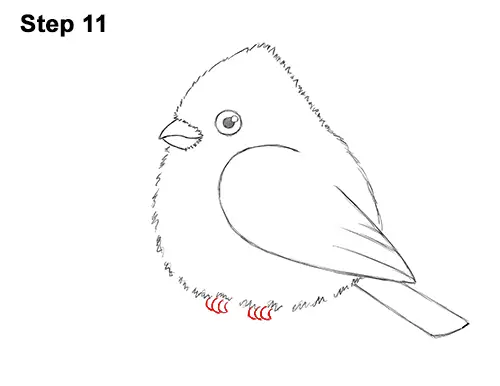
Step 11: Under the bird's body, draw a series of short, curved lines for the toes. Use lines similar to the letter C to draw the cardinal's small, curved toes.
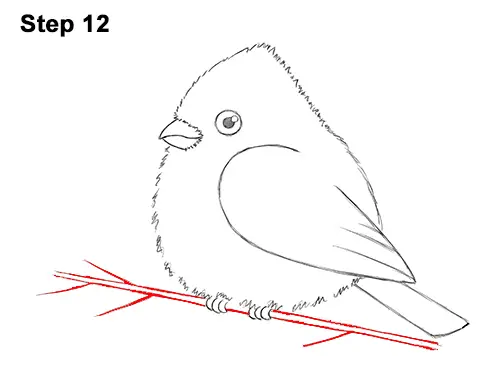
Step 12: Under the feet, draw two long lines to give the cardinal somewhere to perch. As you draw the stick, be careful to not overlap the toes. If you'd like, you can draw a few more small lines on the stick for more branches.
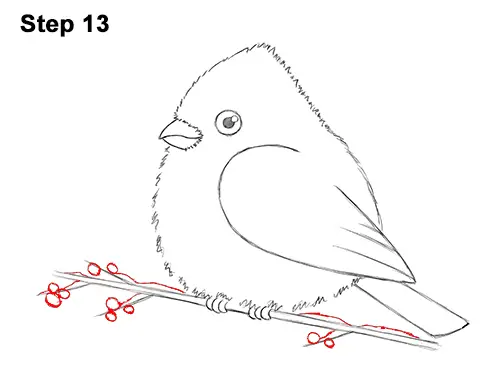
Step 13 (optional): At the end of each branch, draw a few small circles for berries. Make the berries different sizes. Don't do more than three per branch or they'll start to look crowded. Near the base of each branch, draw a short line on the top for snow. Make these lines short and wavy to represent snow that collected on the stick.
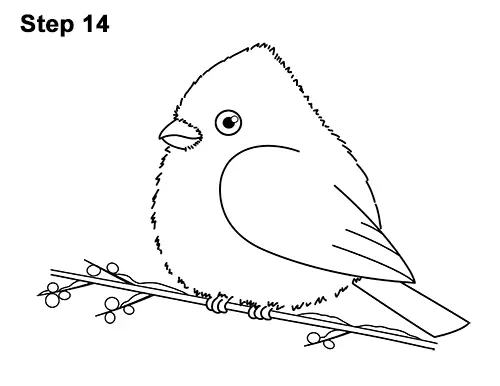
Step 14: Using a pen or marker, carefully go over the lines to make your cardinal drawing permanent. After inking, get rid of every pencil mark with an eraser.
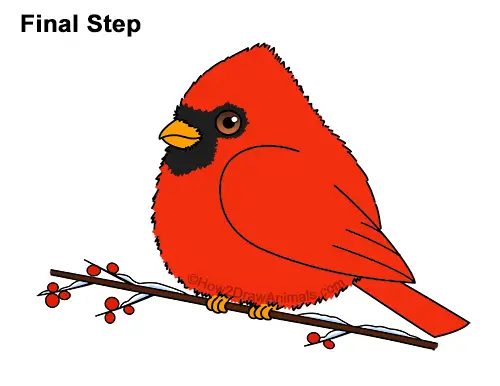
Step 15: Color your cartoon cardinal drawing using color pencils, markers or even crayons! First use black to draw an outline around the bird's eye. Then color the inside. Now color the rest of the body red. To get a gradient effect on the eyes, color the top part dark brown and the bottom part light brown. Use yellow or yellow-orange for the cardinal's beak and toes. Use brown and dark brown for the stick. Color the berries red and add a bit of light blue to the snow.
Thanks for visiting! Subscribe to the How2DrawAnimals YouTube Channel for a new tutorial every Tuesday.
To learn how to draw popular cartoon characters, visit EasyDrawingTutorials.com.
RELATED TUTORIALS
 |
 |
 |