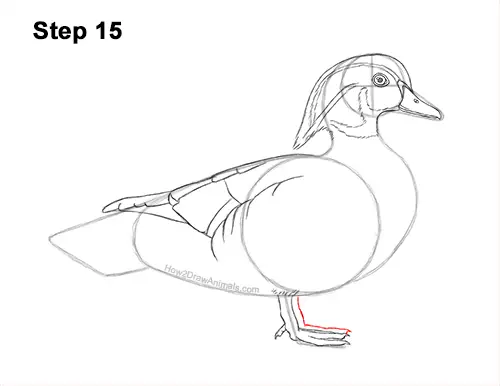
Step 15: Above the wood duck's first foot, draw an L-shaped line for the other foot peeking from behind.
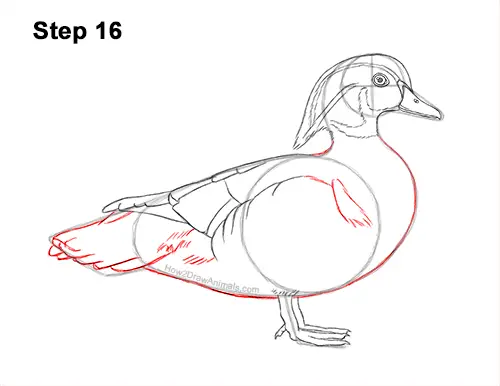
Step 16: Use the remaining lines and shapes as guides to draw the rest of the wood duck's body. Darken the outer edges of the initial guides to create the shape of the body. Don't overlap the shape of the leg as you draw the bottom edge of the body. Draw a series of lines within the shape of the bird's tail for detail on the feathers. Draw a series of longer, angular lines along the edge of the guide for the tail for longer feathers. Inside the body, near the chest, draw a few curved lines for extra texture on the feathers.
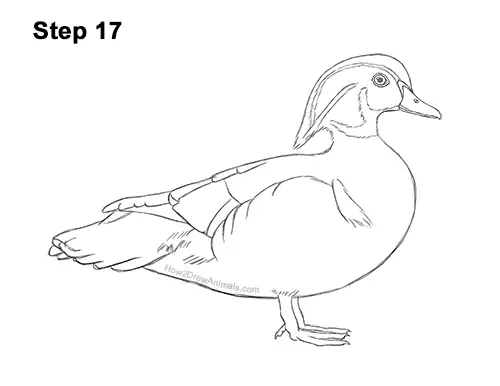
Step 17: Go over the final sketch lines with a pen, marker or any other type of permanent ink. Take your time and be careful when you ink to avoid any accidents. After inking, get rid of every pencil mark with an eraser for a cleaner drawing.
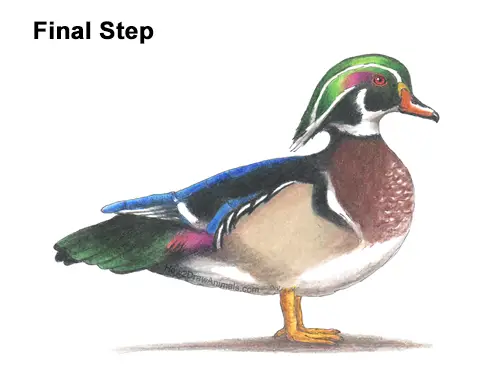
Final Step: Color your wood duck drawing! Use green for the top part of the head. Use black for the bottom half of the head but leave the stripes and markings blank. Use dark green for the outer edges of the head and light green for the middle for a shiny look. Add a bit of pink behind the wood duck's eye, orange for the base of the beak, and black for the bottom of the beak. Use red and red-orange for the rest of the bird's beak and the eye. Color lightly at first and gradually build up to the level of darkness that you like.
Use black for the top part of the bird's body. Remember to color lightly at first. Vary the pressure on your pencil to go from a lighter color to a darker one. Add more color to the wood duck's head. Gradually push harder on the pencil and blend the colors together. Use pinks and purples for the middle of the head and yellows and oranges for the beak. Keep the outer edges of the head dark and the inside light for a shiny look. Add more black to the body. Use blue for the top part of the folded wings. Color lightly at first. Along the bottom of the wood duck's folded wing, draw thick, curved lines for the pattern on the feathers. Use blue on the middle of the wing too and leave a couple of sections blank.
Use black near the base of the bird's tail and gradually transition to dark green toward the tip. It's a good idea to use reference as you draw for a more accurate depiction of a wood duck. Use a blend of orange, purple and pink in the small section between the tail and the wing. Use a blend of brown, light brown and gray in the middle section of the body just below the wing. Use the darker colors around the top and sides and the lighter ones in the middle and bottom.
Use dark brown for the wood duck's chest. Leave a thin section blank between the middle section and the chest. Coloring can be very time-consuming, so be patient and take breaks. As you color the bird's chest, leave a few small sections blank for the lighter speckled pattern. The pattern on the chest doesn't have to be perfect. Just leave a few small spots blank.
Color the wood duck's feet using yellow, orange and a bit of brown. Use a bit of darker brown for some shadows and creases on the feet. Add some shadows using gray along the underside of the body and head to give the figure more volume and dimension. Using brown and gray, add a cast shadow underneath to ground the duck so it doesn't appear to be floating. Don't forget to pause the video after each step to draw at your own pace.
Thanks for visiting! Subscribe to the How2DrawAnimals YouTube Channel for a new tutorial every week.
To learn how to draw popular cartoon characters, visit EasyDrawingTutorials.com.
RELATED TUTORIALS
 |
 |
 |


