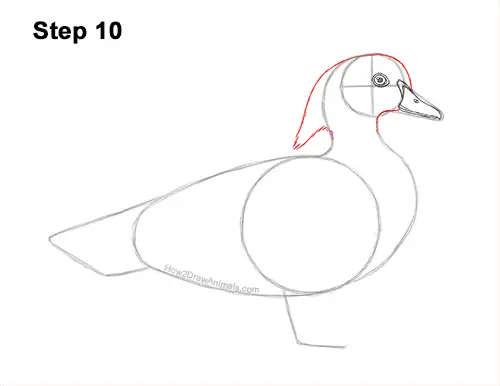
Step 10: Starting on top of the head, lightly sketch a line that slopes down for the crest. Don't draw the line too far away from the bird's head. When you get the size and position right, darken the line. Draw a series of short strokes along the bottom for the tips of the feathers on the crest. Curve the strokes up and then down so that they connect to the back of the neck. Darken the right side of the wood duck's neck. Use the initial circle as a guide to draw the front of the head. Make the shape of the head wider as you follow the basic curvature of the circle.
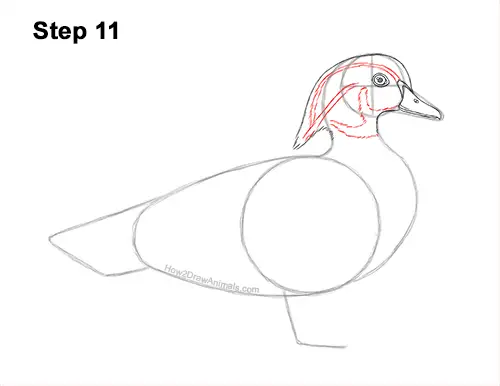
Step 11: Draw the pattern on the head using a series of curved lines. Draw a thin stripe that's made up of two lines that start at the bill, curve over the eye and end near the crest's tip. Keep the stripe thin. Use short strokes near the back for the wood duck's feathers. Starting at the horizontal construction guide, draw another stripe that slopes down toward the tip of the crest. Draw a curved stripe on the lower half of the head. Use short strokes for the left edge. Use short strokes to draw a ring-like shape across the front of the bird's throat.
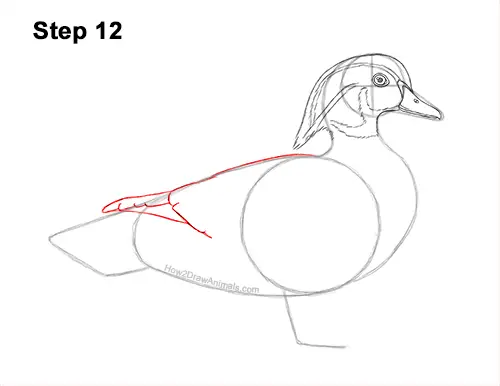
Step 12: Darken the top line of the initial big arc for the first part of the wood duck's folded wing. On the left side, sticking out of the body, lightly sketch an angled line for the pointy tip of the folded wing. When you get the shape right, darken the line. The tip of the wing should overlap the tail a bit. Within the tip of the bird's wing, draw a series of short lines for the detail on the feathers.
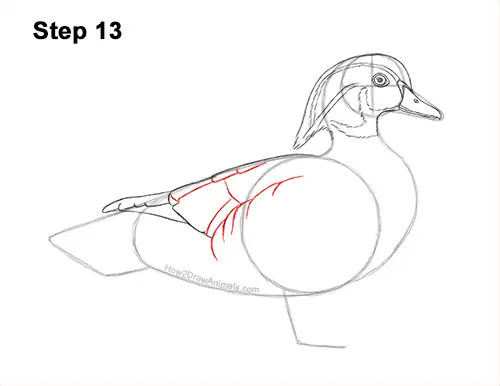
Step 13: Near the middle of the bird's body, draw a big, long, curved line for the second part of the folded wing. Along the curved line, draw a series of short lines for detail on the wood duck's feathers.
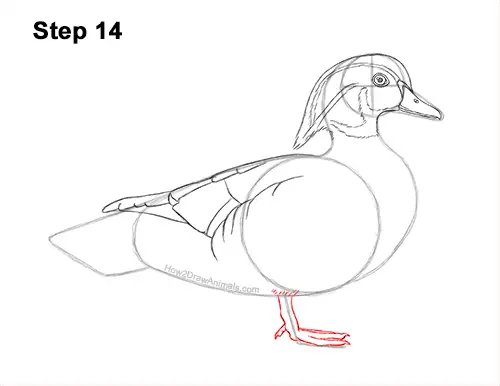
Step 14: Draw a few short strokes above the L-shaped guide for the feathery base of the first leg. Follow the path of the L-shaped guide and draw the leg around it. Keep the shape of the leg thin. At the bottom, follow the guide to create the feet. Keep the feet thin too. Not all the toes will be visible from this angle. Add a line at the top for the other visible toe. On the left, draw an angled line for the toe pointing back.


