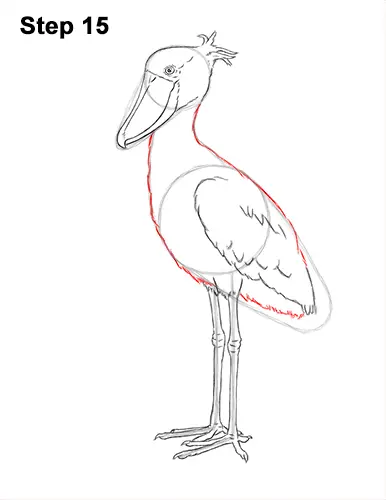
Step 15: Darken the outer edges of the initial guides to create the shape of the shoebill stork's neck and body. Make the lines a bit wavier as you darken them for a more organic shape. Don't overlap the top of the leg that's on this side as you draw the underside of the body.
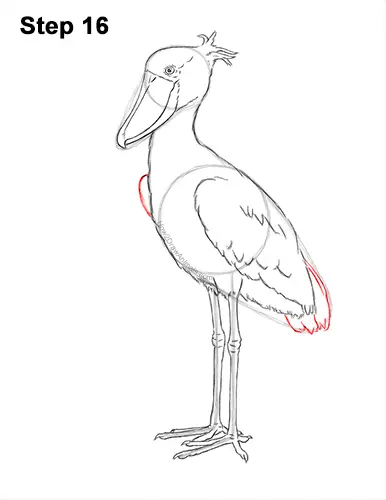
Step 16: Draw a series of curved lines and strokes inside the curved shape of the initial arc for the bird's tail. Draw a short, curved line on the top, left side of the body for the visible part of the shoebill stork's other folded wing.
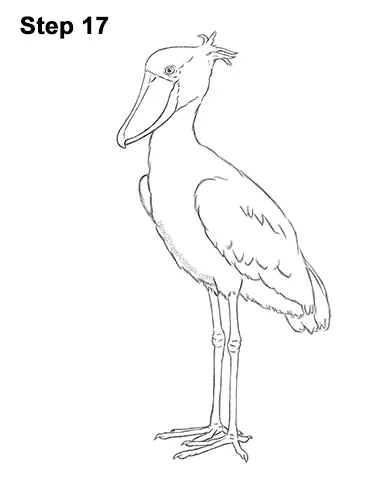
Step 17: For a cleaner look, erase as much as you can of the initial guidelines. Don't worry about erasing all of the guides. It's okay to leave some behind. Re-draw any final sketch lines you may have accidentally erased.
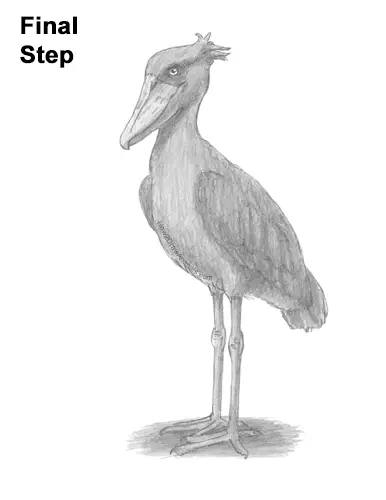
Final Step: Add some shading to your drawing for extra detail. Shoebill storks don't have much of a pattern on their feathers, so just use a medium-gray value all over the body. Use a slightly lighter value for the bird's bill. You can color your shoebill stork drawing instead if you'd like. For a more detailed guide on how to shade, check out this tutorial: How to shade.
Use a dark value for shadows to give the figure more dimension and volume. Vary the pressure on your pencil to get different degrees of tonal value. Pick the direction of the light source when shading so that the shadows are consistent with it. Using a dark value, add a stripe-like pattern on the folded wing to emphasize the shoebill stork's feathers. Add the value lightly at first and gradually build up the level of darkness that you like.
Add a cast shadow underneath. This helps ground the stork so it doesn't appear to be floating. It's always a good idea to use reference as you draw. Don't forget to pause the video to draw at your own pace.
Thanks for visiting! Subscribe to the How2DrawAnimals YouTube Channel for a new tutorial every week.
To learn how to draw popular cartoon characters, visit EasyDrawingTutorials.com.
RELATED TUTORIALS
 |
 |
 |


