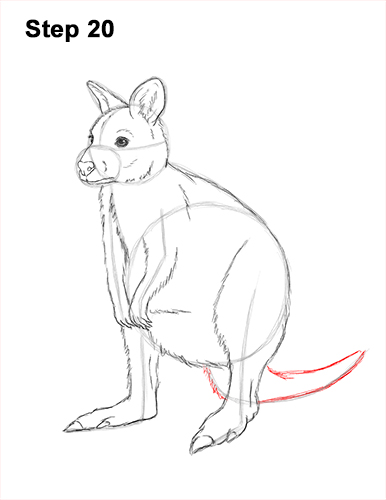
Step 20: Darken the last line under the body for the bottom edge of the tail. Don't overlap the leg. Add another curved line above for the top edge of the wallaby's tail.
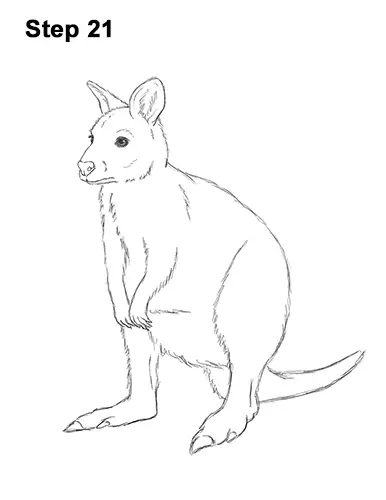
Step 21: For a cleaner look, erase as much as you can of the initial guide lines. Don't worry about erasing all of the guides. It's okay to leave some behind. Re-draw any final sketch lines you may have accidentally erased.
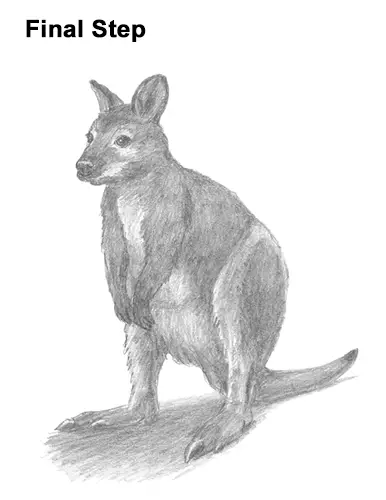
Final Step: Add some shading to your wallaby drawing for extra detail. Wallabies don't really have a pattern on their coats, so just use a medium value all over the body. Make the nose and the tip of the muzzle extra dark. Leave a strip on the nose blank for shine. Use a light value around the eyes and on a small section behind the muzzle. As you shade, use strokes that go in the general direction of the wallaby's fur. Use a light value for the chest and a dark value for the paws. Vary the pressure on your pencil to get different degrees of tonal value. Shading can be time-consuming, so be patient and take breaks. Use a light value for the underside of the wallaby's body and a dark value for the feet and toes. For a more detailed guide on how to shade, check out this tutorial: How to shade.
Add some shadows to your wallaby drawing to give it more dimension and volume. Pick the direction of the light source when shading so that the shadows are consistent with it.
Add a cast shadow underneath. This helps to ground the wallaby so it doesn't appear to be floating. Continue to shade until you're happy with the result. Don't forget to pause the video to draw at your own pace.
Thanks for visiting! Subscribe to the How2DrawAnimals YouTube Channel for a new tutorial every week.
To learn how to draw popular cartoon characters, visit EasyDrawingTutorials.com.
RELATED TUTORIALS
 |
 |
 |


