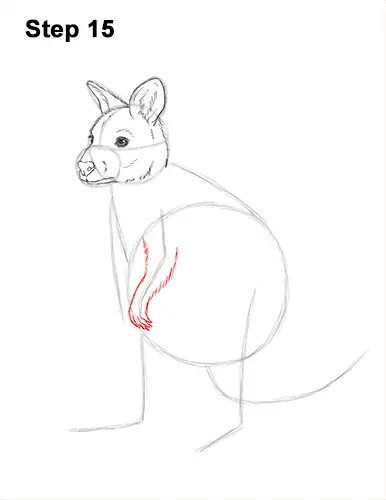
Step 15: Use the angled line under the head as a guide to draw the first arm. Draw the shape of the wallaby's arm around the guide. The top part should be wide and the bottom thin. Use short strokes as you draw the shape of the arm for the fur. At the bottom, draw a series of short, V-shaped lines for the digits. Make the paw wide.
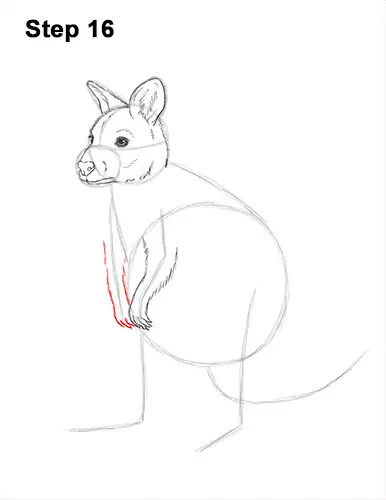
Step 16: Use short strokes to draw the shape of the wallaby's other arm around the guide line on the left. The digits won't be fully visible from this angle, so make them smaller.
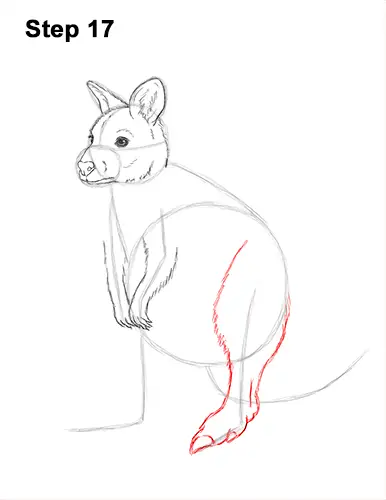
Step 17: Use the angled line under the body on the right side as a guide to draw the first leg. Draw the shape of the wallaby's leg around the guide. The top part should be very wide and the bottom thin. Sketch lightly at first. Only darken the lines when you get the shape right. Use short strokes for fur. Add an extra angled line along the guide at the bottom for the smaller toe on the side. Make the tip of the shape pointy for the wallaby's big claw. The main toe should be big and curved.
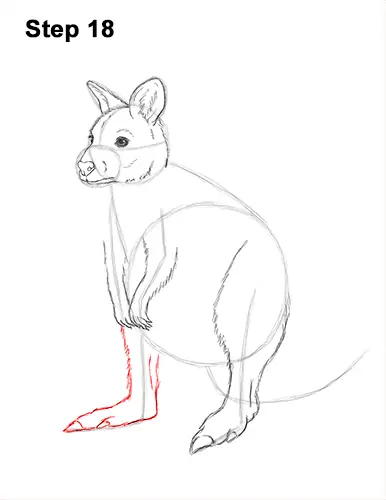
Step 18: Use the angled line on the left as a guide to draw the wallaby's other leg the same way. Draw the leg around the guide. Sketch lightly at first and only darken the lines when you get the shape right. Draw the smaller toe on the side using an angled line. Make the main toe big and the claw pointy. Use short strokes for fur. The top part of the leg will be behind the body, so don't draw it.
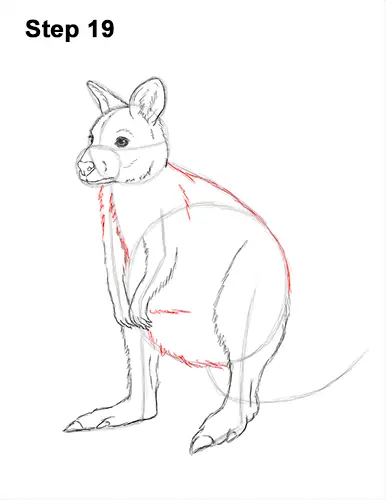
Step 19: Draw a line made up of short strokes to extend the shape of the arm on the left. Use the rest of the initial lines as guides to draw the rest of the wallaby's body. Darken the outer edges of the guides to create the shape of the body. Add some short strokes inside the body to emphasize the shoulder. Use longer strokes for the bottom of the body. Draw a line above for the wallaby's pouch.


