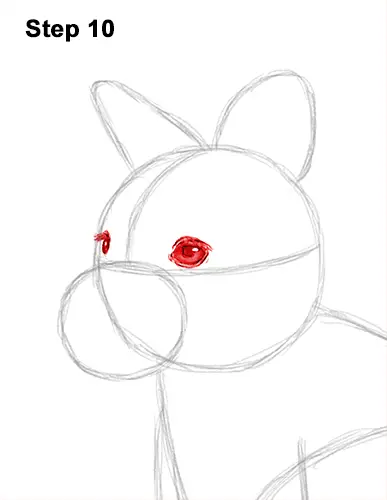
Step 10: Lightly sketch the eyes inside the head as two small circles. Use the initial lines as guides. When you get the size and position of the wallaby's eyes right, darken the lines. Make the sides of the eyes pointy. Add a thick shape over each eye for the eyelashes.
The eyelashes should overlap the wallaby's eyes a bit. Inside each eye, draw a tiny circle to represent glare. Shade the insides of the eyes but don't overlap the tiny glare circles. Make the middle part of each eye extra dark for the pupils. Add a couple of lines around the eyes for extra detail. Add a bit of light value around the eyes for fur.
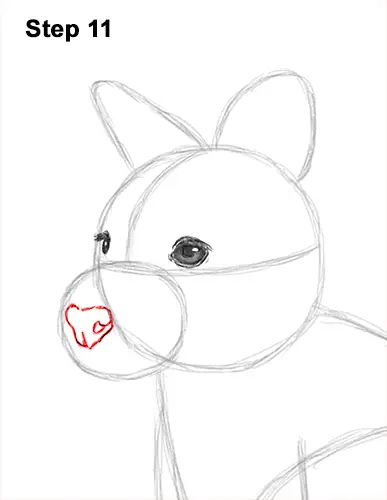
Step 11: Inside the muzzle, near the left side, lightly sketch a small circle for the wallaby's nose. When you get the size and placement of the nose right, darken the lines. Curve the right edge inward and shade a small circle at the tip for the nostril. Make the bottom part of the nose thin and add a small line at the bottom.
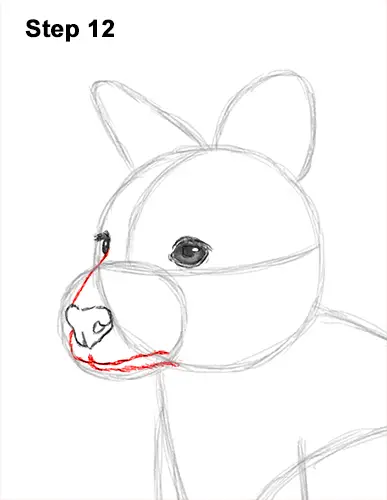
Step 12: Draw a line from the top of the nose to the eye on the left for the top part of the muzzle. Under the nose, on the left side, draw a small curved line for the first part of the wallaby's mouth. Draw another line under the nose that curves to the right for the rest of the mouth. Draw another line under the mouth for the chin. Use the initial circle as a guide to draw the chin.
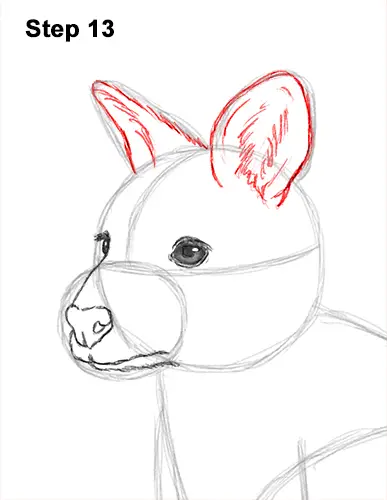
Step 13: Darken the arc on the top, right side of the head for the first ear. Draw a series of short strokes within the arc for the fur found inside the ear. Darken the arc on the left for the wallaby's other ear but make it a bit thinner. Draw a line through the middle to indicate the ear being turned.
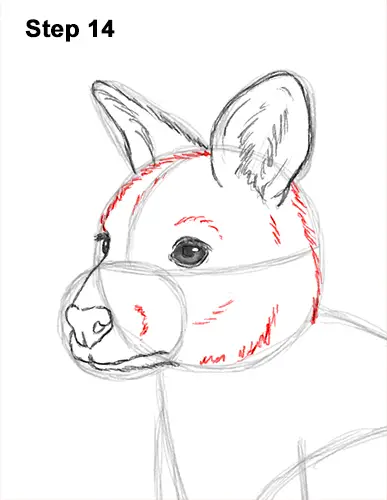
Step 14: Use the initial circle as a guide to draw the rest of the head. Draw a series of short strokes along the path of the circle to create the furry shape of the head. Add some strokes above the eyes to emphasize the brows. Add more strokes inside the shape to give the wallaby's head more structure.


