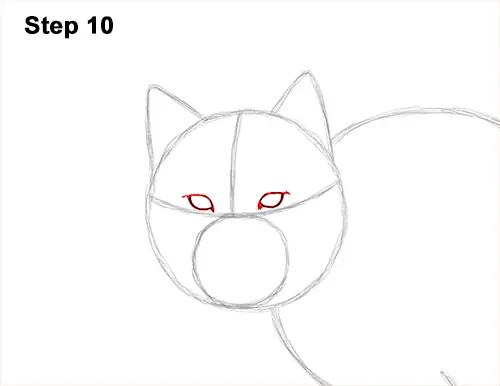
Step 10: Lightly sketch the eyes inside the head as two small ovals. Use the initial construction lines as guides for size and position of the eyes. When you get the size and position right, darken the shapes of the eyes. As you darken the eyes, make the top, outer sides and the bottom, inner sides pointy. Make the outlines of the lynx's eyes darker and thicker. The inner corners of the eyes should point down to the muzzle, and the outer corners should point to the sides of the head.
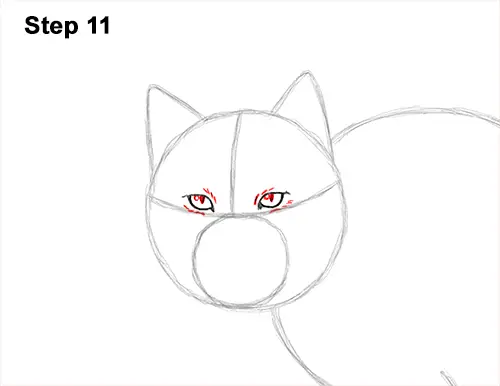
Step 11: Inside each eye, draw a thin slit for the pupils. The lynx's pupils should touch the top edge of the eye but not the bottom. On the side of each pupil, draw a tiny circle to represent glare. Draw a few lines above and below the eyes for extra detail. Use a series of short strokes to create a fur- like texture.
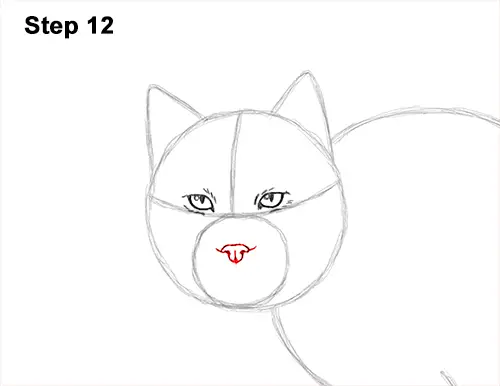
Step 12: Add the nose by first lightly sketching a small triangle inside the muzzle. Pay attention to the size and position of the nose relative to the eyes. When you get that right, darken the lines. As you darken the sides of the lynx's nose, make the lines come inward to create the nostrils. Make the bottom part of the nose thin and add a small line there. Use a wavy line for the top part.
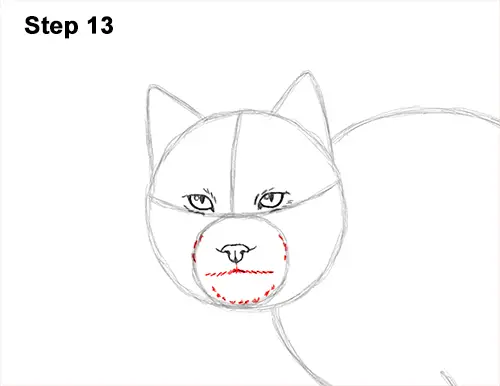
Step 13: Use the small circle inside the head as a guide to draw the rest of the muzzle. Under the nose, draw a horizontal line that's made up of short strokes to create the mouth. The sides shouldn't touch the circle. Add a few strokes along the path of the initial circle to create the shape of the lynx's muzzle. Draw a series of strokes at the bottom for the fuzzy chin. Follow the curvature of the initial circle.
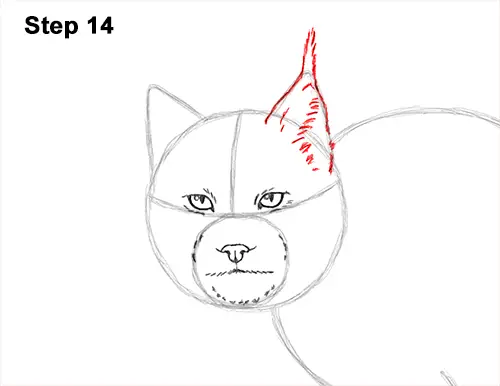
Step 14: Use the triangle-like shape on the top, right side of the head as a guide to draw the lynx's first ear. Darken the sides of the shape and at the top, draw a series of short strokes for the long tuft of fur. These tufts of fur are a distinct feature in the lynx, so draw them tall and prominent. Add some strokes within the shape of the ear for structure and more fur.


