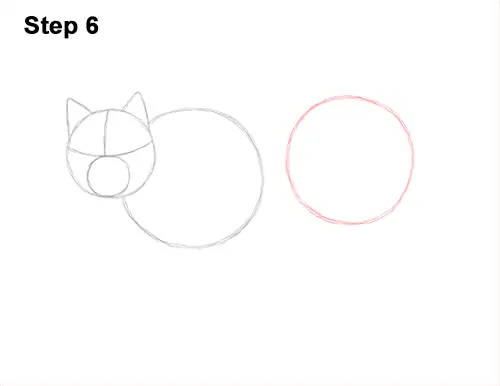
Step 6: On the right side, draw another circle as a guide for the back section of the body. Lynxes' hind legs are longer than their front legs, so the back of the body (this circle) should be a bit higher than the front. This circle should also be a bit smaller than the front circle. Don't place the circles too far apart, otherwise your lynx will be too long.
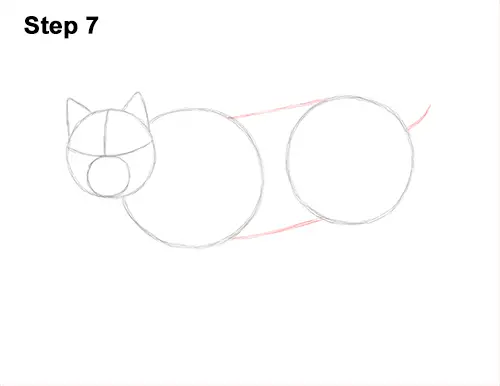
Step 7: Draw two sloping lines to connect the big circles and complete the guide for the body. On the top, right side, draw a short line as a guide for the lynx's stubby tail.
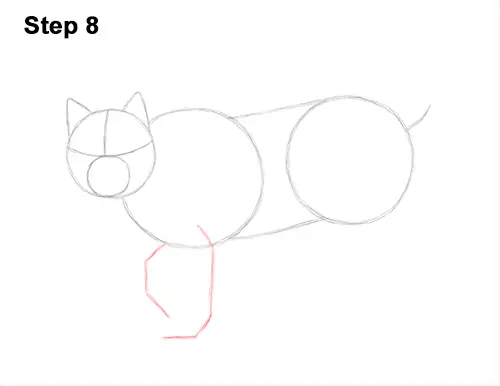
Step 8: Under the circle on the left, draw two angled lines as guides for the lynx's front legs. The first line should bend to the left at the top and bottom to represent joints. Pay attention to its length relative to the body. The second line should be slightly shorter and bend to the right because the lynx will be stepping forward.
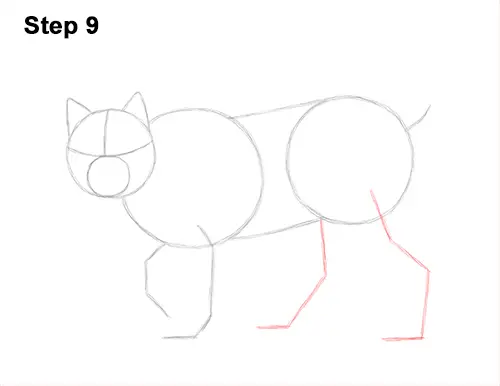
Step 9: Under the circle on the right, draw two more angled lines as guides for the hind legs. Because lynxes have longer hind legs, make these lines longer. Bend the lines in the middle to indicate where the joints will be and at the bottom for the feet.
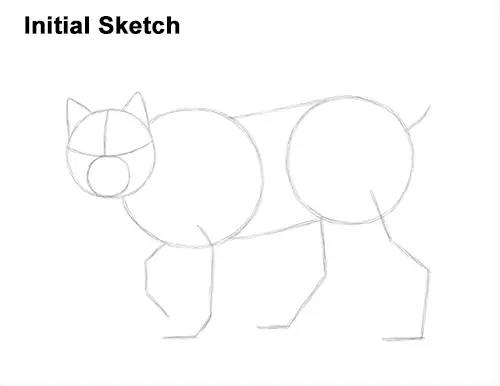
That's it for the guides! From this point on, press harder with your pencil for a more defined drawing.


