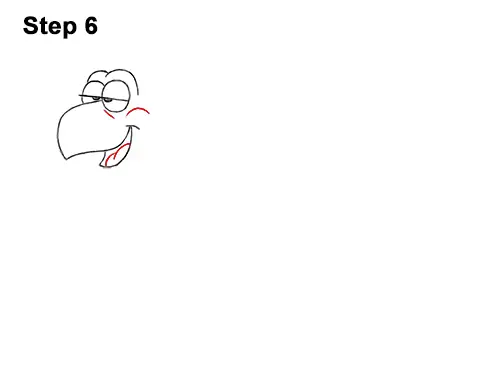
Step 6: Draw two lines inside the mouth for the tongue. Add a line above the smile for the turtle's cheek.
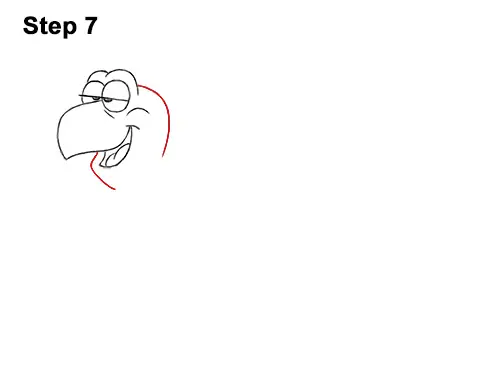
Step 7: Draw a curved line to the left of the mouth and another to the right of the eyes for the head.
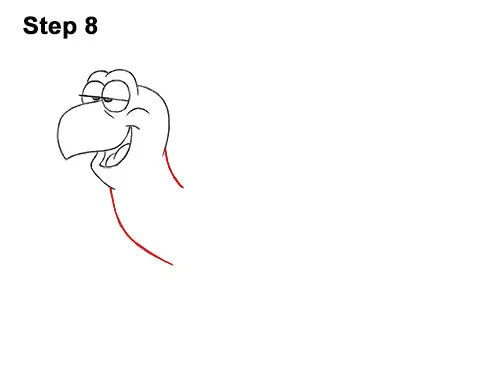
Step 8: Below the back of the head, draw a short, curved line for the top of the turtle's neck. Below the mouth, draw a longer curved line for the bottom part of the neck.
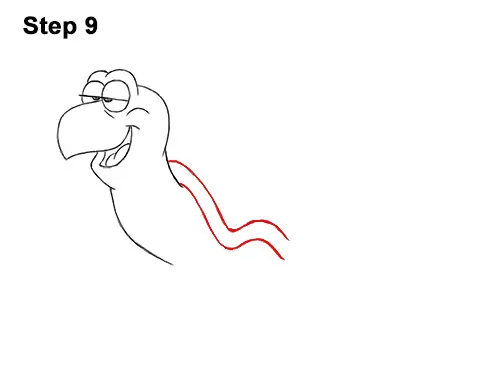
Step 9: Starting next to the neck, draw a long, wavy line that slopes down and to the right for the first part of the turtle's shell. Pay attention to where the line curves back up at the bottom. That's where the first leg will be. Add another line on top that parallels the first one to make the edge of the shell thicker.
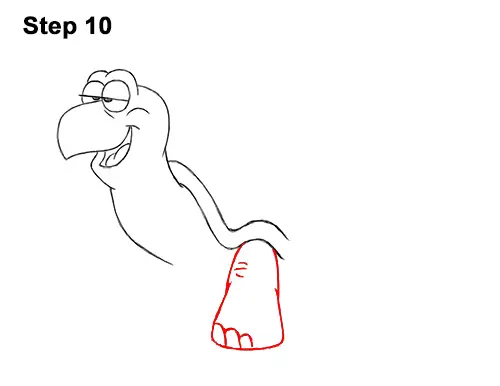
Step 10: Below the section where the shell curves, draw a shape similar to a bell for the first leg. Sketch lightly at first, and then darken the lines when you get the shape right. Don't make the leg too long. Add three curved lines at the bottom for the turtle's nails and a few more lines in the middle for wrinkles.


