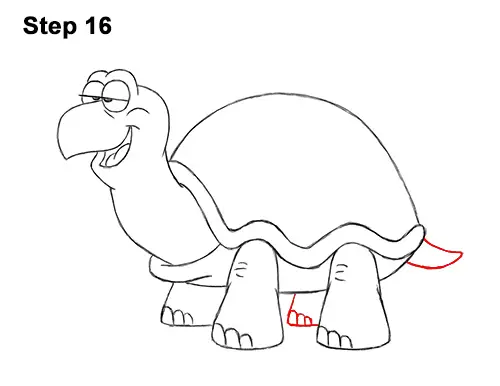
Step 16: Between the legs, draw the visible portion of the hind leg on the other side of the body. On the lower, right side of the body, draw two small, curved lines for the turtle's tail.
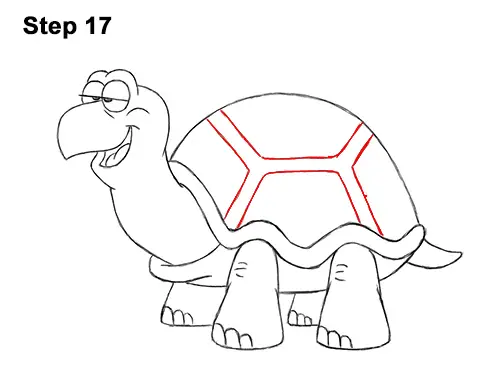
Step 17: Add the turtle's hell detail by first drawing two sloping, vertical lines near the bottom. Add a horizontal line at the top to connect the sloping lines and close off the shape. At the top, draw a similar shape but invert it so that it's upside-down. On the sides, draw angled lines that are similar to greater-than and less than signs (> <).
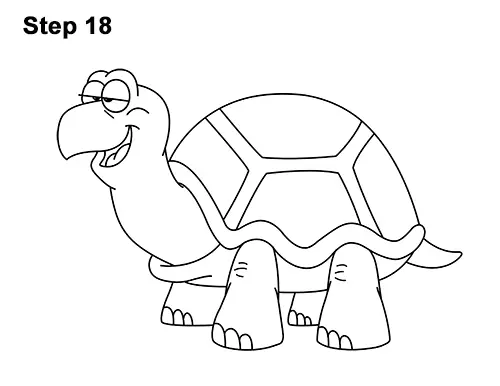
Step 18: Using a pen or marker, carefully go over the lines to make your turtle drawing permanent. After inking, get rid of every pencil mark with an eraser.
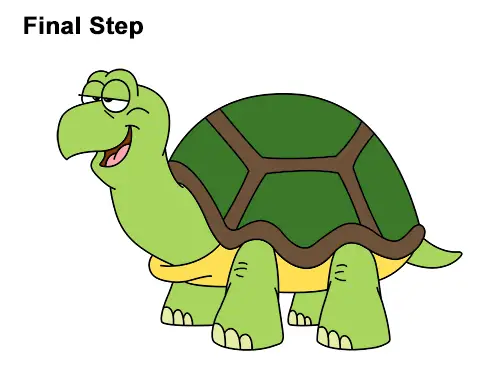
Final Step: Color your turtle drawing using color pencils, markers or even crayons! You can color your drawing any way you want. For this look, use yellow-green for the skin. Use dark green for the shapes inside the shell. Use brown for the bottom edge of the shell and the space between the shell shapes. Use yellow for the bottom part of the turtle's shell, pink for the tongue and red for the inside of the mouth.
Thanks for visiting! Subscribe to the How2DrawAnimals YouTube Channel for a new tutorial every Saturday.
To learn how to draw popular cartoon characters, visit EasyDrawingTutorials.com.
RELATED TUTORIALS
 |
 |
 |


