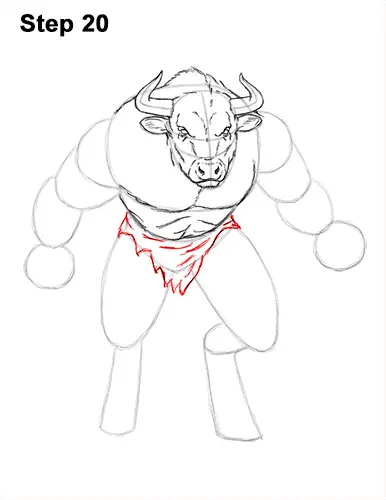
Step 20: Use the V-shaped line underneath as a guide to draw the bottom part of the minotaur's torso. Draw a series of wavy, spike-like lines to represent the tattered edges of the loincloth. Add a few curved lines inside the shape to represent the wrinkles and folds on the cloth.
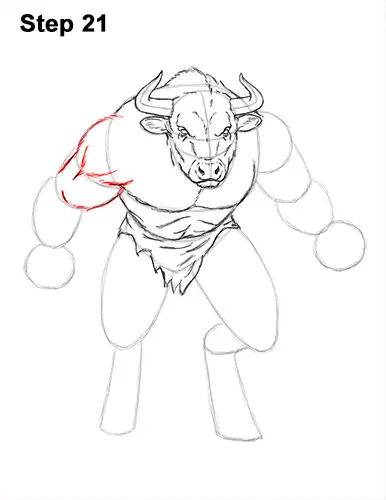
Step 21: Use the shapes on the top, left side of the minotaur's body as guides to draw the shoulder. Darken the outer edges of the guides to create the basic shape of the shoulder and top part of the arm. Add a few curved lines inside to define the muscle structure.
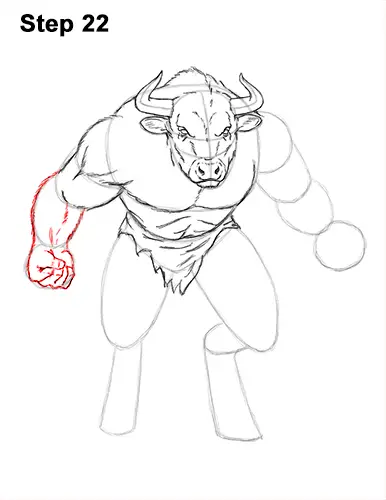
Step 22: Use the small circle and the oval-like shape on the left as guides to draw the rest of the arm and fist. Darken the outer edges of the guides using jagged lines to represent hair. Draw the fist within the shape of the initial circle. Use a wavy line at the bottom for the knuckles. Inside the shape, draw the minotaur's fingers starting with the thumb as a small arc. The folded fingers are behind the thumb, so only draw the visible portions as short, curved lines. Add a few more lines inside the arm to emphasize the muscles and tendons.
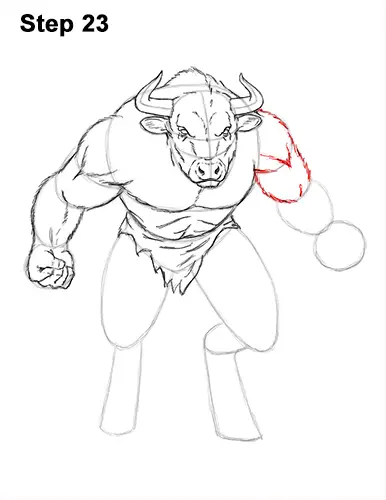
Step 23: Use the shapes on the top, right side as guides to draw the other shoulder the same way. Darken the outline of the guides and add a few lines inside to define the minotaur's muscles.
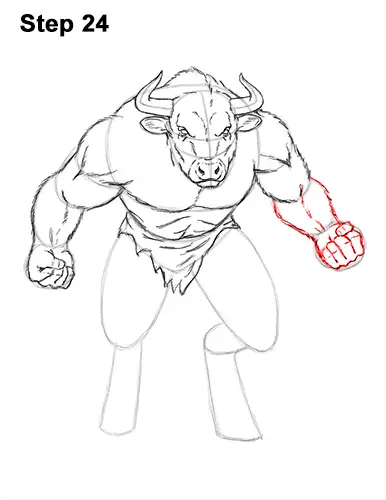
Step 24: Use the shapes to the right of the body as guides to draw the rest of the arm and fist. Darken the outer edges of the top guides to create the forearm. Add a few lines inside for detail. Add the fist inside the circle by first drawing a small oval at the top for the thumb. Add the other folded fingers below the thumb as a series of curved lines. Use a wavy line at the bottom for the knuckles. Add a few more lines on and around the fingers to further define the minotaur's fist.


