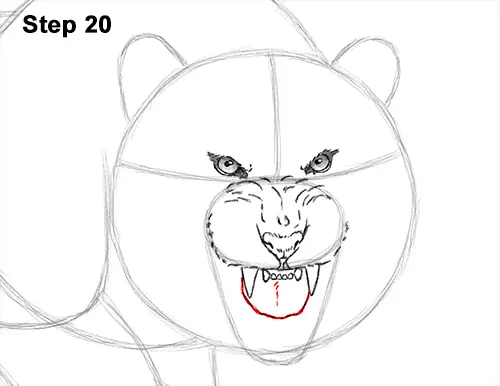
Step 20: Under the canines, draw a long curved line for the tiger's tongue. Add a few lines in the middle of the tongue to represent texture.
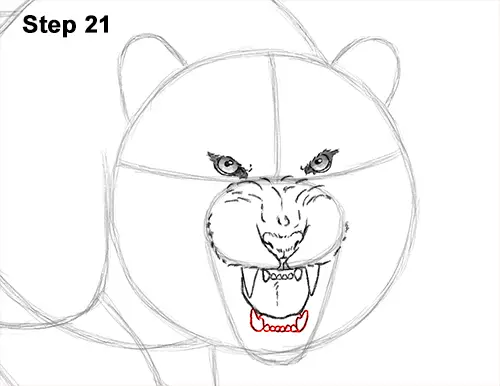
Step 21: Add the bottom row of teeth below the tongue the same way as the top row. Start by drawing the canines on the sides. This time, the triangle-like shapes should be pointing up. Then fill the gap with the remaining teeth using smaller oval-like shapes. Notice the distance from the tongue.
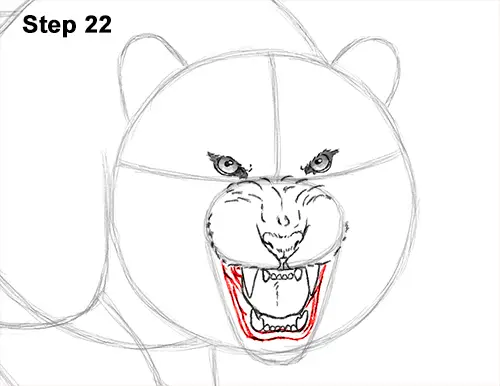
Step 22: Using a series of curved lines, draw the rest of the tiger's mouth and gums. The gums basically consist of a series of curved lines that surround the teeth and tongue. The gums should follow the basic shape of the teeth and tongue and should extend to the muzzle at the top. Make sure that all these lines stay within the initial U-shaped guide line.
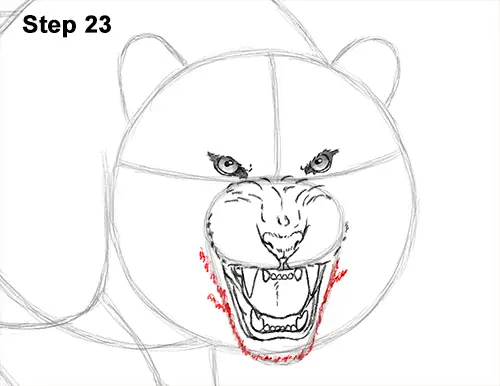
Step 23: Use the initial curved line under the muzzle as a guide to draw the tiger's lower jaw and chin. Follow the path of the guide as you draw a series of quick, short strokes to give it a furry texture. Add a few extra strokes on the sides of the tiger's jaw for extra detail.
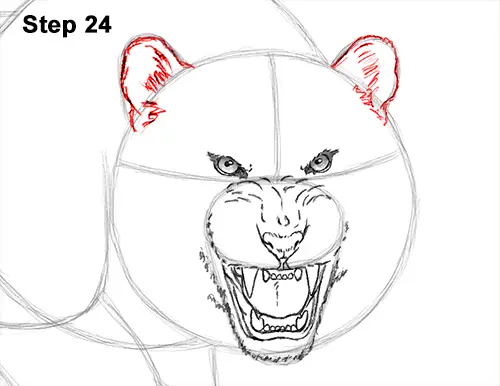
Step 24: Darken the arc on the top left side of the head but make the lines curvier to create the shape of the ear. Now add a few strokes within the shape to give it more structure and to represent the fur inside. Draw the tiger's other ear the same way. Darken the arc, then add a few strokes within the shape.


