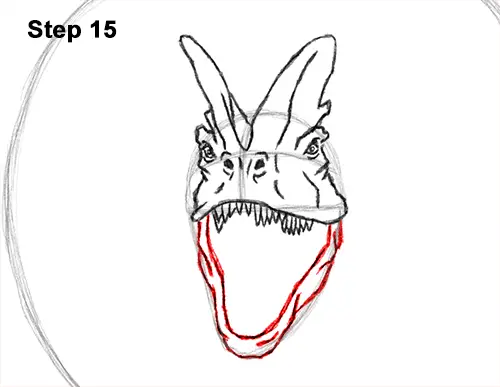
Step 15: Use the curved line under the head as a guide to draw the Dilophosaurus' lower jaw. Follow the basic path of the guide but make the shape of the jaw a bit more jagged as you darken the lines. Inside, draw another line that has a similar shape but smaller for the open mouth. Use the lower jaw as a guide to draw the shape of the dinosaur's open mouth. Leave a big enough space to draw the inside detail.
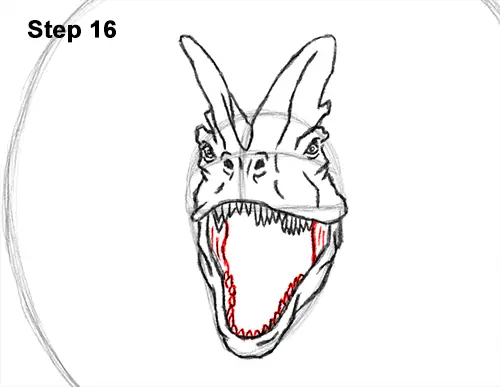
Step 16: Draw a few short lines on the sides of the mouth for the skin in between the jaws. Draw a series of small triangle-like shapes that line the bottom of the Dilophosaurus' mouth for the teeth.
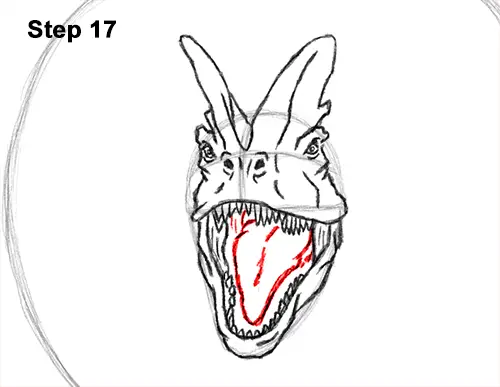
Step 17: Draw a series of curved lines inside the Dilophosaurus' mouth for the tongue. The tongue should come to a rounded point at the bottom. Add some lines on the sides for the dinosaur's throat.
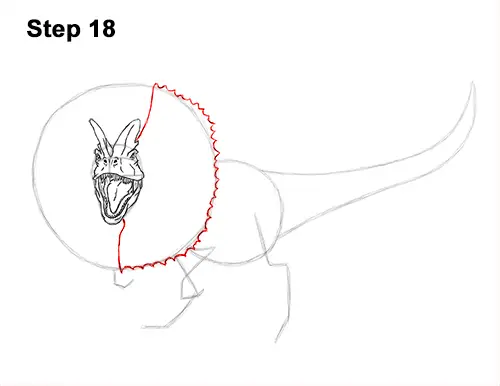
Step 18: Use the big circle around the head as a guide to draw the right part of the Dilophosaurus' open frill. First draw a diagonal line at the top of the head and a vertical line at the bottom to separate the two sides of the frill. Now follow the path of the circle as you draw a series of small curved lines to give the frill a spiky appearance. You can make the shape of the frill come out of the circle a bit so as to not make the shape too perfect. Vary the size of the small curved lines to make the spikes different sizes for a more organic feel.
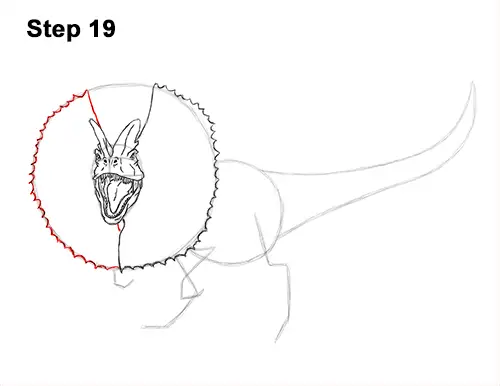
Step 19: Draw another diagonal line above the head for the top part of the frill on the left side. Then add the series of small curved lines as you follow the path of the circle to make the Dilophosaurus' frill spiky. Make the curved lines different sizes to vary the sizes of the spikes.


