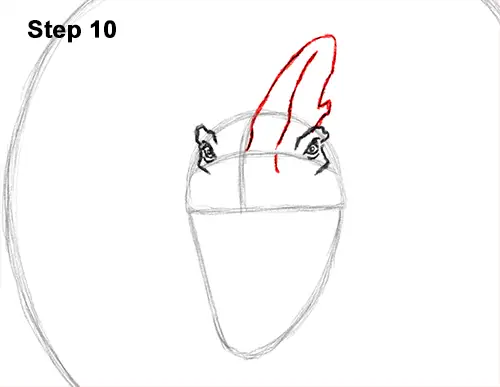
Step 10: Draw the crest on the right by first lightly sketching an arc that's slightly tilted. Pay attention to the angle and the height and width of the arc. When you get it right, darken the lines. Make the outline of the Dilophosaurus' crest a bit jagged and add an extra line within it to indicate the curvature of the shape.
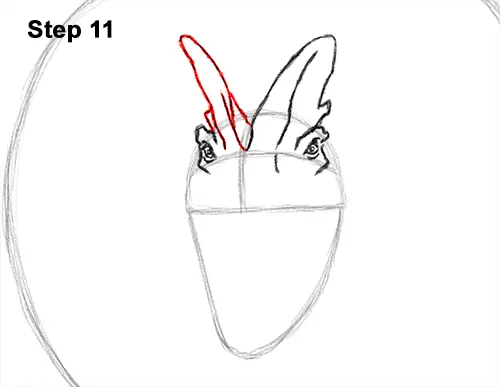
Step 11: Lightly sketch another arc on the left side of the head that's tilting the opposite way for the Dilophosaurus' other crest. Draw a line in the middle of the arc, then darken the outline of the crest using a jagged line. Draw a few more lines near the bottom of the arc to indicate the shape turning away from the first arc.
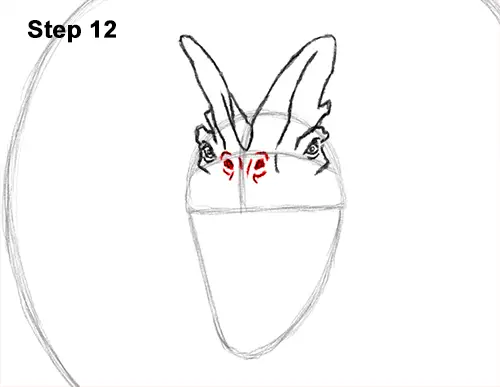
Step 12: Draw two small curved lines under the horizontal construction line for the top ridge of the Dilophosaurus' nose. Draw two small triangle- like shapes under the small, curved lines and shade them in for the actual nostrils. Add a few more lines around the dinosaur's nostrils to emphasize the structure.
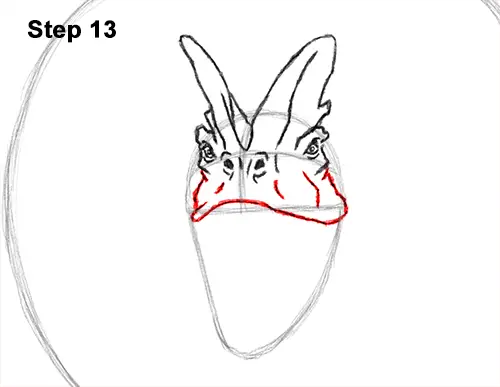
Step 13: Use the bottom part of the initial half- circle shape as a guide to draw the Dilophosaurus' top jaw. Follow the basic path of the guide but curve the section in the middle more and place it a bit higher than the guide. The sides of the top jaw should curve down below the guide. Add a few more lines within the shape of the top jaw to give it more structure.
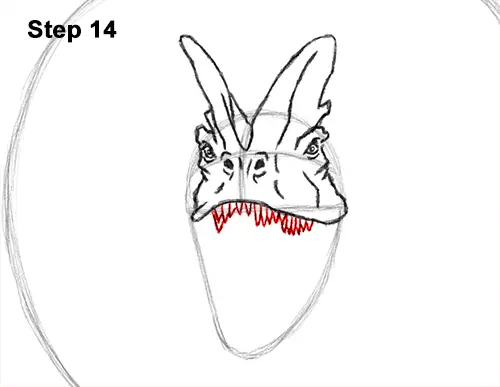
Step 14: Draw a series of long triangle-like shapes directly under the top jaw for the Dilophosaurus' top row of teeth. Follow the path of the jaw as you draw the teeth. Make them different sizes to add variety. The row of teeth shouldn't stretch all the way to the sides of the top jaw.


