







How to Shade: Three Exercises to Practice
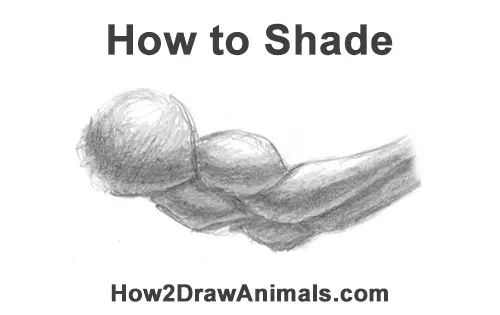
Use the video and tutorial below to learn how to shade your drawings. The tutorial will show you three different exercises to practice shading. Please pause the video to learn at your own pace.
Exercise 1: Create a value scale with your pencil.
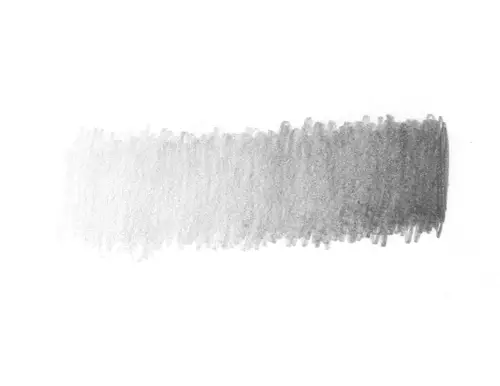
Using any pencil, start to shade lightly on one side and gradually darken your strokes toward the other side. This process is sped up. The video would be too long otherwise, but take your time when you do this. This value scale will show you how light and dark your pencil can be, and you can use it for reference. This exercise will also help you control the pressure that you apply to the paper with your pencil's graphite. Quickly draw strokes from top to bottom, adding more pressure the farther right you go to make them darker.
You can also go back and fix your scale so that the transition from light to dark is more gradual. The transition from light to dark should be gradual and smooth. There are other ways to shade, like stippling and cross- hatching, but for this video, let's shade smoothly. This may be difficult at first , but with practice you'll have greater control of your pencil.
You may also find it easier to go from dark to light instead. The important part is to control the pressure of your pencil to get a smooth and gradual transition.
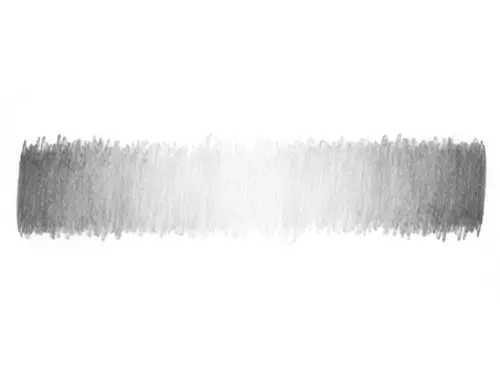
When you get more comfortable, try to go from dark to light, then back to dark and so on. Remember that you can always go back and add more value where needed to make the transitions smoother.
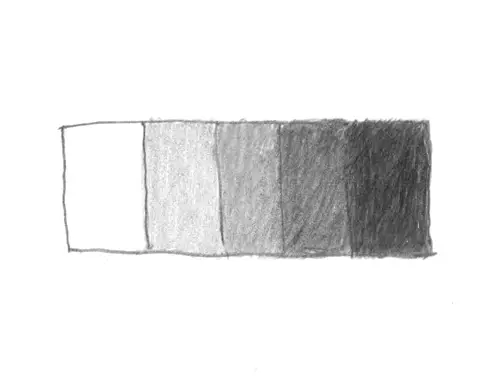
Here is another exercise you can do to sort your pencil's values for reference. First draw five small boxes. Now shade in the box on the right as dark as you can. Don't apply too much pressure because the graphite will be too shiny and you might tear the paper. Now compare the boxes at the ends and shade the box in the middle using a value in between. Now fill in the other two middle boxes with the corresponding values so that the scale goes from light to dark. This is just another way to order your pencil's levels of darkness. You should still practice the smoother light to dark transition.
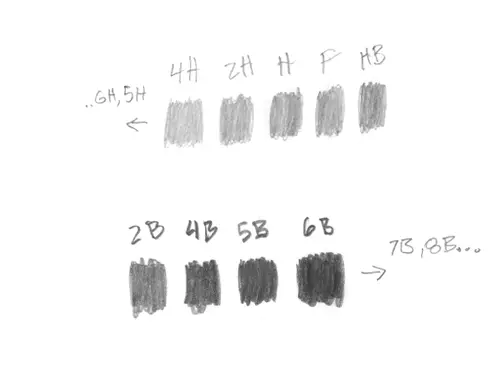
You can also use pencils that have graphite of different values. These pencils have a graphite of a specific strength. They won't shade lighter or darker than their grade. Pencils with a light graphite value fall under the H category, like 6H, 4H, 2H, etc. Pencils with a dark graphite fall under the B category, for example 2B, 4B, 6B, etc. The entire scale from light to dark is:
9H, 8H, 7H, 6H, 5H, 4H, 3H, 2H, H, F, HB, B, 2B, 3B, 4B, 5B, 6B, 7B, 8B, 9B.
These pencils can be very useful when you require a specific value on your drawings.
Exercise 2: Apply the value scale to simple shapes to shade them.
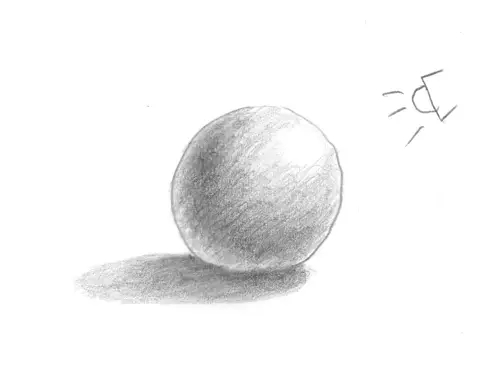
Draw simple shapes and shade them to make them three-dimensional using the value scale. Here's how to turn a circle into a sphere. First determine where the light will come from. I drew a small lamp-like object on the top, right side. The top, right side of the circle is closer to the lamp, so it's the brightest spot. Leave it blank.
Continue putting more pressure toward the lower, left side of the sphere. This side should be darker because it's farther away from the light source. The darkest part of the sphere is called the core shadow. Notice how it curves to conform to the sphere.
The lower, left side of the circle, along the inner edge, should be a bit lighter. This is the reflected light from the surface where the sphere sits. Now because you practiced your value scale, you should be able to get a smooth, gradual transition from light to dark.
Under the sphere, draw a shadow that is cast on the ground. The cast shadow will be a thin, oval- like shape that stretches to the left because the light source is on the top, right side. The cast shadow should be darkest directly under the sphere and it should gradually get lighter toward the left. Here in the cast shadow, the gradual dark to light transition of the value scale is important as well.
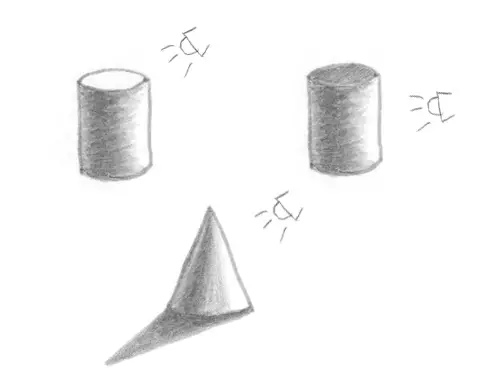
Practice shading other simple shapes using the value scale. Spheres and cylinders will help you with organic shapes later, like animals and humans. Cubes and pyramids will help you when shading non-organic things like buildings and furniture. It's also very important to observe shadows in real life. Take simple objects, like balls and toilet paper rolls, and place them next to a lamp. Study how the light interacts with the objects and creates shadows. Then draw the objects and shadows. After practicing with multiple objects, shading will become more intuitive.
Another exercise to do is to move your light source around to see how that changes the shadows. For this second cylinder, the light source is lower, so the top side would be in shadow as well. The cast shadow would also be longer. The lower the light source, the longer the cast shadow.
ractice shading a variety of shapes. Make them harder as you progress. Cones will also come in handy when shading organic objects later. There really is no special trick. If you want to get better, you just have to practice!
Exercise 3: Shade more complex objects that are made up of simple shapes.
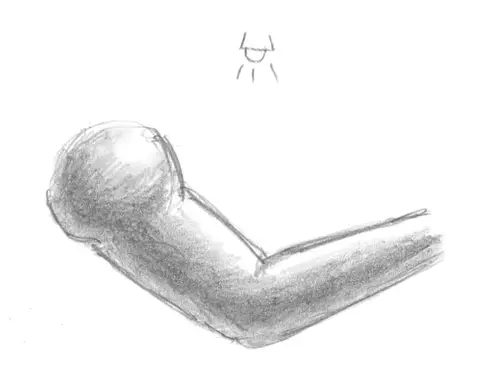
Draw a human arm using basic shapes and apply the shading method to the arm. Use a sphere for the shoulder and a couple of cylinders for the arm. Darken the outline of the arm and erase the inside. Add your light source at the top.
Now shade each section of the arm individually based on the light source at the top. Because the light source is at the top, the core shadows will be at the bottom. The lightest parts, or highlights, will be at the top, so leave those areas blank. As you shade the arm, attach the core shadows from each section to each other so that they become a single long shadow. Make the transition from light to dark smooth and gradual. Don't forget the reflected light at the bottom!
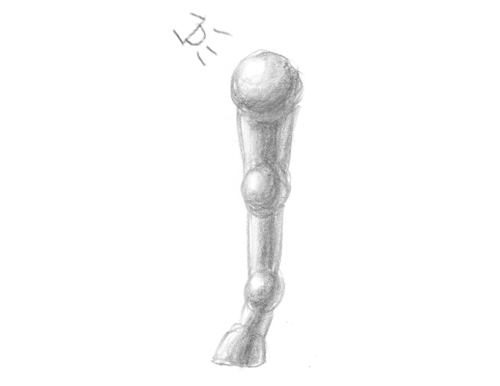
Practice this technique with a variety of limbs, like a horse leg, for example. A horse leg is basically made up of spheres and cylinders too. Break down any object into simple shapes so that it's easier to visualize the shadows. This may be a bit challenging at first, but it'll get easier with practice. After practicing with simple shapes, you can eventually move on to more complex objects.
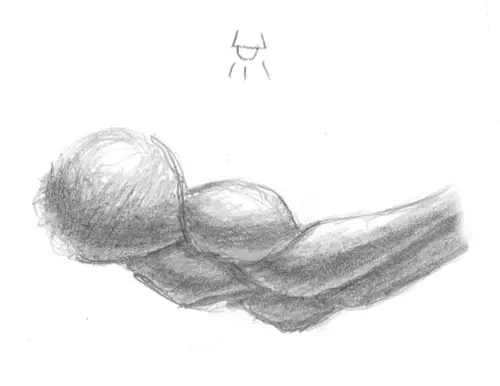
When you move on to more complicated objects, you'll realize that they're just made up of smaller , simpler shapes. If we take the arm at the top and give it more muscle definition, the same rules apply to the smaller shapes. The light source is at the top, so all the shapes on the arm should reflect accordingly.
Knowing muscle anatomy will help you draw a more realistic-looking arm and will help you shade it properly. The core shadow should be near the bottom of each individual shape. The reflected light should also be near the bottom edge of each shape to make it more three-dimensional. The highlight of each shape should be at the top. But tone down the brightness of the highlight the farther down that shape is.
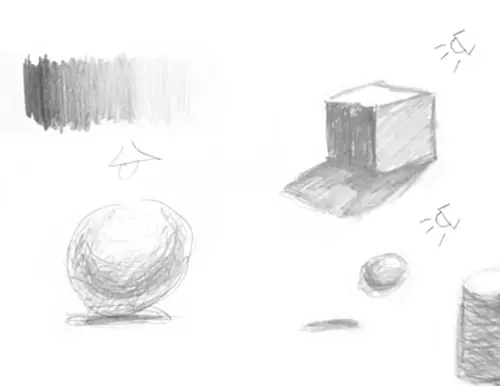
Remember that for shading, first learn to control the pressure of your pencil. Practice that by drawing smooth, gradual value scales. Then apply the gradual shading to simple objects. Use real life objects and observe how light interacts with them. Eventually move on to shading more complex objects. But it's very important to do the value scale exercises first. Above all, you have to practice! It might not be perfect at first, but in time you'll get better.
Thanks for visiting! Subscribe to the How2DrawAnimals YouTube Channel for a new tutorial every Saturday.
To learn how to draw popular cartoon characters, visit EasyDrawingTutorials.com.
RELATED TUTORIALS
 |
 |