







How to Draw an Otter VIDEO & Step-by-Step Pictures
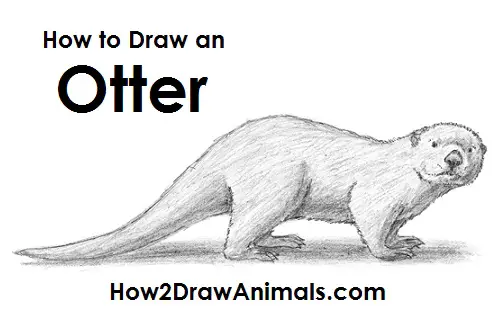
Please PAUSE the "How to Draw a Sea Otter" video after each step to draw at your own pace.
For the first few steps, don't press down too hard with your pencil. Use light, smooth strokes to begin.
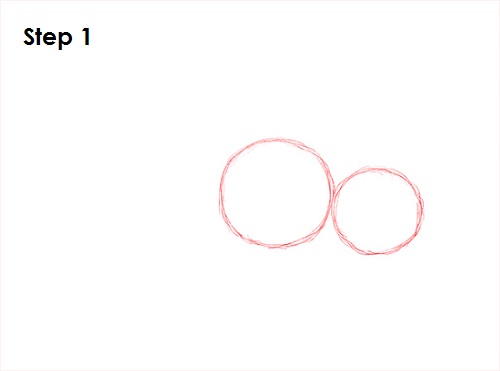
Step 1: Draw two circles as guides for the otter's body. They don't have to be perfect. They're just guides. The circles should be right next to each other, and the circle on the right should be smaller and slightly below the first circle.
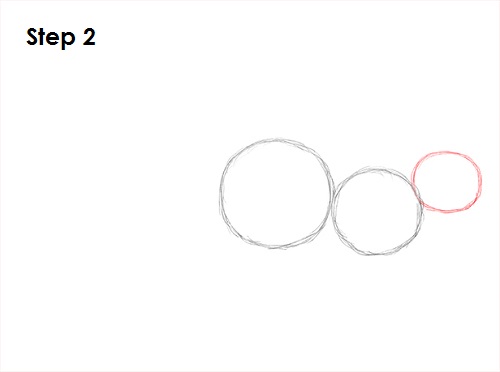
Step 2: Draw an even smaller circle on the upper right side as a guide for the otter's head.
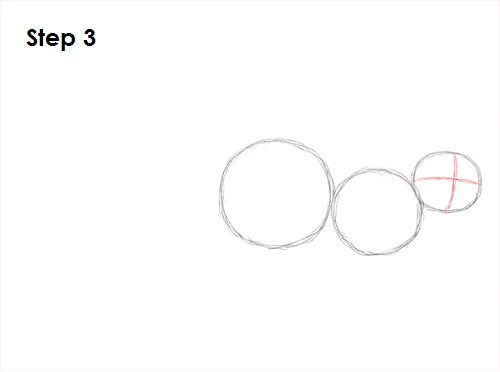
Step 3: Draw two intersecting lines inside the head to help you place the otter's facial features later on.
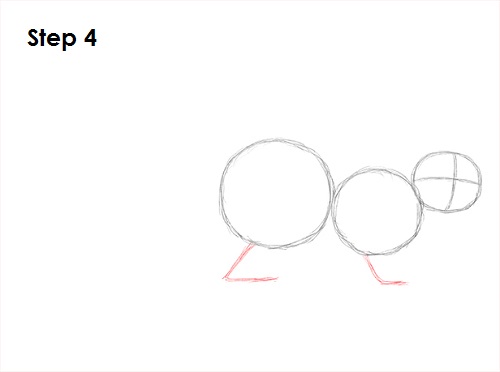
Step 4: Draw two angled lines under the body (one below each circle) as a guide for the otter's legs.
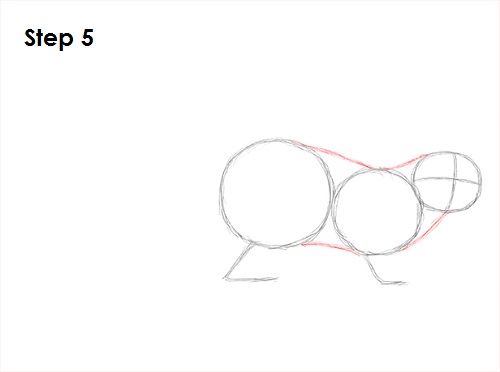
Step 5: Draw a series of curved lines that connect the major shapes to form the otter's body.
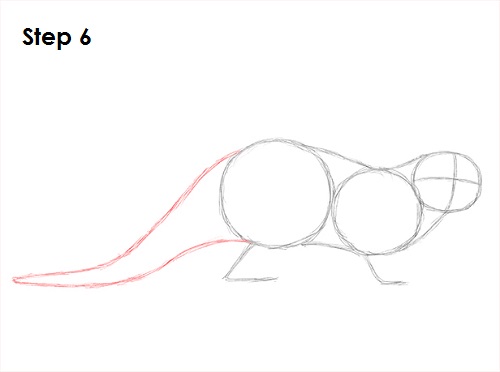
Step 6: Draw two curved lines that come to a point on the left side of the body as a guide for the otter's tail. Draw a long tail for a river otter and a shorter tail for a sea otter.
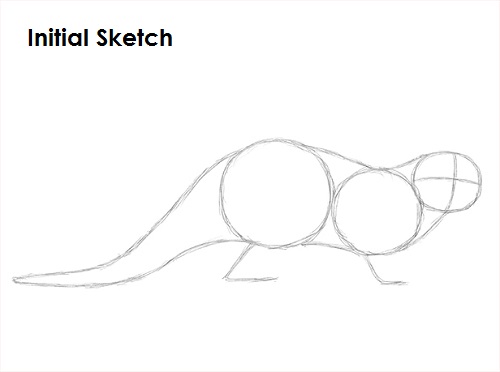
That's it for the initial sketch! From this point on, press harder with your pencil to get a more defined sketch.
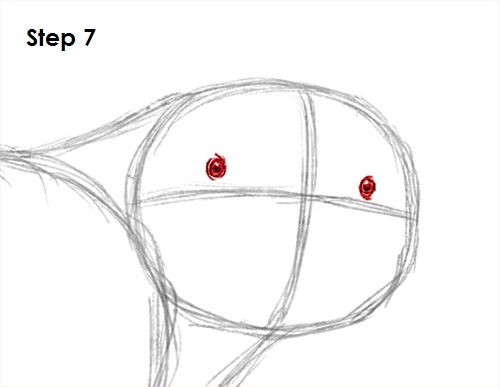
Step 7: Draw the otter's eyes inside the head using the lines as guides for placement. Otters have very small eyes, so draw them as tiny circles. Shade in the inside of the eyes except for a small circle to represent glare. Add a few lines around the eyes as extra detail.
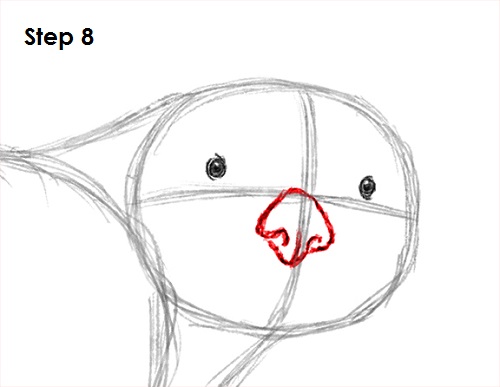
Step 8: Draw the otter's nose using the lines as guides for placement. First lightly draw a diamond. Then darken the outline and give it a rounder shape. Add a couple of arcs on the sides for the otter's nostrils and a line that splits the bottom of the nose.
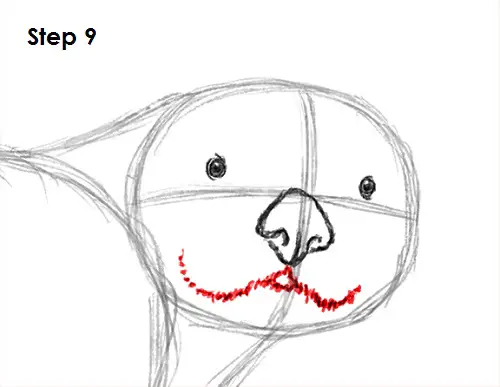
Step 9: Draw the otter's mouth under the nose using quick, short strokes to represent fur. The mouth starts out as a short line under the nose, then it splits into two and curves up.
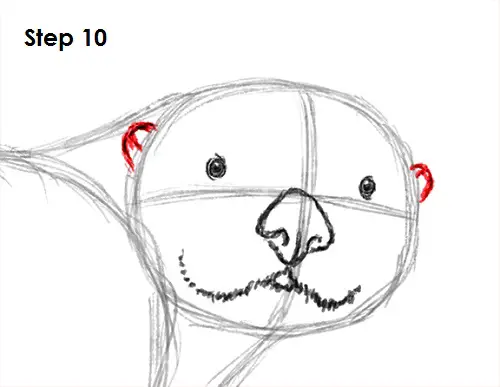
Step 10: Draw a small arc on either side of the head for the ears. Draw a line inside each ear for extra detail.
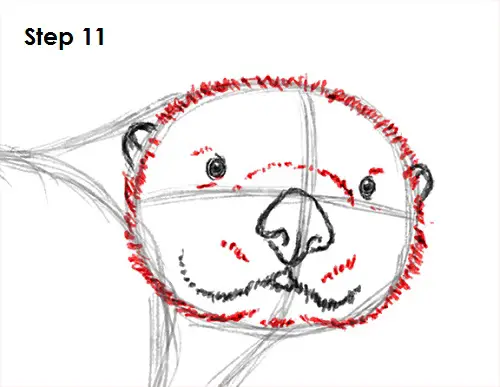
Step 11: Use the original circle as a guide to draw the rest of the otter's head. Otters have some of the densest fur of all the animals, so use quick, short strokes as you go around the head to give it a furry look. Add more strokes around the muzzle and the eyes for extra detail.
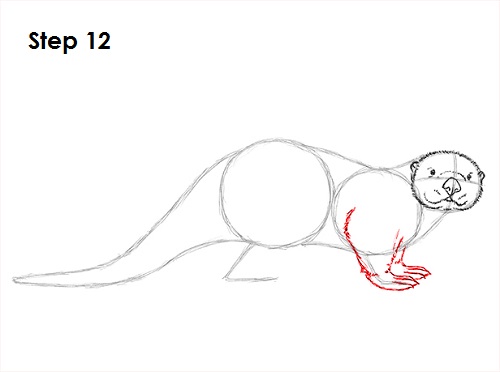
Step 12: Use the line as a guide to draw the otter's front legs. Draw lightly at first to get the structure right. When you're happy with what you have, go ahead and darken it. Draw around the guide line, making the leg thicker on top. Draw the wide paws at the bottom with the otter's webbed toes. Draw the otter's leg on the other side the same way. Most of it is hidden, so only draw the visible portion.
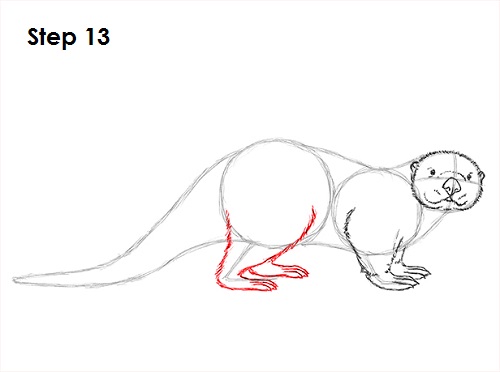
Step 13: Use the other line as a guide to draw the otter's hind legs the same way as the front legs. Remember to draw the leg lightly at first, then darken it when you have the structure right. The hind leg is thicker at the top. Don't forget to draw the webbed feet at the bottom! Draw the visible portion of the otter's foot on the other side using the same technique.
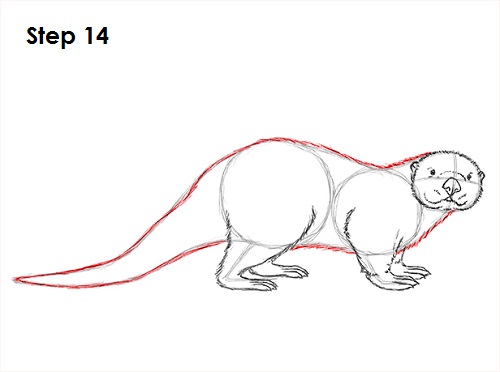
Step 14: Darken the initial lines to draw the rest of the otter's body and tail.
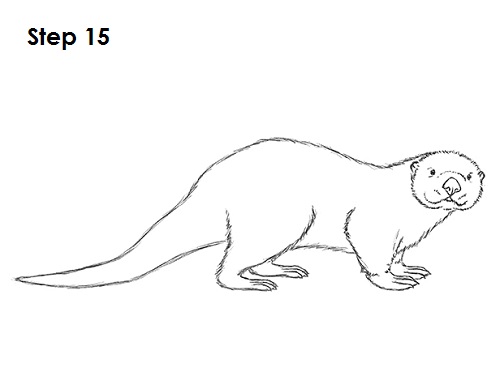
Step 15 (optional): For a cleaner look, erase as much as you can of the initial guide lines. Don't worry about erasing all of them. It's okay to leave some behind. Also re-draw any final sketch lines that you may have accidentally erased.
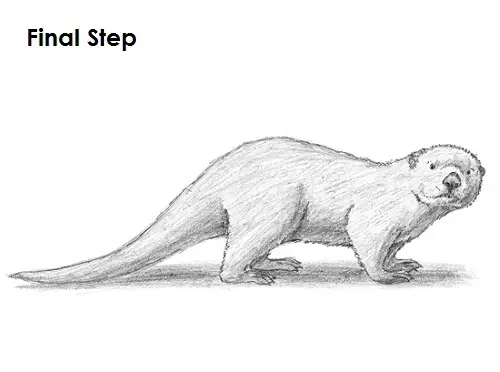
Final Step (optional): Add some shading to your otter drawing to give it more dimension and volume. Pick the direction of the light source when shading so that the shadows are consistent with it. Vary the pressure on your pencil to get different degrees of tonal value. Add a cast shadow underneath. This helps ground the otter so it doesn't appear to be floating.
You can add more value throughout your otter drawing for extra detail. It's a good idea to use reference to be as accurate as possible and remember to PAUSE the video any time you need help along the way.
Thanks for watching! Subscribe to the How2DrawAnimals YouTube Channel for a new tutorial every Tuesday.
To learn how to draw popular cartoon characters, visit EasyDrawingTutorials.com.