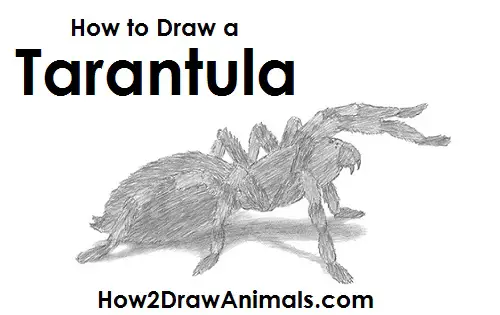
Please PAUSE the "How to Draw a Tarantula" video after each step to draw at your own pace.
For the first few steps, don't press down too hard with your pencil. Use light, smooth strokes to begin.
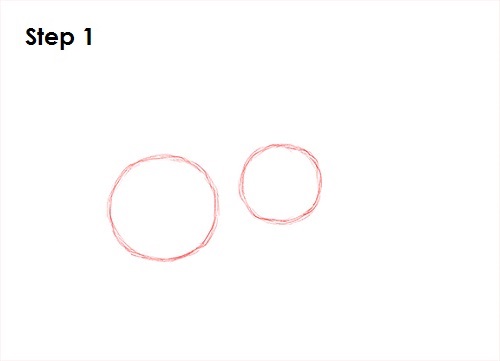
Step 1: Draw two circles as guides for the tarantula's body. The circles don't have to be perfect. They're just guides. The circle on the left should be almost twice as big and should be placed lower than the circle on the right.
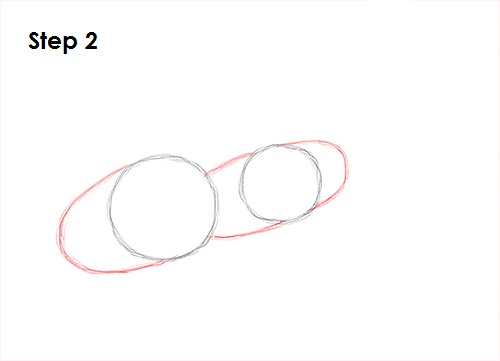
Step 2: Draw a couple of arcs and curved lines around the circles to complete the guide for the tarantula's body. Draw a small arc on the right and a big arc on the left. Then connect both shapes with two curved lines.
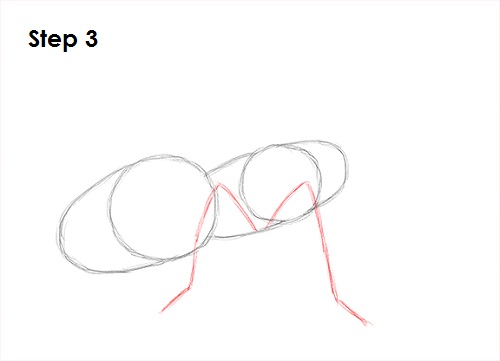
Step 3: Draw two angled lines under the front part of the tarantula's body as a guide for the first set of legs. The lines bend once at the top and again at the bottom near the tip. The end result should be similar to the letter M.
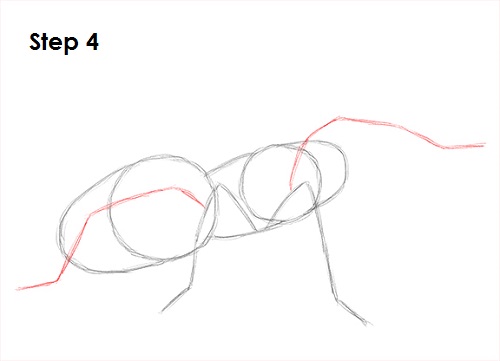
Step 4: Draw two more angled lines on either side of the tarantula's body as guides for the second set of legs. The leg on the right will be raised, so the guide should have a more vertical orientation.
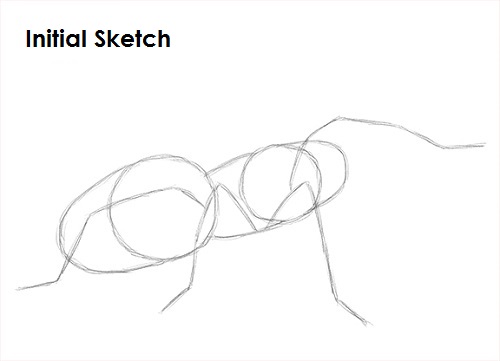
That's it for the initial sketch! From this point on, press harder with your pencil to get a more defined sketch.
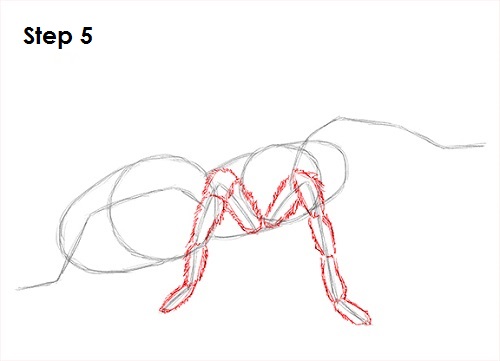
Step 5: Use the M-shaped lines in the middle as guides to draw the first pair of legs. Lightly sketch each segment of the first leg as you follow the basic path of the line. When you get all the segments on the leg right, darken the lines. Tarantulas are covered in hair or bristles, so as you darken the lines, use quick, short strokes to represent this hair. Draw the leg on the left the same way. First sketch the individual segments lightly as you follow the guide line. When you get the structure of the tarantula's leg right, darken the lines. Use quick, short strokes as you darken each segment to represent the hair on the legs.
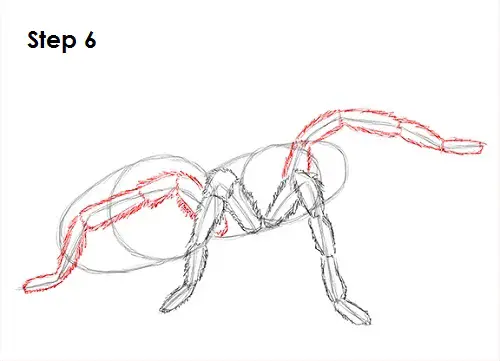
Step 6: Draw the tarantula's second pair of legs using the same technique. Follow the path of the guide as you lightly sketch the segments. Darken the lines using quick, short strokes only when you have the structure right. The pair of legs on the right will be raised, so draw the individual segments with a vertical orientation. Don't overthink adding the hair on the legs. Just add it all over as you follow the guides. The hairs on tarantulas can become embedded in your skin and cause irritation and discomfort.
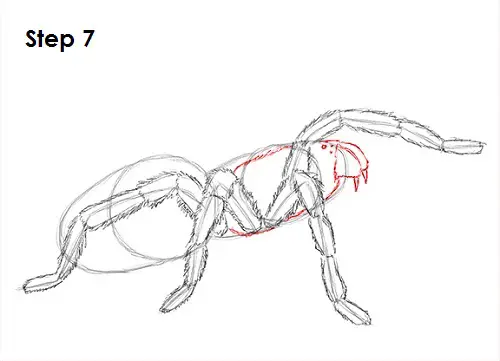
Step 7: Use the initial shapes as guides to draw the front part of the body or cephalothorax. Follow the basic path of the guide and make the shape thinner. Be sure to not draw over the legs. Add four dots at the tip of the head for the tarantula's eyes. The other four eyes are on the other side. Draw a couple of curved lines at the front for the tarantula's mouth parts or chelicerae. Below each shape, draw a spike for the tarantula's fangs. The pedipalps or mandibles have been omitted for the sake of simplicity and for the view of the fangs.
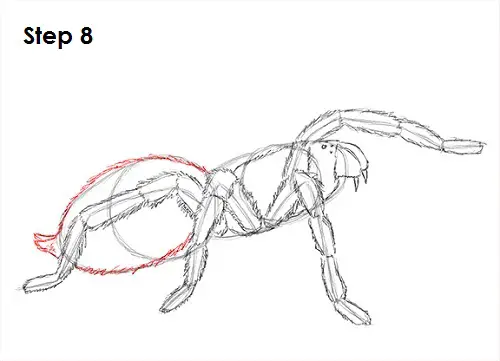
Step 8: Use the shapes on the left as guides to draw the tarantula's abdomen using quick, short strokes. Draw the two spikes at the tip of the abdomen for the silk-producing spinnerets. Some spiders will defensively throw the bristles on the abdomen with their legs.
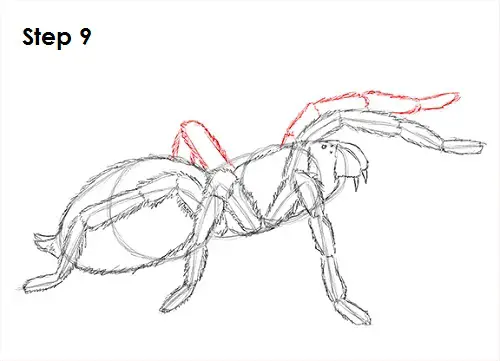
Step 9: Draw the pair of legs on the other side by using the first as guides. Lightly sketch the raised leg on the other side by using the one in front as a template, then darken the lines. Now draw the visible portion of the tarantula's hind leg on the other side.
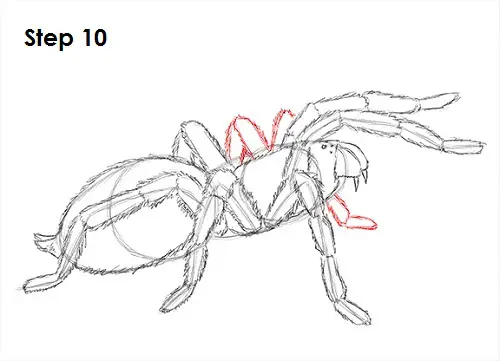
Step 10: Draw the visible portion of the two remaining middle legs on the other side. Draw the tip of the one leg on the lower right side of the body. The tips of the other legs are hidden behind the tarantula's body.
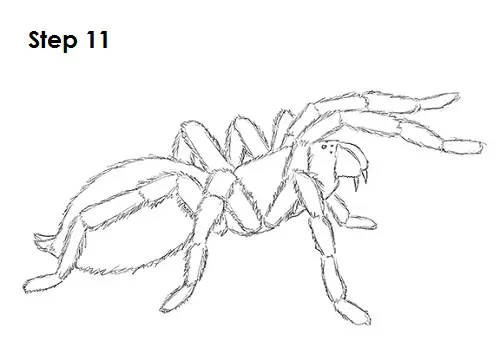
Step 11 (optional): For a cleaner look, erase as much of you can of the original guide lines. Don't worry about erasing all of the guides. The tarantula's hairs make that hard to do. It's okay to leave some behind. Re-draw any final sketch lines that you may have accidentally erased.
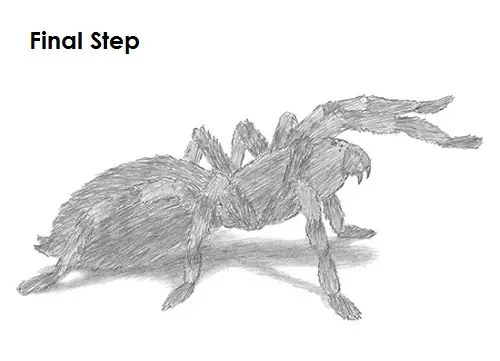
Final Step (optional): You can add more value throughout your tarantula drawing for extra detail. Use quick, short strokes as you follow the shape of the body. Try not to add the value smoothly to get a more hairy texture. Use sparse, short lines all over. Vary the pressure on your pencil to get different degrees of tonal value along the segments on the tarantula's legs. Add the value by using strokes that go in the general direction of the hair. Some tarantulas have red or yellow on their bodies. You can add color to your tarantula drawing if you'd like. It's always a good idea to use reference for a more accurate drawing. If you have a pet tarantula, try to duplicate it on your drawing.
Add a cast shadow underneath. This helps ground the tarantula so it doesn't appear to be floating. Use dark strokes near the middle of the shadow and lighter strokes along the edge for the shadow's diffusion. Don't forget to pause the "How to Draw a Tarantula" video after each step to draw at your own pace.
Thanks for watching! Subscribe to the
How2DrawAnimals YouTube Channel for a new tutorial every Tuesday.
To learn how to draw popular cartoon characters, visit
EasyDrawingTutorials.com.







