







How to Draw a Lovebird
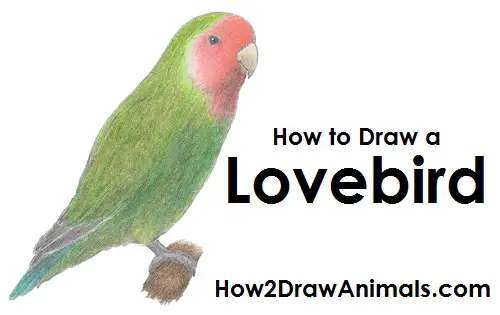
Please PAUSE the video after each step to draw at your own pace.
For the first few steps, don't press down too hard with your pencil. Use light, smooth strokes to begin.

Step 1: Draw a circle as a guide for the lovebird's head. The circle doesn't have to be perfect. It's just a guide. Leave enough room on the bottom for the body.
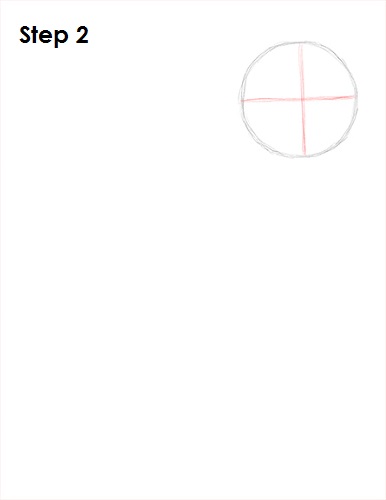
Step 2: Draw two intersecting lines inside the circle. These lines will help you place the facial features later on.
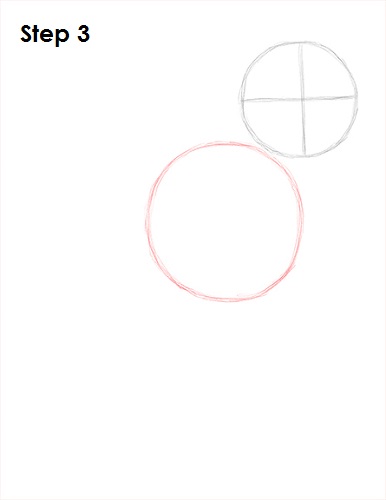
Step 3: Draw another circle on the bottom left side of the head as a guide for the lovebird's body. This circle should be almost twice as big. The edges of the two circles should almost touch.
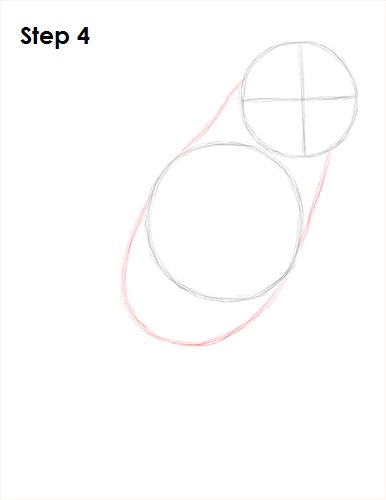
Step 4: Add a few more lines to finish the guide for the lovebird's body. Add a couple of lines to connect the head to the body at the top and a curved line at the bottom.
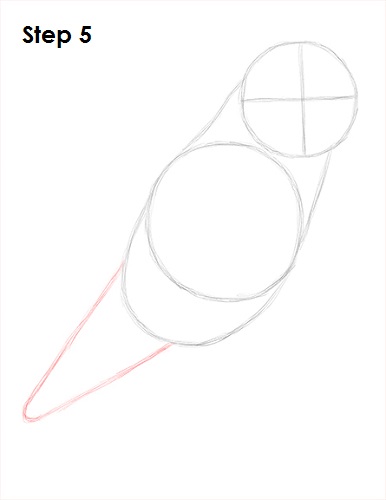
Step 5: Draw a long, thin arc on the lower left side of the body as a guide for the lovebird's tail.
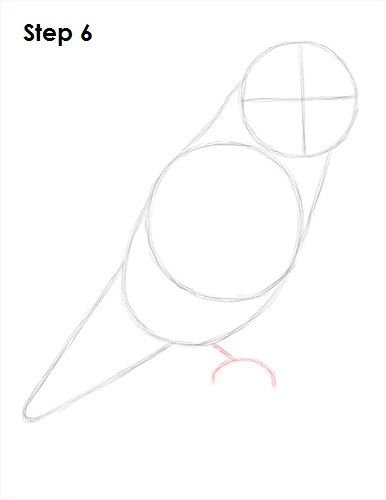
Step 6: Draw a couple of small lines under the body as a guide for the lovebird's feet.
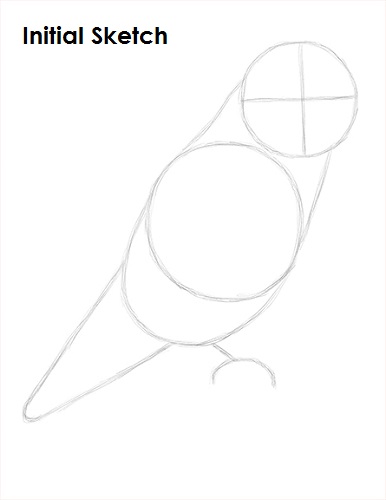
That's it for the initial sketch! From this point on, press harder with your pencil to get a more defined sketch.
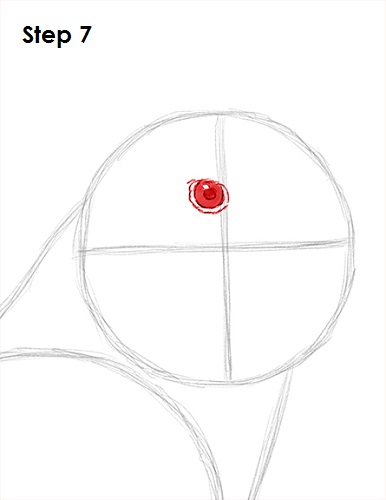
Step 7: Draw the lovebird's eye inside the head as a small circle. Use the lines as guides for placement. Draw some lines above the eye for the feathers. Add a dot in the middle for the pupil and a smaller circle to the side to represent glare. Shade the rest of the eye using a value that's lighter than the pupil. Add some lines around the lovebird's eye for extra detail.
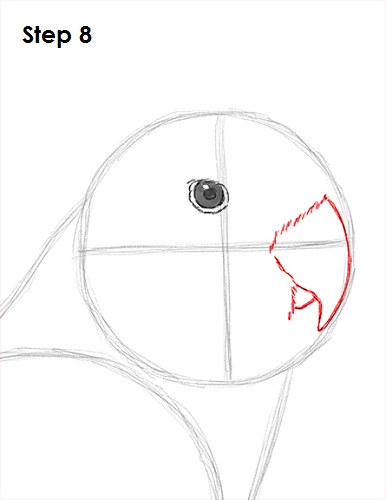
Step 8: Draw the beak by first drawing the feathery base using quick, short strokes. Now draw the first part of the top beak as a curved line that follows the path of the original circle. Add the second part of the top beak as a wavy line that connects to the feathery base. Use the initial lines as guides. Draw the bottom beak as a small curved line and a short feathery base under the top beak.
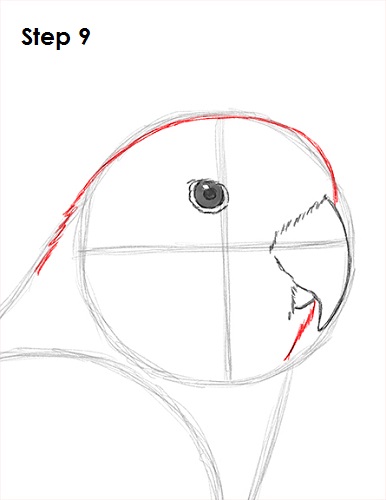
Step 9: Draw the rest of the lovebird's head using the remaining lines as guides. Simply follow the basic path of the original guides as you darken the lines and create the head.
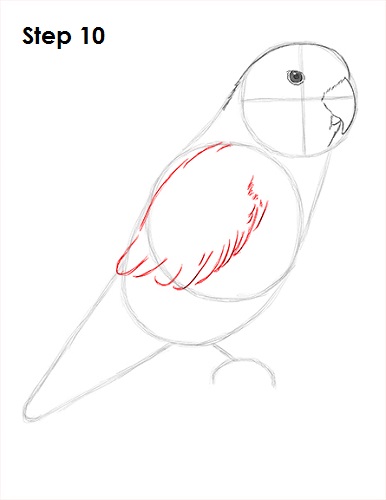
Step 10: Draw the top part of the lovebird's folded wing inside the body as a series of curved lines. The bottom part of the wing consists of short curved lines similar to the letter J along to the bottom part of the initial circle. Add the right side of the wing as more short lines within the shape of the initial circle guide.
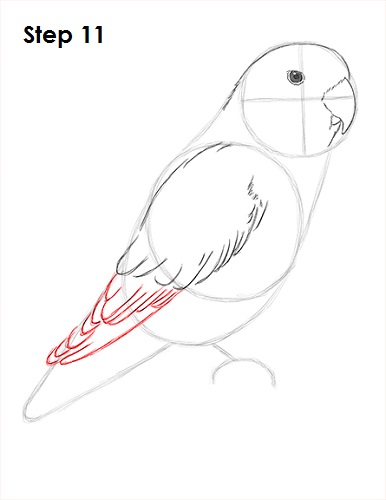
Step 11: Draw the second part of the folded wing using more curved lines under the first part of the wing. Use small curved lines of different sizes as you draw the second section of feathers. Keep adding short curved lines on the left side of the guide, then draw a longer line on the right to close the shape of the wing.
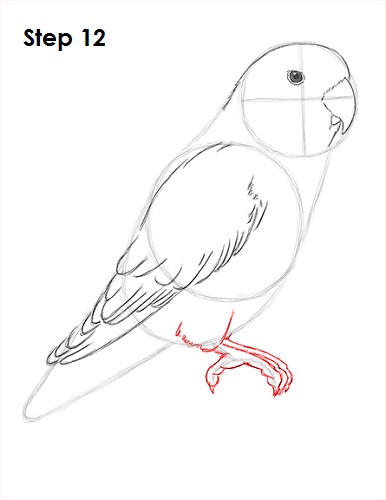
Step 12: Use the short lines under the lovebird's body as guides to draw the feet by first drawing the base using quick, short strokes. The draw the feet by following the basic path of the guide and making the shape of the feet thicker as you darken the lines.
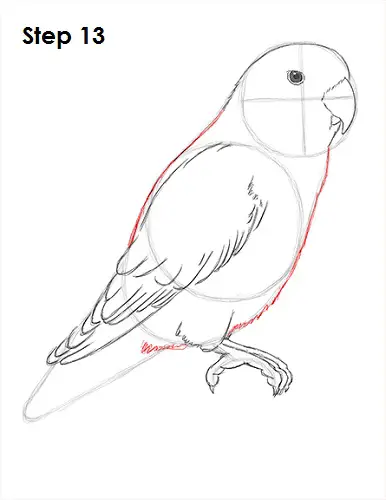
Step 13: Darken the initial guide lines to create the shape of the lovebird's body. Use quick, short strokes at the bottom to create a feathery texture.
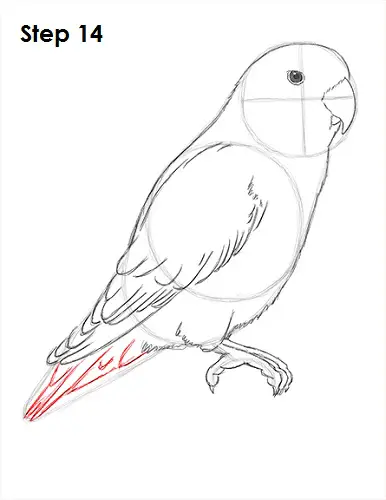
Step 14: Draw the tail within the arc shape on the lower left side.
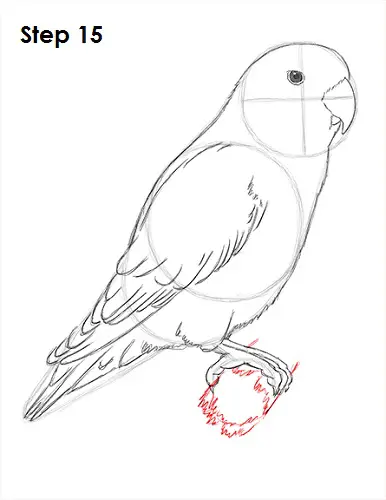
Step 15 (optional): Draw something under the feet so the lovebird doesn't appear to be floating. A few short strokes in the shape of a circle create a stick.
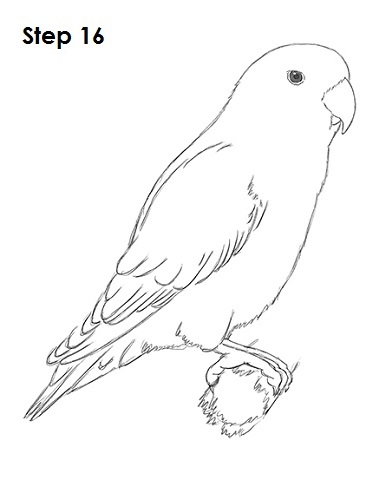
Step 16 (optional): For a cleaner look, erase as much as you can of the initial guide lines. Don't worry about erasing all of the guides. It's okay to leave some behind. Re-draw any of the final sketch lines that you may have accidentally erased.
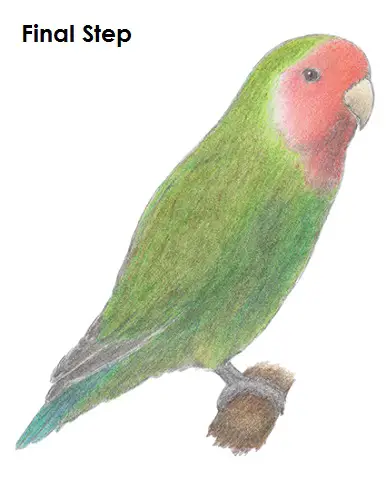
Final Step (optional): Lovebirds are colorful, so instead of the usual shading, try coloring your drawing. Using gray, add some shading to give the lovebird drawing more dimension and volume. Pick the direction of the light source so that you draw the shadows consistently. Shadows are generally at the cool end of the color spectrum, so add some to the shadows. Color the beak using light brown or yellow. Color the front part of the head light red or pink. There are different species of lovebirds and different variations within a species. They all have different colors, so you can color yours differently if you'd like.
Add the color lightly at first, and then darker as you cover the face. Apply more pressure to your pencil to get a darker value. Use similar colors on top of each other like orange red and pink to give the face more variety. Continue adding the different layers of colors until you get the shade you like. Start coloring the body using light green or yellow-green. Use strokes that go in the general direction of the feathers on the lovebird's body. Just like with the red face, add layers of similar colors to the body like lime green, dark green and even blue! Color lightly at first as you build up the different layers and test the colors. If you don't like a color, simply cover it with one you do like.
As you add more colors, push down a little bit harder to blend the colors together. Adding the different layers of color can be very time-consuming, so be patient and take breaks. Continue adding the different shades of green until you get the color you like on the body. The tail is blue, so color it using different layers of shades of blue. After coloring the tail blue, use some gray for the tips of the wings and feet. After the gray, use different shades of brown for the stick the lovebird is standing on. If you have a pet lovebird, try to duplicate its color on your drawing. And don't forget to pause the "How to Draw a Lovebird" video to draw at your own pace.
Thanks for watching! Subscribe to the How2DrawAnimals YouTube Channel for a new tutorial every Tuesday.
To learn how to draw popular cartoon characters, visit EasyDrawingTutorials.com.