







How to Draw a Budgie (Cartoon)
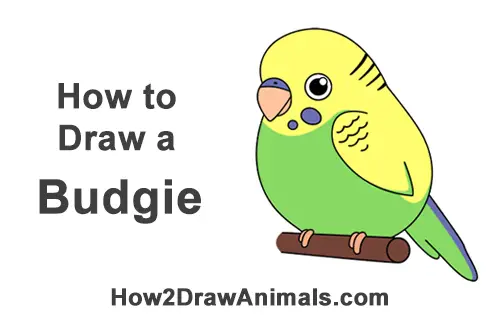
Please PAUSE the "How to Draw a Budgie (Cartoon)" video after each step to draw at your own pace.
Written step-by-step video tutorial:
For the first few steps, don't press down too hard with your pencil. Use light, smooth strokes to begin.
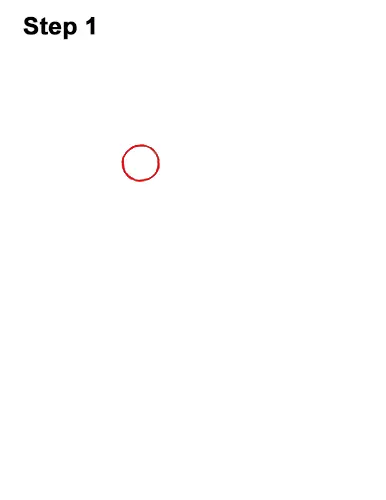
Step 1: Draw a small circle for the budgie's eye. Sketch lightly at first, and when you get the shape right, darken the line.

Step 2: Inside the eye, near the top, draw a tiny circle to represent glare. Add a bigger circle in the middle and shade it in for the budgie's pupil. As you shade in the pupil, be careful to not overlap the tiny glare circle.
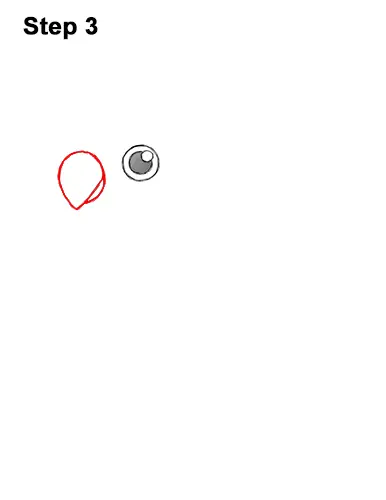
Step 3: To the left of the eye, lightly sketch a small oval for the beak. As you sketch the oval, make the bottom part pointy. When you get the shape of the beak right, darken the line. Add an extra small, curved line on the right for the lower part of the parakeet's beak.
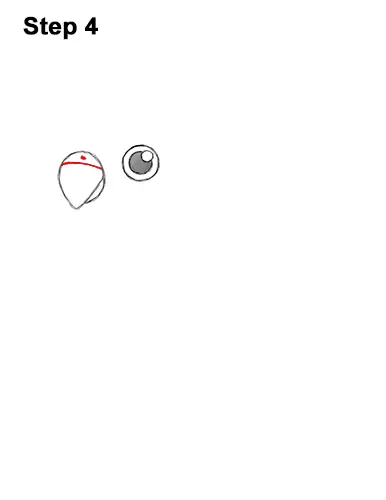
Step 4: At the top of the bird's beak, draw a short line and a dot for the nose.
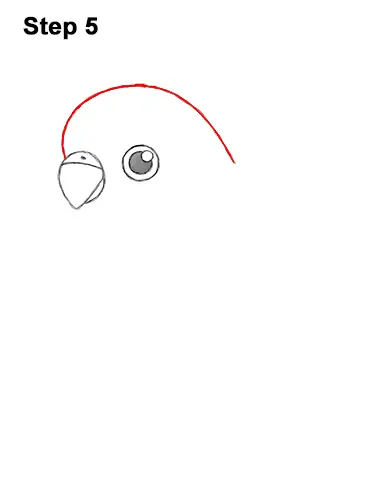
Step 5: Draw the budgie's head by first making a small mark high above the eye. Now draw a curved line from the beak to the small mark for the front part of the head. Add another curved line that slopes to the right of the small mark for the back of the bird's head.
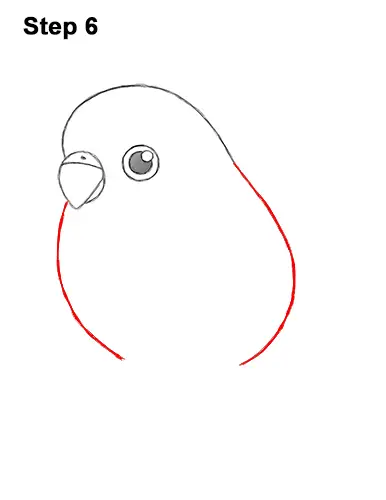
Step 6: Lightly sketch a long, curved line under the beak for the first part of the budgie's body. Draw another long, curved line on the right side for the back of the body. When you get the lines right, darken them. The longer they are, the longer the body will be.
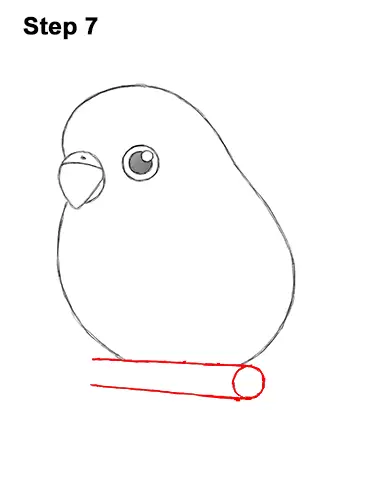
Step 7: Under the body, draw two long horizontal lines to give the budgie a perch. Draw a small circle on the right to finish the perch. Remember to sketch lightly first.
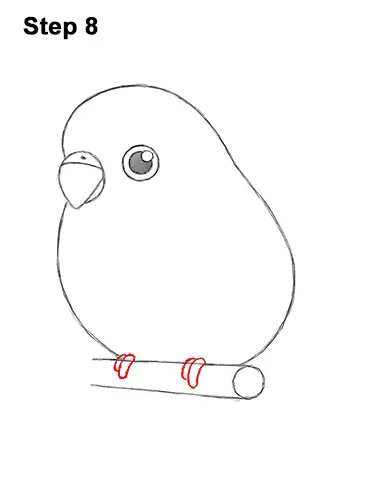
Step 8: At the top of the perch, draw four small, curved ovals for the visible toes. The budgie's toes should overlap the top line for the perch a little bit.
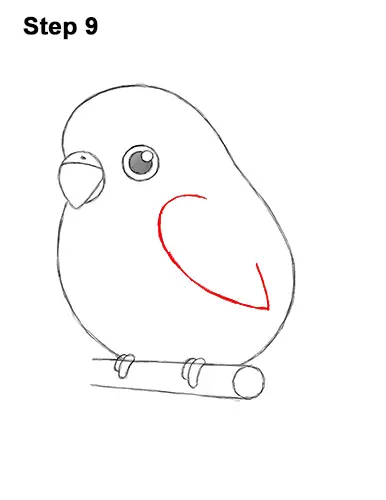
Step 9: Inside the body, near the right side, draw a long, curved line for the folded wing. The wing should be pointy at the bottom. The shape should be similar to a half of a heart.
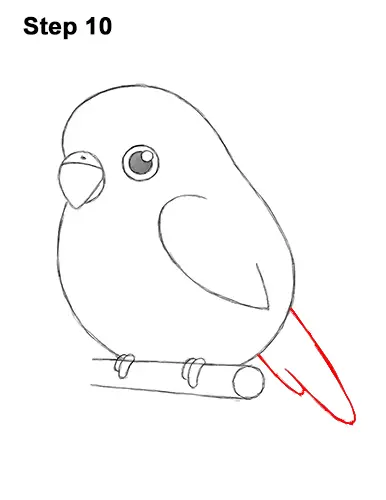
Step 10: On the lower, right side of the body, lightly sketch a couple of long, curved lines for the bird's tail. When you get the shape right, darken the lines. You can make the budgie's tail longer if you'd like.
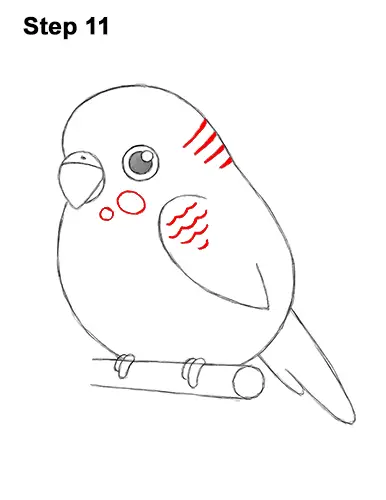
Step 11: Add a few lines on the right side of the head for extra detail. Under the eye, draw a couple of circles for the patches on the feathers. You can also skip this step for a simpler drawing. Near the top of the parakeet's wing, draw a few wavy lines for more detail on the feathers.
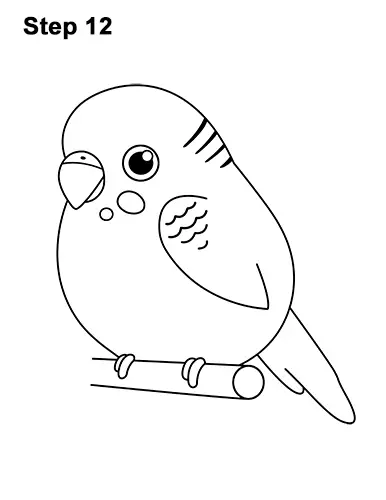
Step 12: Using a pen or marker, carefully go over the lines to make your budgie drawing permanent. After inking, get rid of every pencil mark with an eraser.
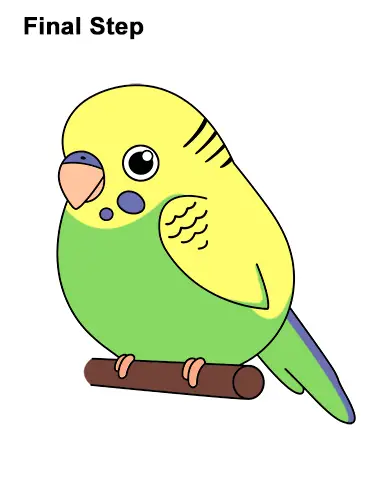
Final Step: Color your budgie drawing using color pencils, markers or even crayons! Budgies have a variety of colors, so you can color yours however you'd like. For a standard budgie look, color the head, wing and back of the body yellow. Color the rest of the bird's body green. Use blue or purple for the nose, the throat patches and a bit on the tail. Use peach or yellow-orange for the beak and toes. Use brown for the perch. If you have a pet budgie, try to duplicate its colors on your drawing. Don't forget to pause to draw at your own pace.
Thanks for visiting! Subscribe to the How2DrawAnimals YouTube Channel for a new tutorial every Tuesday.
To learn how to draw popular cartoon characters, visit EasyDrawingTutorials.com.
RELATED TUTORIALS
 |
 |
 |