







How to Draw a Giraffe (Cartoon) VIDEO & Step-by-Step Pictures
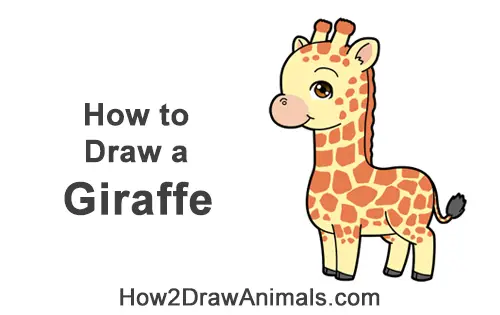
In this free art lesson, you'll learn how to draw a cute cartoon Giraffe.
Stay tooned for more free drawing lessons by:
Liking us on Facebook>>
Subscribing on YouTube.com>>
Following us on Instagram>>
RELATED TUTORIALS
 |
 |
 |
To draw this cartoon giraffe step by step, follow along with the video tutorial below and pause the video after each step to draw at your own pace. You may find it easier to follow the step-by-step drawings below the video. The new lines in each step are shown in red, so you'll know exactly what to draw next. You may want to open the video in a new tab and use both drawing methods. Take your time and draw at your own pace.
Below you can watch a Narrated step-by-step video tutorial:
For the first few steps, don't press down too hard with your pencil. Use light, smooth strokes to begin.
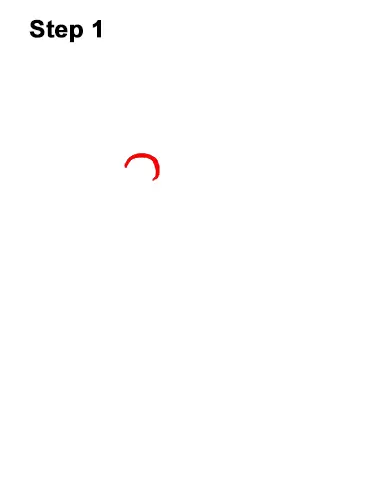
Step 1: Draw a small, curved line that's similar to the letter C for this cartoon giraffe's eye. Sketch lightly at first so that it's easy to erase if you make a mistake. When you get the shape right, darken the line and make it thicker for the eyelashes. The shape should be like a half-circle minus the bottom. Make the tips pointy.
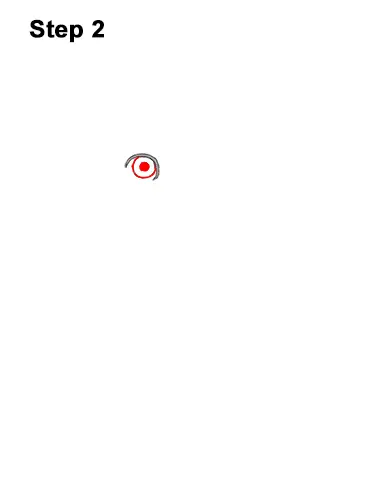
Step 2: Under the eye, near the right, draw a small circle for the iris. In the middle of the iris, draw a smaller circle and shade it in for this cute giraffe's pupil.
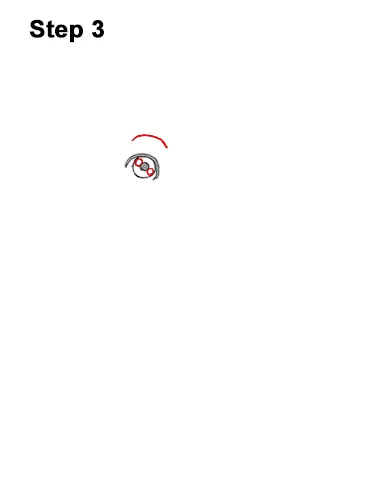
Step 3: On either side of the pupil, draw a tiny circle for highlights. You can draw only one circle if you'd like. Above the eye, draw a long, curved line for the giraffe's brow.
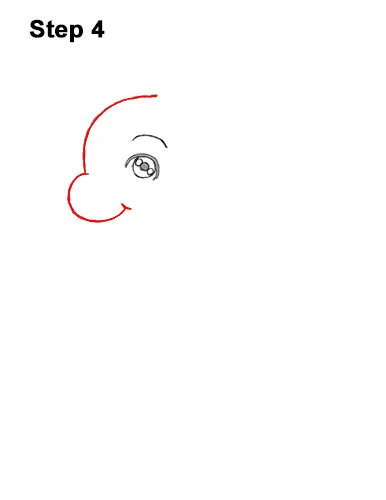
Step 4: To the left of the giraffe's eye, draw a line that curves up and to the right for the giraffe's head. Pay attention to how high above the eye the top of the head is. Below the line for the head, draw a C-shaped line for the muzzle and smile. Add a shorter line on the left side for a smile line.
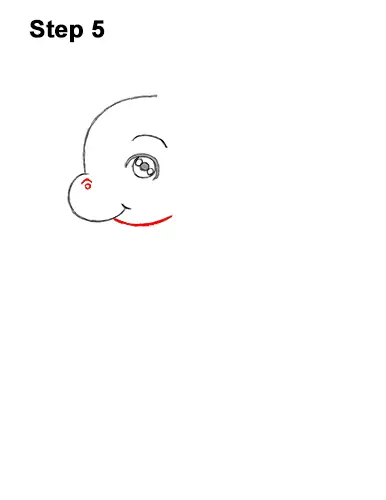
Step 5: Under the giraffe's mouth, draw a short, curved line for the bottom of the head. Inside the muzzle, near the top, draw a small circle with a curved line on top of it for the nostril.
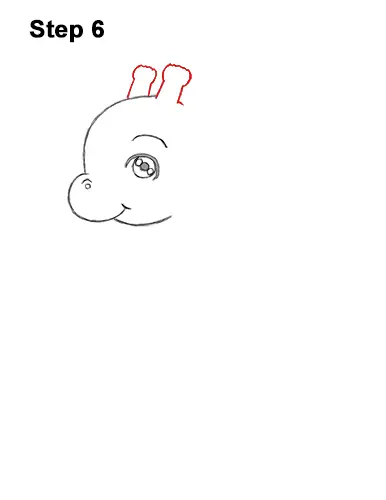
Step 6: On top of the giraffe's head, draw the two small horns. The horns are made up of two short, vertical lines with a semi-circular line at the top. Make the horn on the left a bit smaller than the horn on the right.
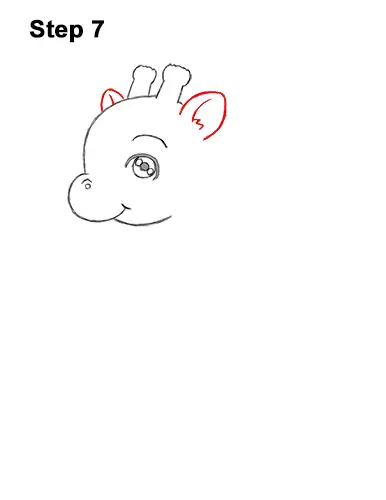
Step 7: To the right of the horns, draw a small arc-like shape for the giraffe's first ear. Make the top of the shape a bit pointy. Inside the shape, draw a few more lines for the inner ear structure. To the left of the horns, draw a smaller arc-like shape for the other ear.
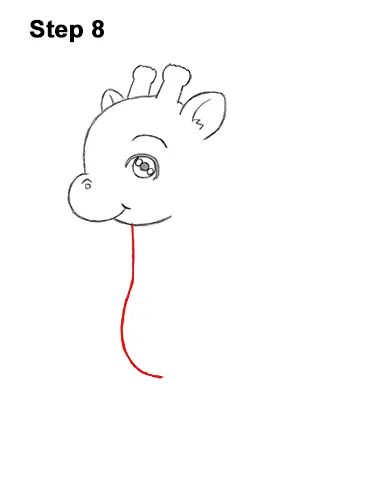
Step 8: Below the head, draw a vertical line for the giraffe's long neck. At the bottom, draw a long line that curves to the right for the chest. Pay attention to the lenght of this line in relation to the head.
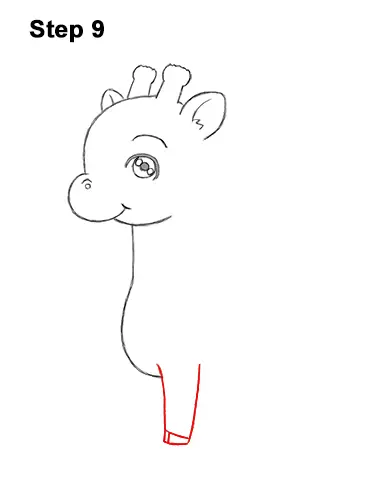
Step 9: To the right of the chest, draw the giraffe's first leg. The leg is made up of two long vertical lines for the sides and a short, horizontal line to close off the shape at the bottom. Draw a a couple of short lines inside the shape, at the bottom, for the hoof.
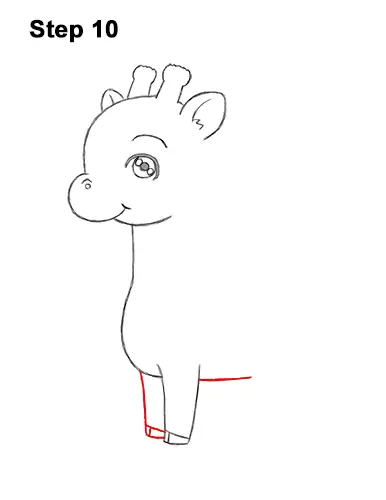
Step 10: To the left of the leg, draw a similar shape for the giraffe's other front leg. Don't forget the hoof at the bottom! To the right of the first leg, draw a curved, horizontal line for the underside of the body.
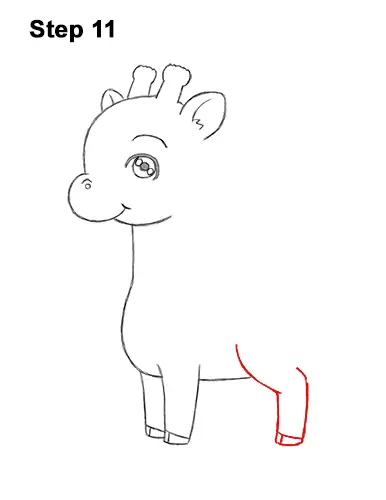
Step 11: To the right, draw a the giraffe's hind leg. The top part of the leg is made up of a sloping, curved line. The bottom part is the same as the front legs: two vertical lines for the sides and a short horizontal line to close off the bottom. Add a couple more lines inside the shape at the bottom for the hoof.
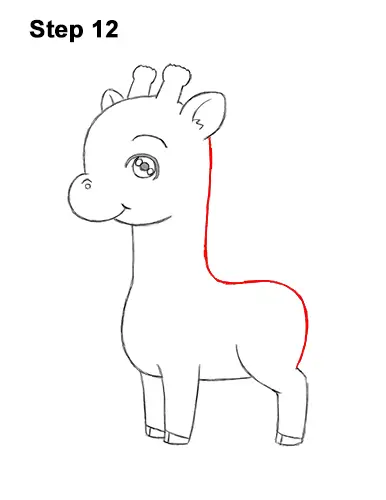
Step 12: Draw a line from the top of the hind leg that curves to the left for the top part of the giraffe's body. The line should dip down a bit at the top for the back. Then continue to draw the line up toward the ear to creaet the other side of the neck and head.
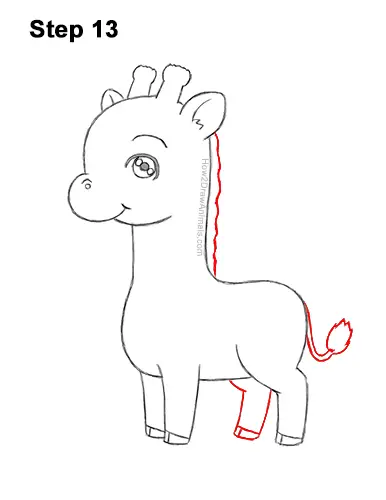
Step 13: To the right of the neck, draw a wavy, vertical line for the giraffe's mane. To the left of the body, draw a couple of short, curved lines for the tail. At the tip of the tail, draw a the brush like tuft of hair. To the left of the hind leg, draw the hind leg that's on the other side of the body. Only draw the visible bottom portion of this leg.
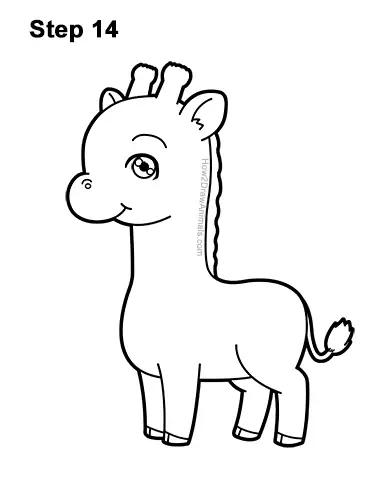
Step 14: Go over the lines with a pen or marker to make your cartoon giraffe drawing permanent. Take your time and be careful when you ink to avoid any accidents. After the ink dries, get rid of every pencil mark with an eraser. After the ink dries, get rid of every pencil mark with an eraser.
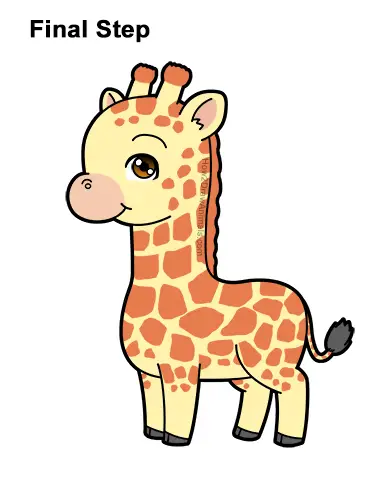
Final Step: Color your chibi giraffe drawing any way you'd like, using color pencils markers or crayons! Use orange to create spots all over the body. Make the spots angular. Color in small spots for the head and legs and big spots for the rest of the body. Use orange for the mane and tips of the horns too. Color the muzzle and inside of the ears pink. Color the eye light and dark brown. Use dark brown for the tip of the tail and hooves and color the rest of the body yellow.
Thanks for visiting! Subscribe to the How2DrawAnimals YouTube Channel for a new tutorial every week.
To learn how to draw popular cartoon characters, visit EasyDrawingTutorials.com.
To learn how to draw Manga, visit How2DrawManga.com.
RELATED TUTORIALS
|
|
|