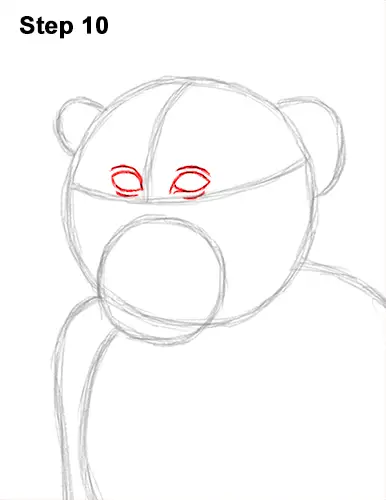
Step 10: Inside the head, on top of the horizontal construction guide, lightly sketch two small ovals for the macaque's eyes. Place the eyes on either side of the vertical construction guide. Don't place the eyes too far away from each other. When you get the size and position of the eyes right, darken the shapes but make the side pointier for the corners of the eyes. Draw a couple of short, curved lines around the eyes for the eyelids and wrinkles.
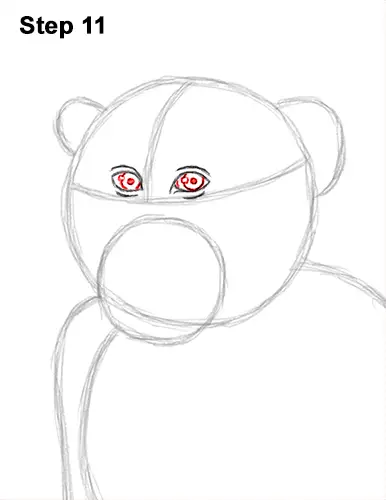
Step 11: Inside the monkey's eyes, draw tiny circles for highlights. Add bigger circles for the irises but don't overlap the tiny highlight circles. The circles for the irises are basically made up of short, curved lines. In the middle of each iris, draw a big dot for the pupils.
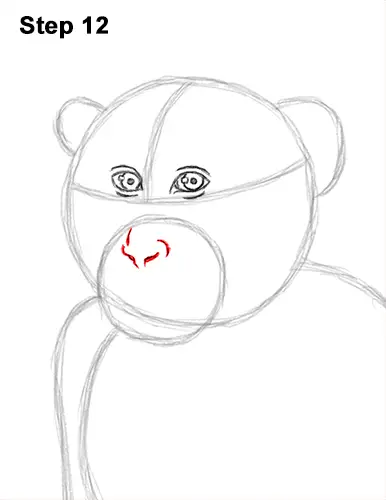
Step 12: Inside the circle for the muzzle, at the top, draw a series of short lines for the rhesus macaque's nose. The bottom lines should form a shape that similar to the letter V. Make the bottom lines thicker and darker for the nostrils. Use a short, curved line on the right side for the outer edge of the nostril.
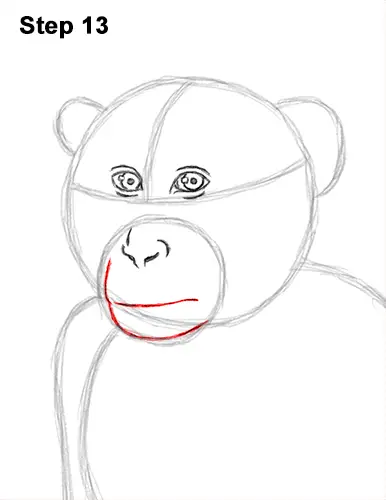
Step 13: Far down below the nose, draw a horizontal line for the macaque's mouth. The mouth should be close to the lower edge of the big head circle. Follow the basic path of the smaller circle to complete the side of the muzzle. Darken the lower edge of the guide to create the chin under the mouth.
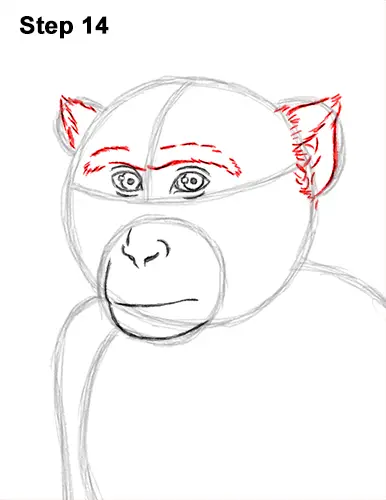
Step 14: Use the small arcs on the sides of the head as guides to draw the monkey's ears. Darken the basic path of the guides using short strokes to create the furry shapes of the ears. Make the tops of the ears pointier than the initial arcs. Within the shapes, draw more lines and strokes for the furry ear openings and the inner ear structures. Above the eyes draw curved lines that are made up of short strokes for the thick, furry eyebrow.


