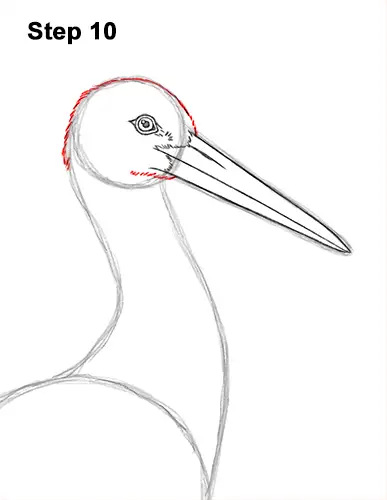
Step 10: Darken the initial small circle to create the shape of the stork's head. Stretch the right side of the head farther right than the initial edge of the circle. Use short strokes as you darken the left side of the head to create a feathery texture. Add short strokes to the left of the beak for the bottom of the head.
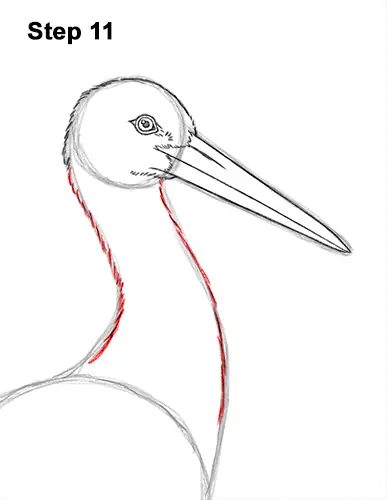
Step 11: Darken the lines under the head to create the shape of the stork's neck. Use short strokes as you darken the guides for a feathery texture.
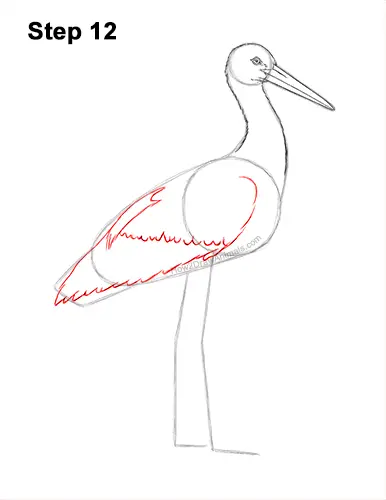
Step 12: Lightly sketch a long, thin shape across the entire body for the stork's folded wing. The left side of the wing should be thin and pointy and the right side should be wider and curved. The left side should also overlap a big part of the guide for the tail. When you get the overall shape of the wing right, darken the lines. Use short, curved strokes along the bottom of the wing for individual feathers. Add more short, curved strokes across the shape of the wing for the feather pattern.
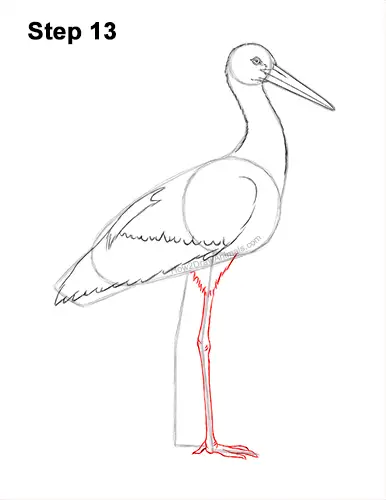
Step 13: Use the long, vertical line on the right side as a guide to draw the white stork's first leg. First draw a V-shaped line at the to that's made up of short strokes for the feathery base of the leg. Then draw the shape of the leg around the guide line. Draw the edges of the leg close to the guide to keep the shape of the leg skinny. Add a bulging shape where the guide bends for the joint in the middle of the leg. At the bottom, draw three long, thin shapes along the guide for the toes pointing forward. The toe in the middle should be longer and the toe on the other side should barely be visible. Add a smaller shape on the left side for the toe pointing backward.
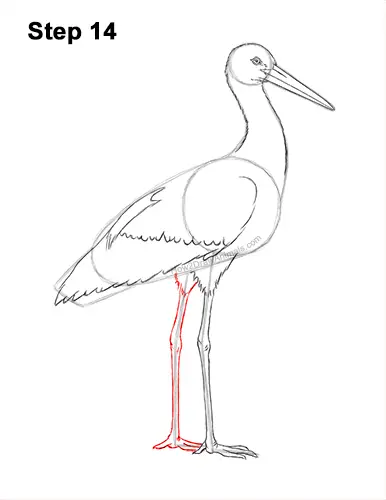
Step 14: Use the line on the left as a guide to draw the stork's other leg the same way. Draw the V-shaped feather base at the top first. Then draw the skinny shape of the leg around the guide line. Add a bulge where the guide bends for the joint and then add the toes at the bottom. A big portion of the toes will be hidden behind the first foot.


