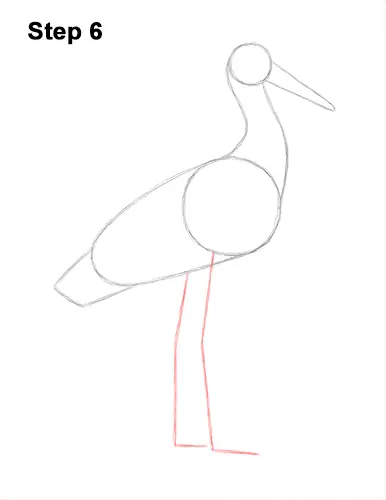
Step 6: Under the body, draw two long vertical lines as guides for the stork's legs. These lines should be almost as long as the length of the entire body. Bend the lines in the middle slightly to indicate where the joint will be. At the bottom, bend the lines to the right as guides for the feet.
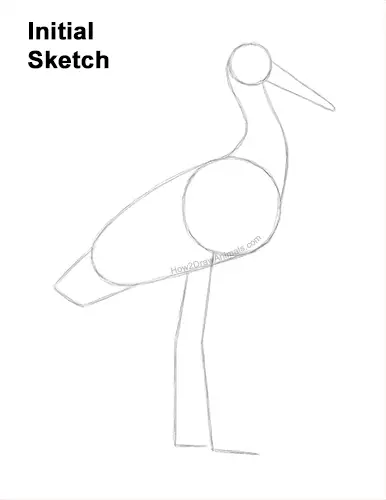
That's it for the guidelines! From this point on, press harder with your pencil for a more defined drawing.
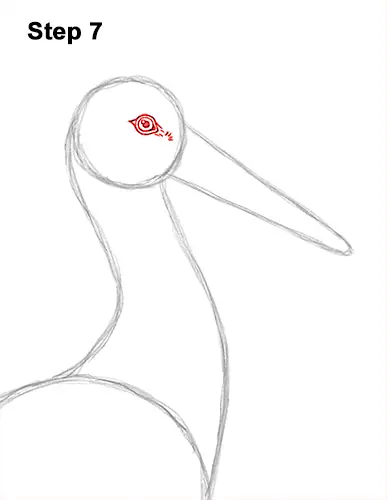
Step 7: Inside the stork's head, on the top, right side, lightly sketch a small circle for the eye. When you get the size and position of the eye right, darken the lines. Inside the eye, off to the side draw a tiny circle for a highlight. In the middle of the eye, draw a slightly bigger circle and shade it in for the pupil. Don't overlap the tiny highlight circle as you shade in the pupil. Add a few small, curved lines around the bird's eye for a bit of the bare skin and corners of the eyes. To the right, draw a few short strokes for a few feathers.
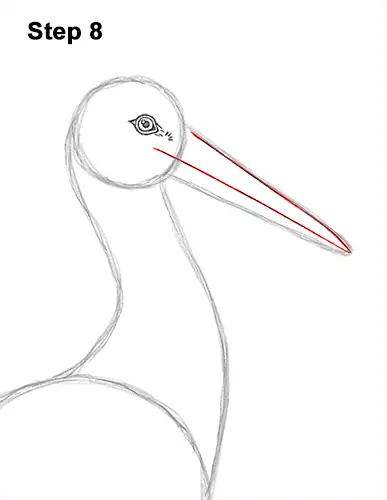
Step 8: Darken the top part of the triangular guide on the right for the first part of the white stork's beak. Make the tip pointy and draw a line across the middle of the shape for the actual mouth. The mouth should stretch inside the head and end below the eye.
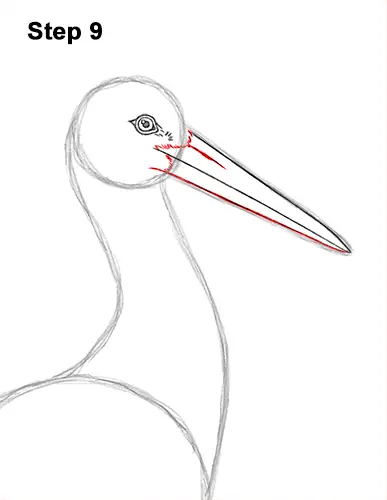
Step 9: Darken the bottom part of triangular guide to finish the shape of the stork's beak. On the left side draw a couple of curved lines that are made up of short strokes for the feathery base of the beak. Inside the top part of the beak, draw a shorter sloping line for the nostril.


