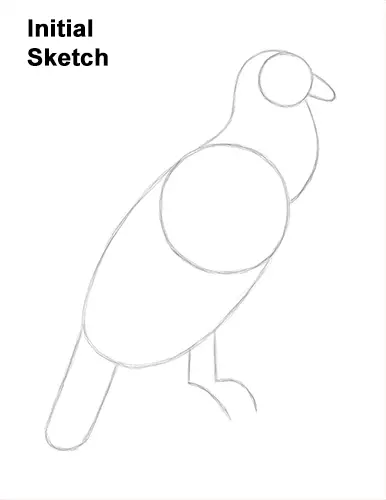
That's it for the guides! From this point on, press harder with your pencil for a more defined drawing.
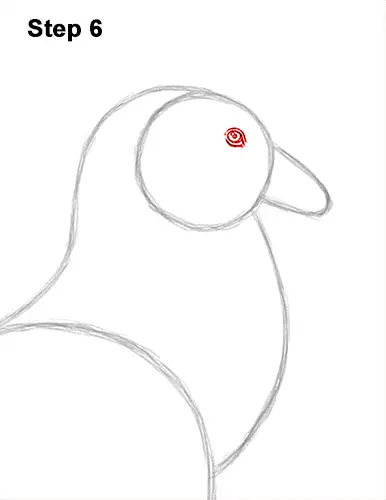
Step 6: Inside the condor's head, on the top, right side, lightly sketch a small circle for the eye. When you get the size and position of the eye right, darken the lines. Inside the eye, draw a tiny circle off to the side for a highlight and a bigger circle in the middle for the pupil. Shade in the pupil but don't overlap the tiny highlight circle. Add a few small, curved lines around the bird's eye for a bit of the bare skin.
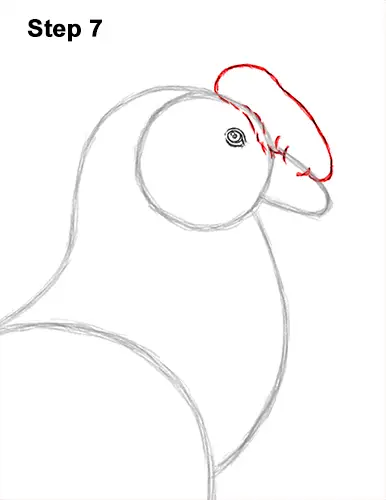
Step 7: On top of the head, draw a long, curved shape for the condor's comb or crest. The comb should extend down to the beak. Use a series of short, curved line to create the base of the comb at the bottom.
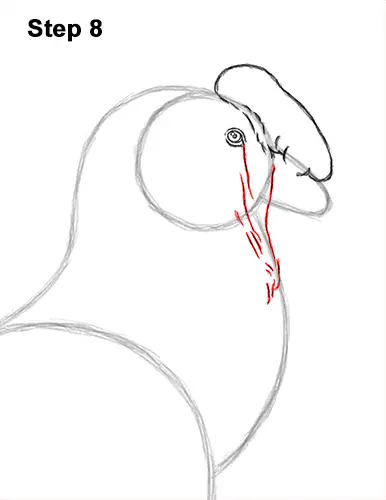
Step 8: On the left side of he Andean condor's head and neck, draw a series of vertical lines for the loose skin on the head called the wattle. Draw these lines along the path of the initial guides. Don't overthink these lines; just add a few vertical lines.
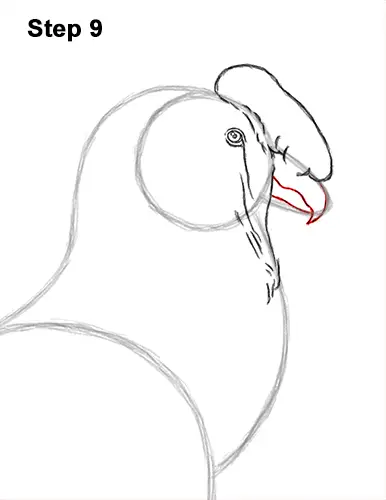
Step 9: Darken the top part of the initial small arc to create the condor's beak. Extend the right side of the line farther down for the pointy tip of the beak. Curve the line back into the guide to create the wavy mouth. Darken the bottom part of the guide for the lower half of the beak.
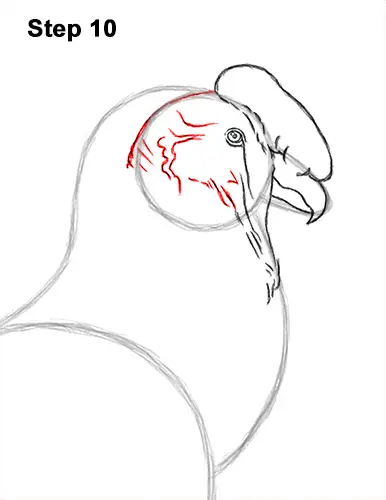
Step 10: Darken the left side of the initial circle to create the back of the Andean condor's head. Inside the head, on the left side, draw a series of wavy lines for the veins and wrinkles on the bare skin. These lines don't have to be perfect; just draw a few squiggly lines inside the head.


