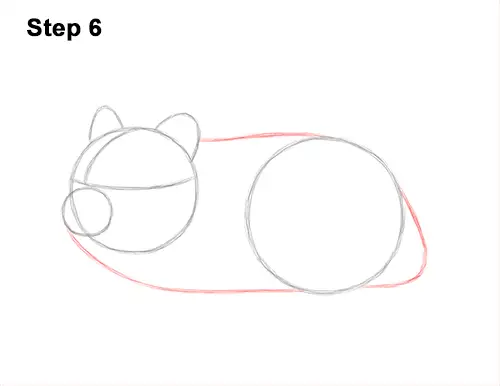
Step 6: Draw a curved, horizontal line that connects the tops of the main circles as a guide for the front of the body. Draw a long, curved line from the muzzle to the bottom of the big circle for the rest of the body. On the lower, right side, draw a curved line for the rest of the back portion of the hamster's body.
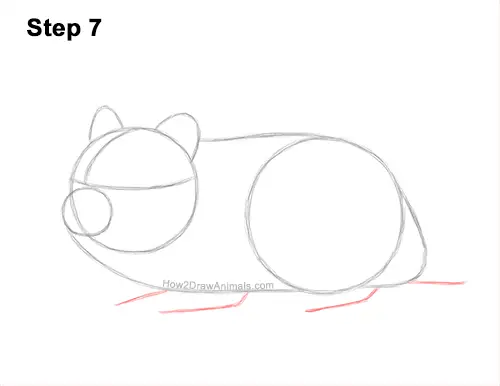
Step 7: Under the front part of the body, draw two short lines, that curve to the left as guides for the dwarf hamster's front feet. Under the back portion of the body, draw a line that curves to the left for the hind leg and a line that curves t the right for the tail.
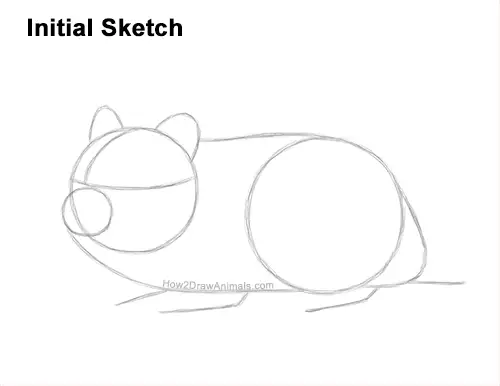
That's it for the guides! From this point on, press harder with your pencil for a more defined drawing.
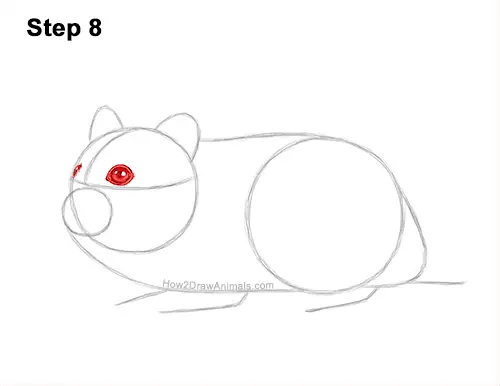
Step 8: Inside the head, lightly sketch two small circles for the dwarf hamster's eyes. Use the initial lines as guides for placement. The eye on the left should be small and thin because the head is turned. When you get the size and position of the eyes right, darken the shapes. Shade the eye on the left except for a tiny circle at the top that represents glare. Inside the eye on the right, draw two tiny circles for highlights. Shade the eye except for the tiny circles. When you shade the eye on the right, use a dark value at the top and a light value at the bottom for a rounder feel. Don't overlap the highlight circles. Add some strokes on the right side of the eye on the left for fur. Add a few curved lines around the eye on the right for a bit of bare skin.
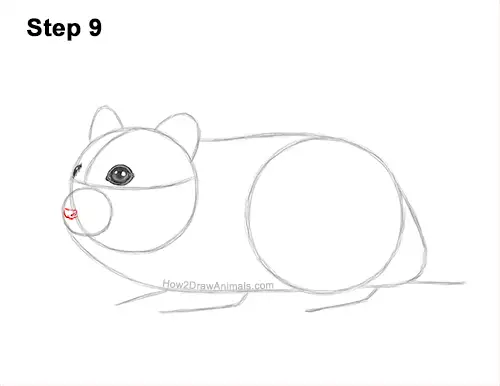
Step 9: Inside the muzzle, on the left side, lightly sketch a small oval for the hamster's nose. When you get the size and position right, darken the shape. Add a small line on the bottom edge. Curve the right edge of the nose inward to create the nostril. Use a series of short strokes at the top for fur.


