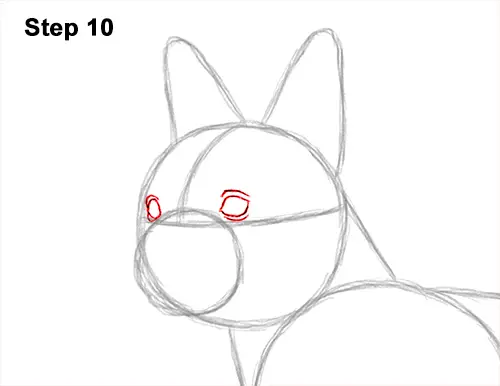
Step 10: Inside the head, lightly sketch two small circles for the dog's eyes. Use the initial lines as guides for placement. When you get the size and position right, darken the shapes. The eye on the left should be smaller. Make the sides of the eyes pointier as you darken the lines. Draw a few short, curved lines around the Boston terrier's eyes for the eyelids and some wrinkles.
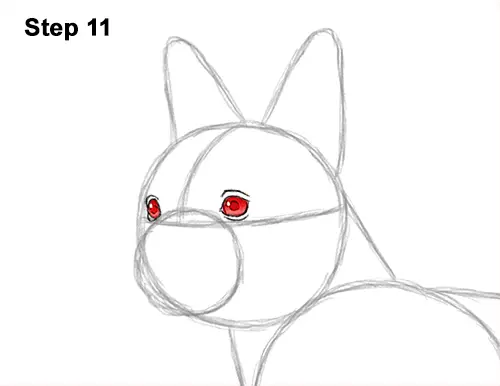
Step 11: Inside each eye, off to the side, draw a tiny circle for highlights. In the middle of each eye, add a big dot for the pupils. The pupil on the right should be bigger. Shade the rest of the Boston terrier's eyes but don't overlap the tiny highlight circles. As you shade the irises, use a value that's dark at the top and light at the bottom for a more round look.
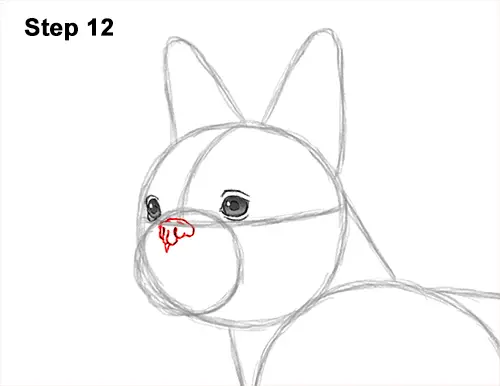
Step 12: Inside the muzzle, near the top, lightly sketch a small oval for the Boston terrier's nose. When you get the shape and size right, darken the lines. Curve the sides inward to create the nostrils. The dog's nostrils are basically two small slits. Add another small slit between them, on the bottom. Make the bottom of the nose pointier than the initial oval and darken the top edge.
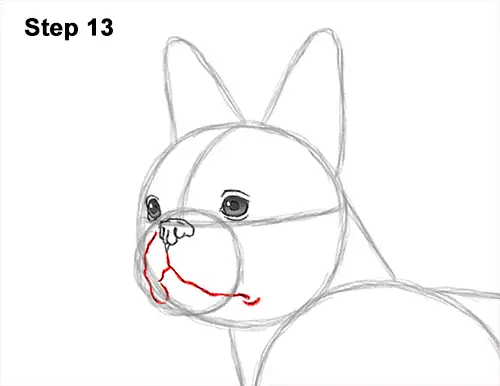
Step 13: Draw a line under the nose that angles to the left for the first part of the dog's mouth. Pay attention to the length of this first line and the way it angles downward. From under the nose, draw a longer line that curves to the right for the other side of the mouth. Draw a curved line close to the left edge of the small circle for the side of the muzzle. Curve the Boston terrier's muzzle line up toward the mouth. Add a short line on the right side of the mouth for the loose skin.
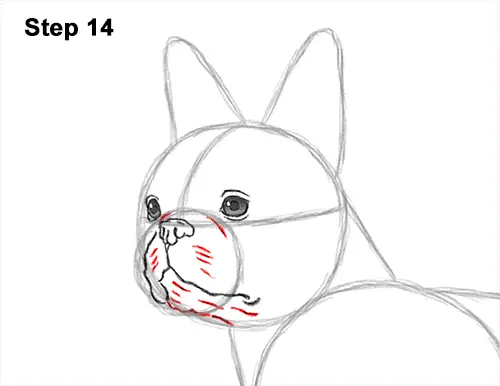
Step 14: Draw a couple of short, curved lines above the nose for some wrinkles on the muzzle. Under the mouth, draw a series of short lines that slope to the right for the chin and some wrinkles. Add a few more short lines above the mouth for more wrinkles on the Boston terrier's muzzle.


