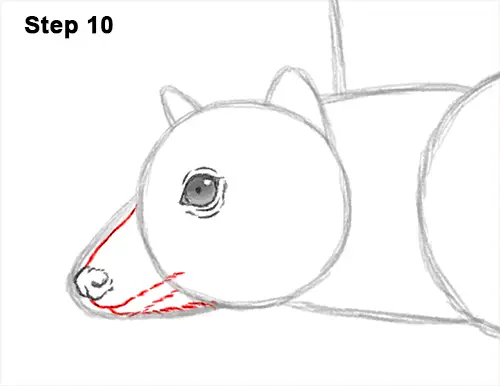
Step 10: Under the nose, draw a line that curves to the inside of the head for the mouth. The flying fox's mouth should fit inside the initial arc. Use short strokes to represent fur. Draw a line under the mouth for the lower jaw. Use the arc as a guide to draw this line. Use the top part of the arc as a guide to draw the top edge of the bat's muzzle.
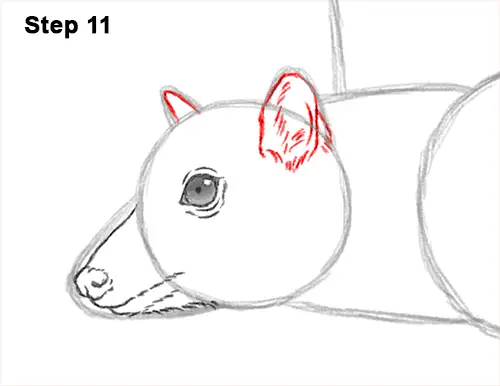
Step 11: Darken the arc on the top, right side of the head for the first ear. Add a series of lines within the shape for the inner ear structure and fur. Darken the other arc for the flying fox's other ear peeking from behind. Add some lines inside for detail.
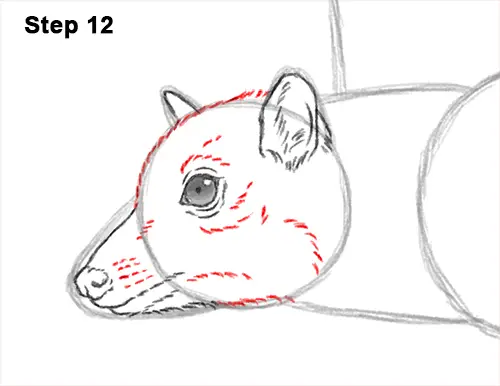
Step 12: Darken the top edge of the initial circle using short strokes for the bat's furry head. Darken the bottom of the circle using short strokes too but make that line flatter. Draw a series of lines that are made up of short strokes inside the head for detail on the fur. Add a few short strokes inside the flying fox's muzzle for more fur and for the base of the whiskers.
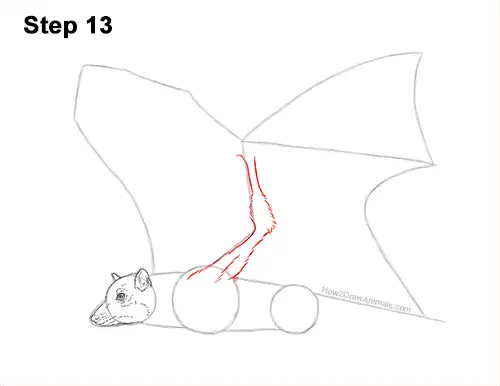
Step 13: Use the angled line above the front part of the body as a guide to draw the first part of the flying fox's wing. Extend the bottom part of the line farther in for the shoulder. Darken the initial line but make it curvier. Above the section where the guide angles, curve the shape for the forearm. At the bottom, draw a line that's made up of short strokes to make the shape of the arm thicker. Continue to draw the line above that to create the bat's elbow joint, the thick forearm and the thin wrist. Use short strokes for a furry texture. Add some short strokes inside the arm too for extra detail.
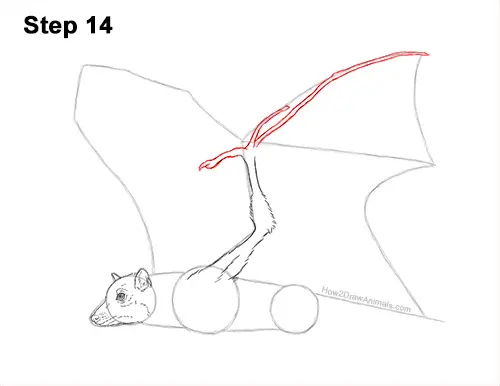
Step 14: To the left of where the guide line bends, lightly sketch a small, thin, curved shape for the flying fox's thumb. When you get the shape right, darken the lines. Draw a small, pointy shape on the tip for the bat's claw. Above that, draw an even thinner shape along the edge of the guide for the first digit. This first digit isn't very big, so don't draw the lines too long. To the right, draw an even longer, thin shape for the second digit. Don't draw it too far from the first digit. When you hit the top edge of the guide, angle the shape of the digit along the edge all the way to the top tip.


