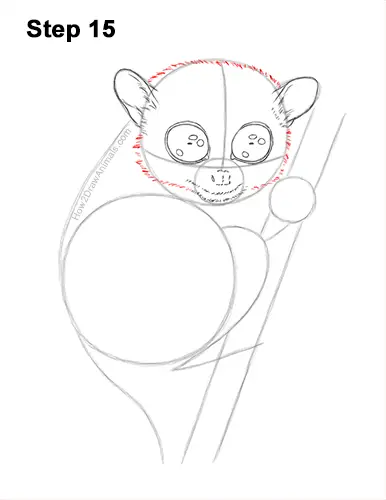
Step 15: Use the first circle as a guide to draw the rest of the tarsier's head. Follow the basic path of the circle but make the top of the head flatter and wider. Use a series of short strokes as you create the shape of the little primate's head for a furry texture. Use short strokes along the right edge of the circle for more of the head. Curve the bottom of the head to the left so that it meets the chin. Follow the left edge of the circle using short strokes to complete the tarsier's head. Make the shape wider.
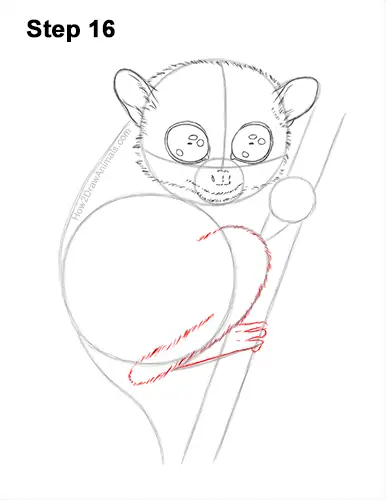
Step 16: Use the curved line on the right that's shaped like the number 2 as a guide to draw the leg. Draw a series of short strokes along the path of the guide for the fur on the tarsier's leg. On the top and bottom, extend the line inside the big circle to make the shape of the leg longer. Curve the bottom of the line upward and follow the slope of the guide so that the leg is folded against the body. Darken the bottom guide for the foot. Along the right side of the branch, draw the primate's toes using curved lines. Make the toes short and thin because they're wrapping around the branch. The fourth toe is behind the leg.
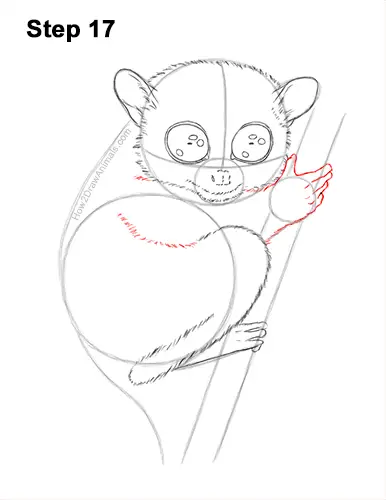
Step 17: Use the small circle to the right of the head as a guide to draw this tiny primate's hand. Draw the visible part of the thumb behind the head. On the top, right, draw the first finger wrapped around the branch. Along the right side of the circle, draw a series of curved lines overlapping each other for the other fingers. Tarsiers have long fingers, but most of them won't be visible, as they are folded on the other side of the branch. Across the top of the body, draw a long, curved line made up of short strokes for the furry arm.
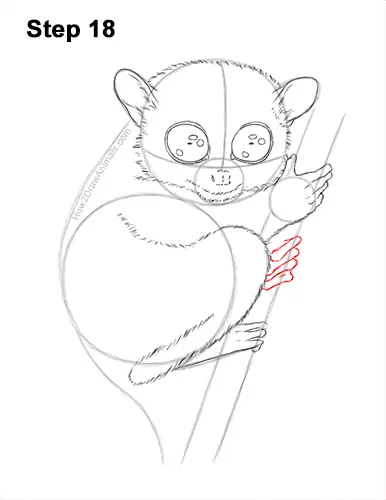
Step 18: Below the tarsier's first hand, draw the fingers from the other hand that are wrapping around the branch. Draw the fingers as thin, long, cylindrical shapes that slope across the branch. Make the lines wavy and curve the tips to emphasize the knuckles on this primate's tiny fingers.
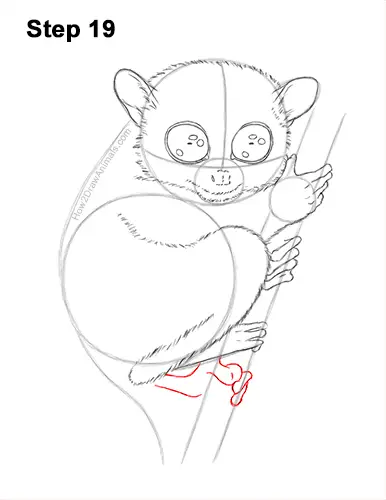
Step 19: Below the tarsier's first foot, draw the second foot using curved lines along the shape of the branch. Draw the first toe using a short, curved line on the left edge of the branch. Along the right edge of the branch, draw a couple of thin, curved shapes for the other toes peeking from behind. Back to the left side of the branch, draw the bottom of the foot using a curved line that connects to the leg.


