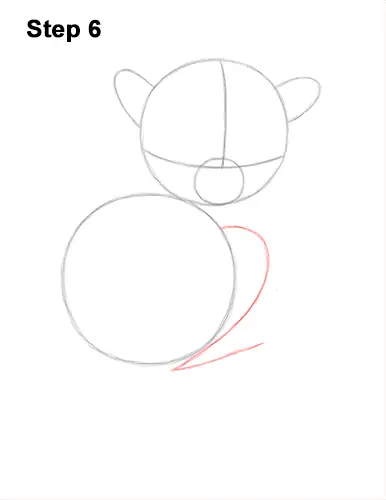
Step 6: To the right of the body, draw a long, curved line as a guide for the tarsier's leg. At the bottom, draw a sloping line so that the overall shape is similar to the number 2.
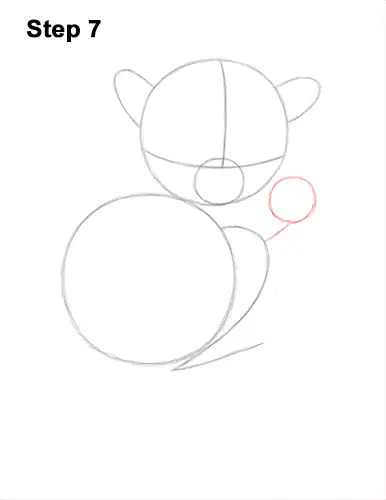
Step 7: On the top, right side of the leg, draw a short line with a small circle at the end as a guide for the tarsier's hand.
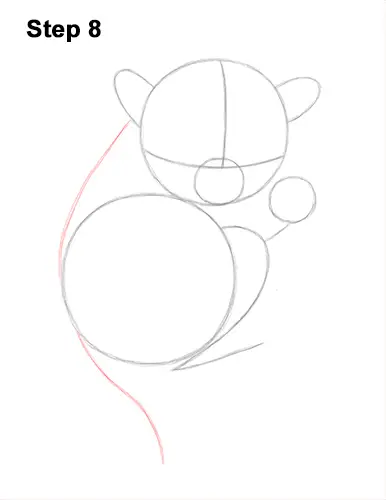
Step 8: On the left side, draw two long, curved lines as guides for the back and base of this tiny primate's tail. If you have room on your paper, draw the line for the tarsier's tail about one and half times the length of the body.
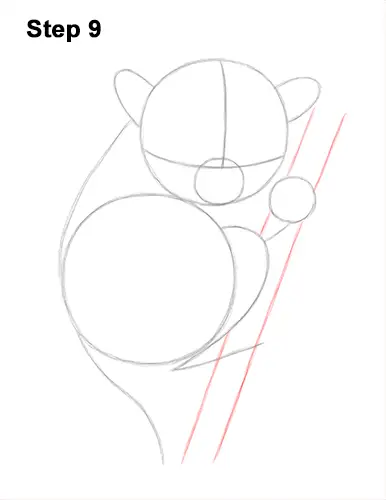
Step 9: To the right of the tarsier's body, draw two long, sloping, vertical lines as guides for a tree branch. Branches aren't perfectly straight, so don't worry about making the lines too straight. You can make the shape of the branch wider but you'll have to adjust the grip on the hand and feet later.
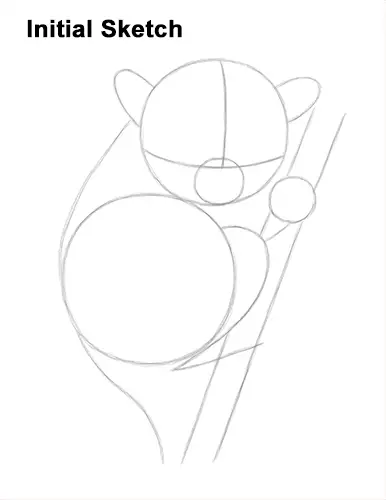
That's it for the guides! From this point on, press harder with your pencil for a more defined drawing.


