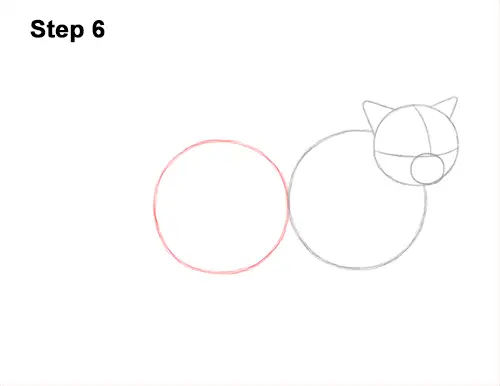
Step 6: To the left, draw another big circle as a guide for the back portion of the Himalayan's body. Use the four-marks method to draw this circle too. The two body circles should be around the same size. The edges of the body circles should touch. If you place them far apart, your cat will be too long.
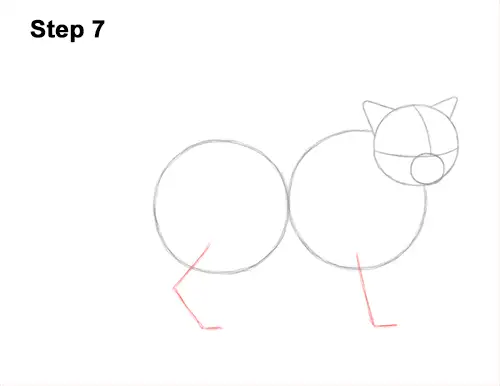
Step 7: Below the circle on the left, draw an angled line as a guide for the cat's hind leg. Bend the line in the middle and bottom. To the right, draw another line as a guide for the front leg but only bend it at the bottom and not the middle.
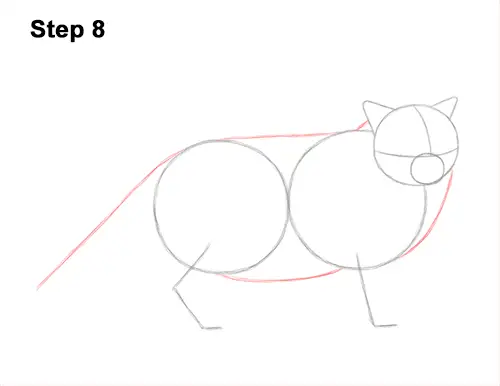
Step 8: Draw a series of lines that connect the three circles to create the guides for the torso and neck. The Himalayan cat's torso is big because of the fluffy fur. On the left side of the body, draw a long line that slopes down as a guide for the tail.
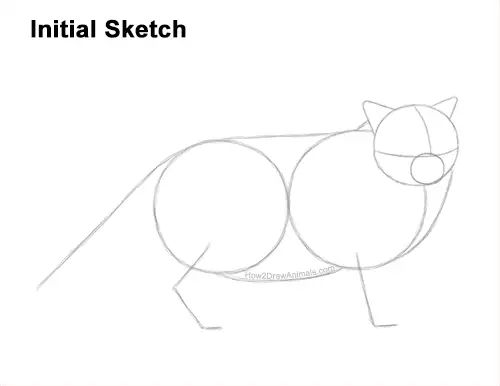
That's it for the guides! From this point on, press harder with your pencil for a more defined drawing.
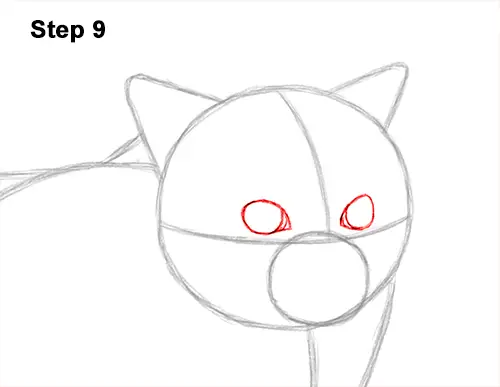
Step 9: Inside the head, lightly sketch two small circles for the Himalayan's eyes. Use the initial lines as guides for placement. When you get the size and position of the eyes right, darken the lines but make the sides pointier. For the shape on the left, make the lower, right side pointy for the corner of the eye. Darken the circle inside. Draw the eye on the right slightly narrower because of the way the cat's head is turned. Add the corner of the eye on the lower, left side but don't make the shape as pointy as the other eye.


