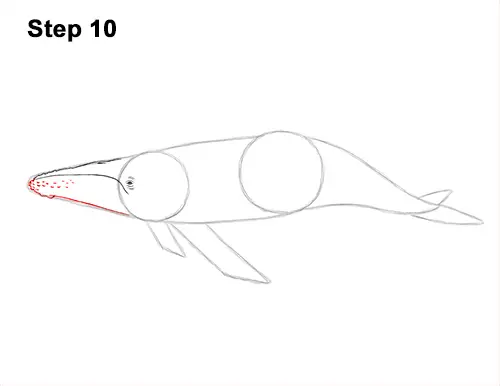
Step 10: Use the bottom part of the initial arc as a guide to draw the lower half of the head. Use short, curved lines along the path of the arc on the left side for the bumpy skin found there. Darken the rest of the initial arc on the right side to complete the shape of the humpback whale's head. Draw a few more short, curved lines on the left tip for more bumps and barnacles on the lower part of the mouth.
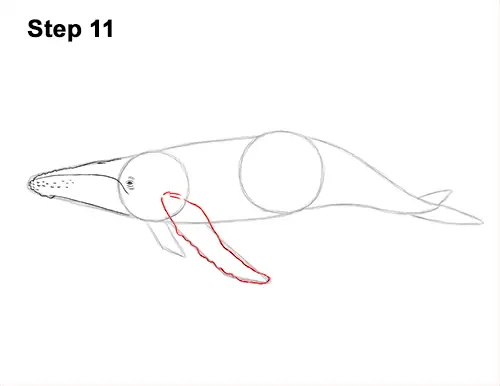
Step 11: Use the big, angular shape under the whale's body as a guide to draw the first flipper. Draw the shape of the flipper around the guide but make the left edge wavier for the bumps and barnacles. Make the corners of the shape rounder as you darken the guide lines. Stretch the top of the flipper inside the shape of the body and curve the line. Humpback whale flippers are some of the longest in any whale in relation to their bodies, so don't draw these shapes too small.
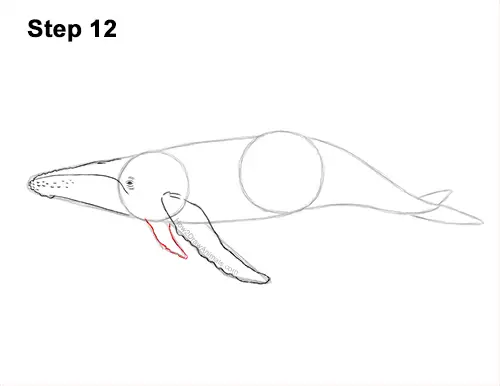
Step 12: Use the angled shape on the left as a guide to draw the humpback whale's other flipper the same way. Make the flipper rounder than the guide.
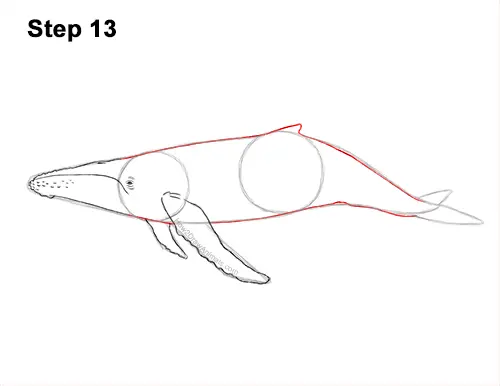
Step 13: Use the initial lines and shapes as guides to draw the main part of the body. Darken the outer edges of the initial guides to create the shape of the body. At the top of the second initial circle, draw a small, triangular shape for the short dorsal fin on the back. Darken the underside of the humpback whale's body but don't overlap the flipper that's on this side of the body. Stretch the shape of the body into the tail and make the end on the right a bit wider than the initial guide.
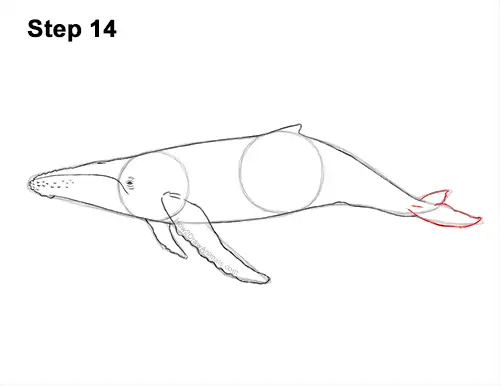
Step 14: Use the triangular shapes on the right as guides to draw the tail. Darken the path of the guides but make the shapes rounder. Use wavy lines on the left edge for the skin texture.


