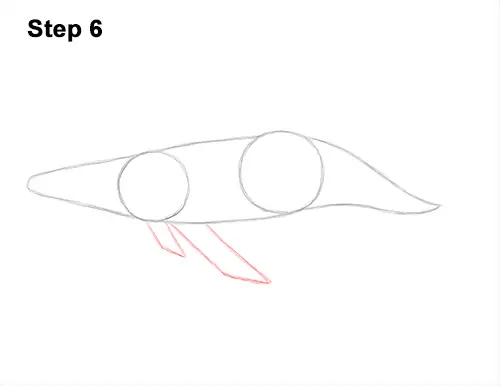
Step 6: Below the first circle, off to the right, draw a diagonal line as a guide for the first flipper. Add a parallel line to the right and close off the shape at the bottom to finish the guide. This shape should be pretty long. To the left, draw a similar shape only smaller as a guide for the humpback whale's other flipper.
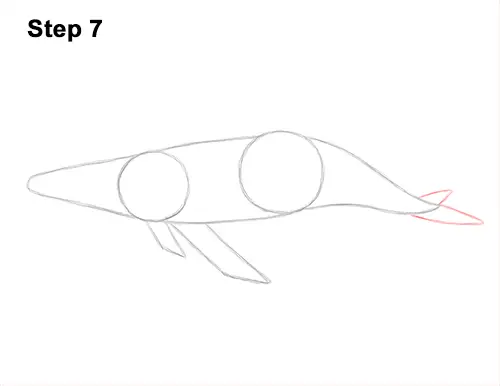
Step 7: On the right tip, draw the first part of the tail fluke using a sloping line at the top and a curved line at the bottom. At the top, draw the other half of the humpback whale's fluke using a similar shape, only inverted and smaller.
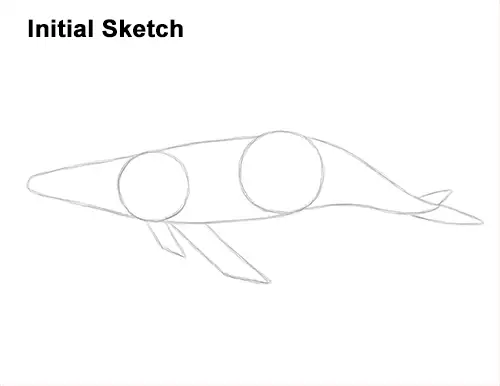
That's it for the guides! From this point on, press harder with your pencil for a more defined drawing.
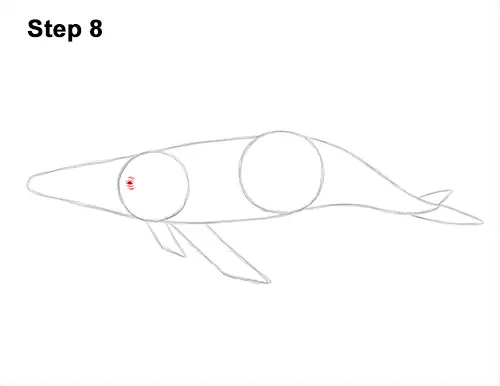
Step 8: Inside the first circle, near the left edge, draw a very small oval for the eye. When you get the position and size of the eye right, darken the shape but makes the sides pointier like a little football. Shade the inside of the humpback whale's eye using a medium value. Add a tiny dark dot in the middle for the pupil. Draw a couple of short, curved lines above the eye to emphasize the brow. Draw a couple of curved lines under the eye too for creases on the skin.
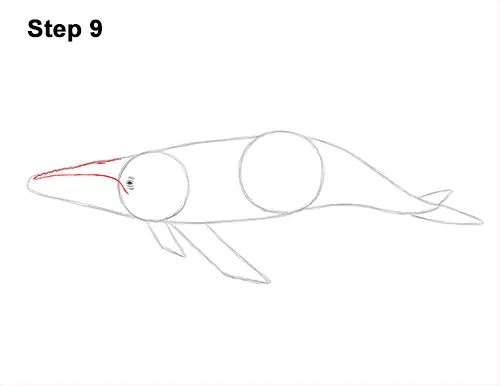
Step 9: Starting on the lower, left side of the eye, draw a line that slopes upward for the first part of the mouth. Continue to draw the line toward the tip of the initial arc on the left to finish the humpback whale's long mouth. Sketch lightly at first. When you get the shape of the mouth right, darken the line. The top of the mouth should be close to the top of the head. The tip on the right should be almost under the eye. Darken to top part of the initial arc to create the head. Use wavy lines on the left side for a bumpy texture. Near the middle of the head, draw an extra curved bump for the blowhole. Draw a short line below the bump on the head to create the whale's blowhole slit.


