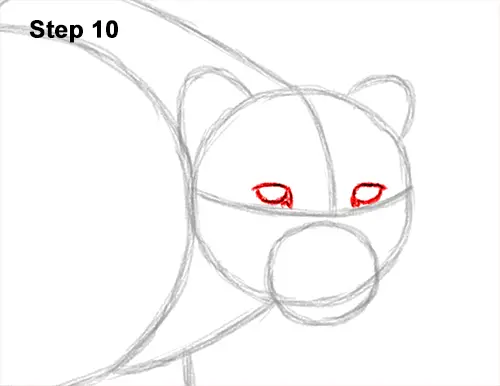
Step 10: Lightly sketch the eyes inside the head as two small ovals. Use the initial lines as guides for the placement and size of the king cheetah's eyes. When you get the position and size of the eyes right, darken the lines. Make the top edges of the eyes flatter and the outer sides pointier. Draw a couple of lines on the inner sides for the corners of the eye that point down toward the muzzle.
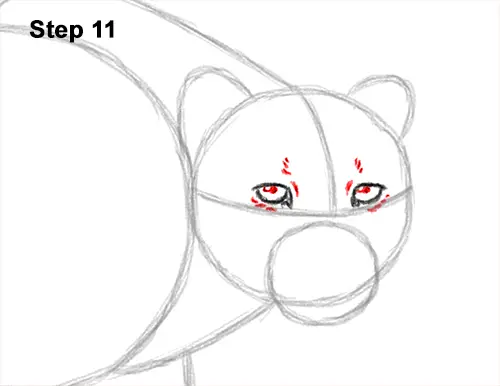
Step 11: Inside each eye, off to the side, draw a tiny circle for highlights. Inside each eye, near the top edge, draw another tiny circle and shade it in for the pupils. Add a series of short strokes around the king cheetah's eyes for the detail on the fur.
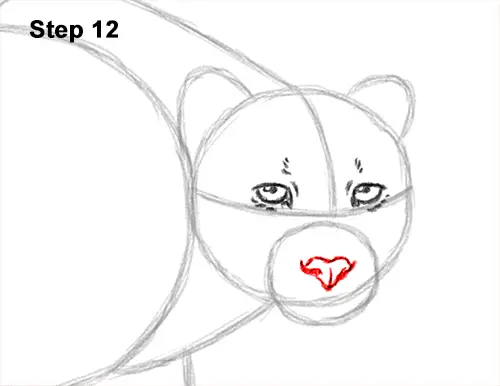
Step 12: Inside the circle for the muzzle, lightly sketch a small oval for the king cheetah's nose. Position the oval a bit higher than the lower edge of the bigger head circle. When you get the position and shape right, darken the top edge using a wavy line. Darken the sides of the oval but curve the line inward to create the nostrils. Make the top corners of the nose pointy. Make the bottom part of the nose thin. Add a small vertical line at the bottom. The end result of the cheetah's nose should be triangular.
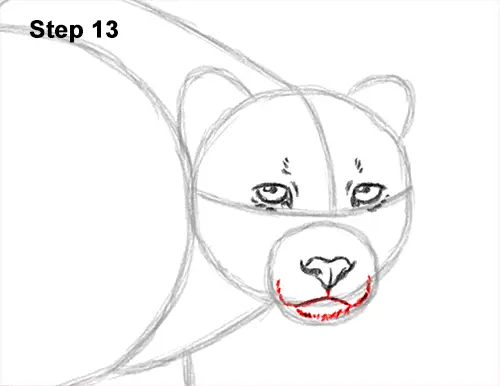
Step 13: Under the nose, draw a line that curves to the left for the first half of the mouth. On the right side, draw another line that curves up for the rest of the king cheetah's mouth. Use the sides of the circle as guides. Draw a series of short strokes along the lower edge of the circle for the fuzzy chin.
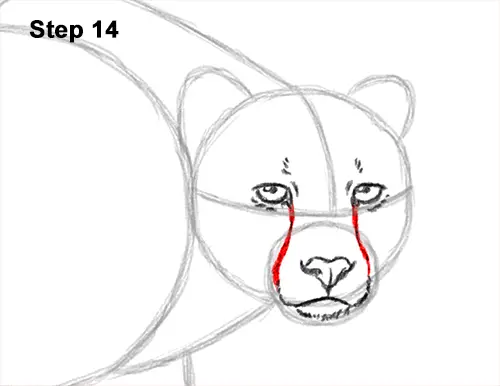
Step 14: Draw a couple of curved lines that connect the inner corners of the cheetah's eyes to the sides of the mouth for the tear markings. At the bottom, use the edges of the initial circle as guides for the placement of the tear markings.


