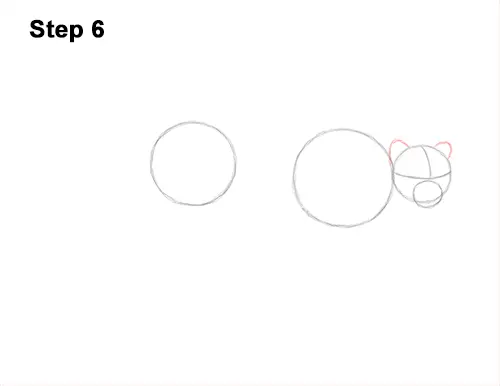
Step 6: On top of the head, near the sides, draw two short arcs as guides for the cheetah's ears.
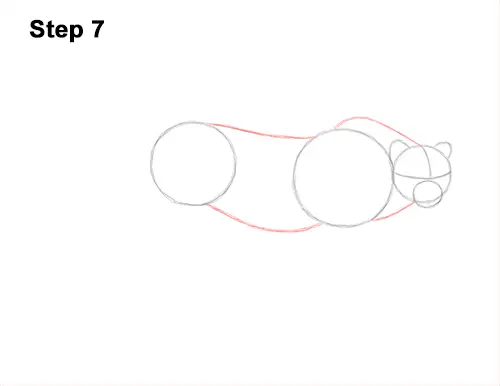
Step 7: Connect the top of the head to the top of the first circle as the guide for the first part of the king cheetah's neck. Make the arc of this line tall. Draw a line connecting the shapes at the bottom to complete the neck. Draw two long, curved lines that connect the first two circles to complete the guide for the torso.
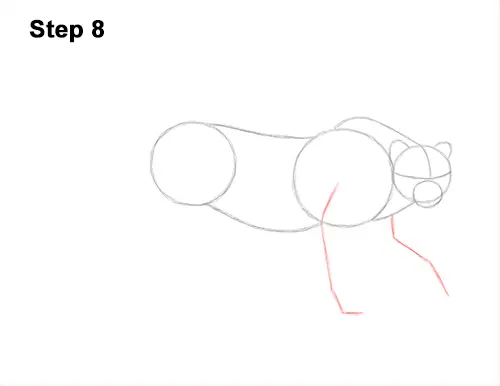
Step 8: Draw a long line under the first circle as a guide for the front leg. Bend the line at the top to indicate where the joint will be and at the bottom for the foot. To the right, draw another angled line as a guide for the other leg. This line should slope in the middle as the cheetah steps forward.
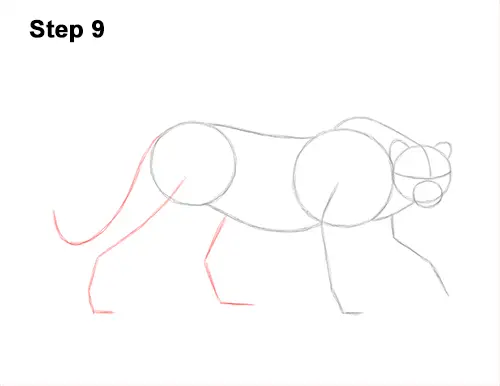
Step 9: Draw a long, angled line under the second circle as a guide for the hind leg. This line should slope to the lower, left side before bending at the bottom to indicate where the joints and foot will be. To the right, draw a shorter angled line as a guide for the king cheetah's other hind leg. Bend the line near the middle and at the bottom for the joints too. On the left side of the body, draw a long line that curves up at the bottom as a guide for the tail.
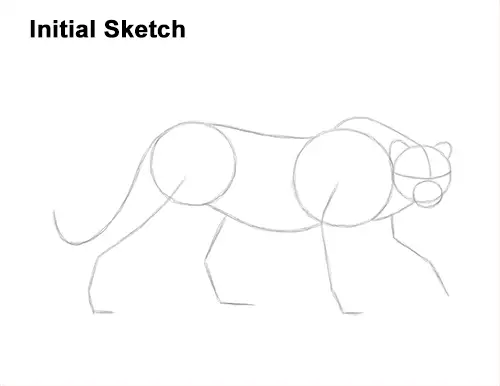
That's it for the guides! From this point on, press harder with your pencil for a more defined drawing.


