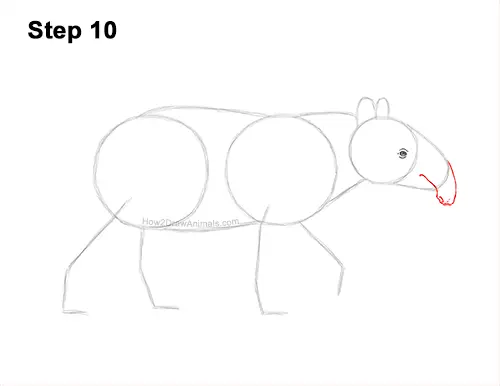
Step 10: On the tip of the initial arc, lightly sketch a thick shape that curves down for the tapir's droopy nose. Don't draw the nose hanging to low below the face or your tapir will look like an elephant. When you get the shape right, darken the line. Extend the bottom line in toward the eye to create the mouth. Near the tip of the nose at the bottom, draw a couple of short, curved lines for the nostril on this side.
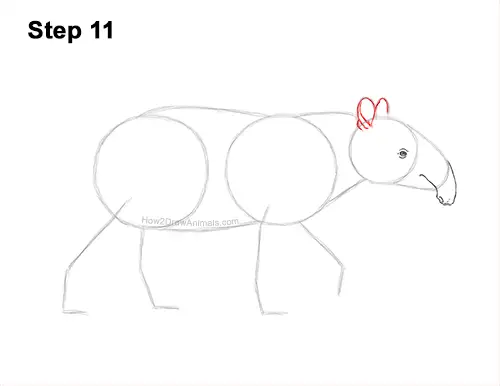
Step 11: Darken the small arcs on top of the head to create the tapir's ears. Draw curved lines inside and on the bottom of the arc on the left to give the ear more structure. Don't draw anything inside the arc on the right because that ear is facing away from us.
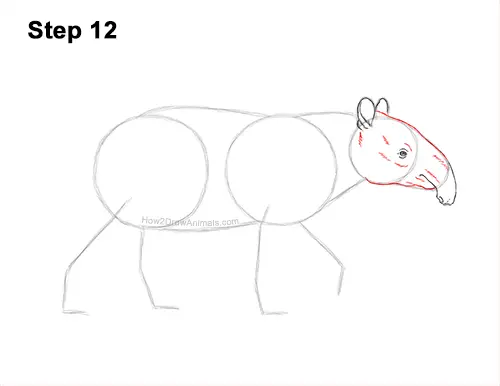
Step 12: Use the initial small circle and arc as guides to draw the rest of the tapir's head. Darken the top edge of the arc but make it a bit wavier for the bridge of the nose/top of the head. Use the bottom part of the arc as a guide for the lower part of the mouth but draw the mouth higher. Extend the line for the mouth into the initial circle and curve it up for the jaw. Draw a series of short strokes inside the shape of the tapir's head to give it more structure. Draw some lines inside the muzzle to define the muscles on the long nose. Add more lines around the eye to define the skeletal structure of the cranium.
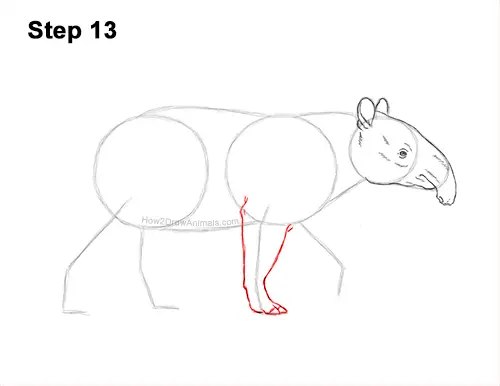
Step 13: Use the second line from the right as a guide to draw the first front leg. Follow the path of the guide and lightly sketch the shape of the leg around it. The tapir's leg should be wide at the top and thin at the bottom. When you get the shape of the leg right, darken the lines. Bend the shape of the leg where the guide bends to indicate where the joints are. At the bottom, draw a couple of angled lines for the pointy toes. Add a line inside each toe for the hooves.
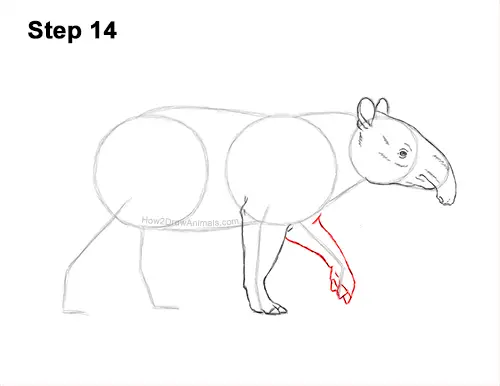
Step 14: Use the line on the right as a guide to draw the tapir's other front leg the same way. Lightly sketch the leg around the guide. Make the top part wide and the bottom part narrow. When you get the shape of the leg right, darken the lines. The toes should point down as the leg steps forward. The toes should be made up of small, V-shaped lines. Inside each toe, draw a small line for the hooves.


